DIY: Bug Marionette

EPEngineer By EPEngineer3 min read1.6K views

Growing up as a little boy, I was always fascinated by everything that could move.
While watching a kid show that involved Marionette, I got the idea to make my own. That crude design was bird-like in nature but it provided hours and hours of fun as well as the pride of knowing that it was one of a kind.

After my kids reminded me for the tenth time that they really, really wanted to do some craft; this project came to mind and I proceeded to scavenge the whole house for supplies. As with all my creations, I am not sure what I would need until I see it.

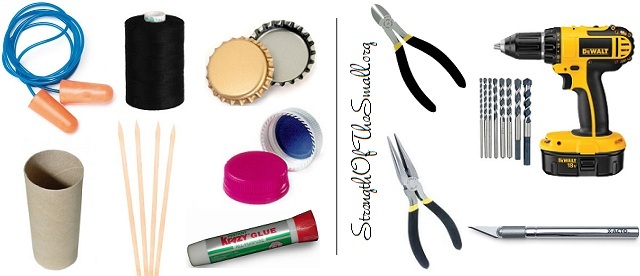
Materials/Tools Needed:

  • Toilet Paper Roll
  • Disposable Ear Plugs
  • Wooden Skewers
  • Metal Bottle Caps
  • Plastic Bottle Caps
  • Sewing Thread or Fishing Wire
  • Empty Krazy Glue Tube (for the neck)
  • Wire Cutters
  • Pliers
  • Power Drill and Drill Bits
  • Precision Knife/Blade
Materials & Tools Needed.

Step by step:

  • First get your Ear Plugs and cut off the cushion part to use as the eyes. Then cut the rope into 2 equal lengths which will be passed thru small holes made on the paper roll. Put a knot on each rope close to the paper roll so as not to have the rope move (See picture below).
  • Once done, drill thru the middle of the bottle caps so that you can pass the ear plug rope thru it and make a knot at the end to stop the cap from sliding out.
  • Now, get the 2 metal caps and drill thru the middle of them. Once done you will get the Foam plugs and make 2 holes thru the side so that they can be tied down (or hot glue them if you prefer). Loop a piece of black thread from the underside of one of the metal caps, thru the foam plug and back into the metal cap. Do the same for the second metal cap and foam plug and tie the two pieces together to form the head.
  • You will then make 2 small holes onto the Crazy glue cap and pass the black thread thru those and knot it together to hold the head in place. By now it should look like the picture below.
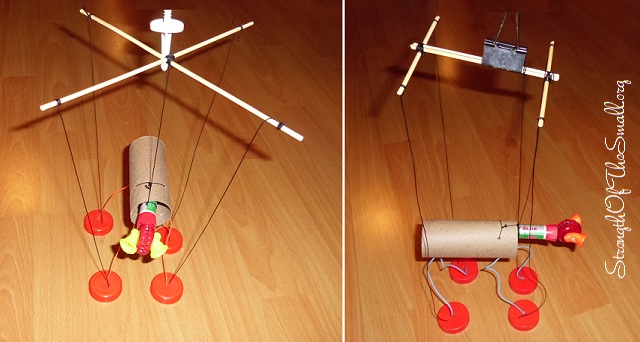
  • Now, take your 2 skewers and cut off the sharp end and discard the sharp ends. Use your black thread to make either of the 2 designs pictured above for the handle. Once done you are ready to tie everything together.
  • Make a hole onto the middle of the Crazy glue bottle and make sure it goes thru. Make 2 holes onto the paper roll to tie the head onto the body. As you pass the black thread from the paper roll thru the Crazy glue bottle and back thru the paper roll make sure that it’s all nice and tight. Once the thread is knotted you will leave some slack and tie it to your handle ( See below pics for reference).
  • Now that the first thread is connected you can start doing each leg individually. Drill the hole on the cap, knot the thread and take it up to the handle and fasten. Repeat for the rest of the legs and you are done.
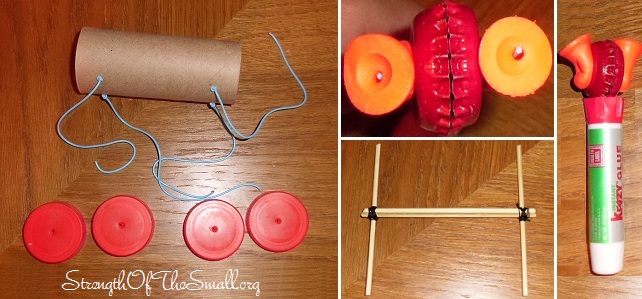
Step by Step Instructions.

Once the parts have been successfully put together, it will look similar to the picture below.
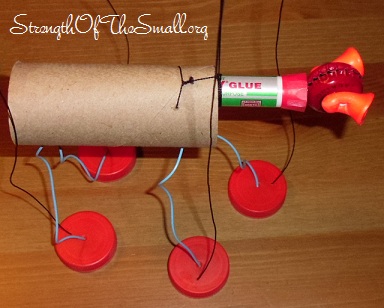
Bug Marionette (Close Up).
Bug Marionette.

Have a fun time making your own Bug Marionette and don’t hesitate to share the link for us to see your creation.
DIY: Stocking Hooks

EPEngineer By EPEngineer2 min read903 views

Yesterday we decorated the Fireplace Mantel, which is still a work in progress.
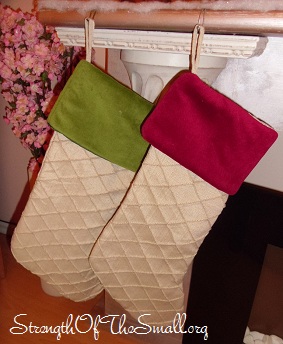
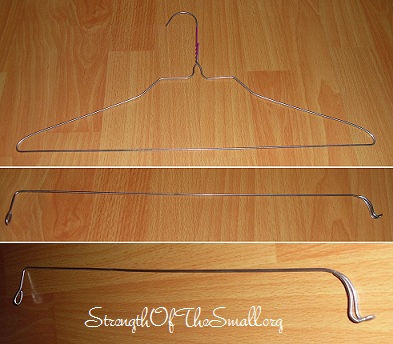
We set up and displayed the Nativity Scene, the Angels and Carolers, the Church and Village collection as well as other little displays. I had the Stockings lined up and when I was about to hang them up I couldn’t figure out where I left the hooks. Not knowing which box to look into and unwilling to search, I decided to create temporary hooks using old Wire Coat Hangers I had around (the ones you get from your Dry Cleaner).

Stocking Hook/Hanger.

Materials Needed:

  • Wire Coat Hanger or Sculpture Wire
  • Wire Cutters
  • Pliers (to bend wire)

Step by step:

  • First get the hanger and cut it close to the twist area. Once cut, you can bend the end onto a loop.  I found that bending the end into a loop helps to eliminate the sharp edges.
  • Starting from the looped end measure about an inch and a half to two inches and bend onto a 90 degree angle. This will allow the hanger to latch onto the back of the surface it will lay at.
  • Straighten the hanger as you go along to to the desired length and make sure that you leave an extra two inches to loop back at the end.
  • Now you can shape the end that will hold the stocking according to the surface it will lay on top of. On our case the edge is rounded off, so I rounded the edge.
  • Now, fold back the extra two inches of the hanger and bend together facing up. Bend the rest of the hanger end the same shape and make sure that the end of the hanger is as close to the hanger as possible. Now you are done, Enjoy!
Stocking Hook/Wire Coat Hanger.

We hope your week is filled with peace and joy.

DIY: Fireplace Mantel

EPEngineer By EPEngineer2 min read3.1K views

Once upon a time, our old house was equipped with a gas fireplace (possibly double sided). Somewhere along the way, one owner decided that a Wall Heater would serve the needs of his family best. So, he removed the fireplace and replaced it with a wall heater and added a second wall heater in the hallway.

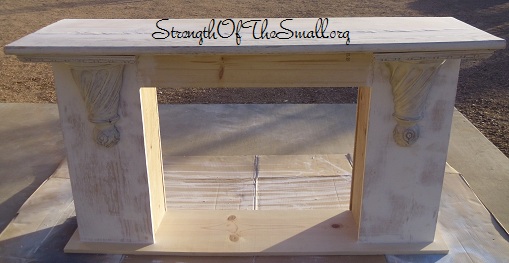
Now, as the owners of this house, we have decided to remove the wall heaters and add an electric fireplace (restoring what used to be). Early this year we purchased a Wall Mount Electric Fireplace and we decided to build a Mantel around it. So, after much procrastination, we decided to buy the necessary supplies to start building. That was on Friday. Yesterday, I started cutting and putting the pieces together. Today, I filled in the holes and cracks with plaster and sanded it down in preparation for painting. They are still a couple more minor things to do before it’s finished; however, you can see what it will look like from the picture below.

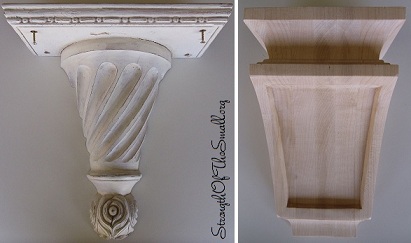
Vintage Wall Sconce Corbel & Raw Maple Corbel.

The White Vintage Wall Scone was purchased a couple of months ago in Downtown Pomona, at the Pomona Antique Mart. The Raw Maple Corbel was from Lowe’s. Though we love each pair of sconce equally, the Vintage Sconce stood out the most and complimented the Fireplace beautifully.

Materials/Tools Needed:

  • Wire Brush
  • Screwdriver
  • Tape Measure
  • Chop Saw
  • Router & Bits
  • Paintbrush, Tape, Paint or Spray Paint for the Mantel
  • Plaster
  • Stud Finder
  • Drill, Drill-bits and Wood Screws
  • Clamps (for holding the wood in place)
  • Hammer
  • Level
  • Black heat-resistant paint for the firebox
  • Sandpaper
  • Wood Glue
  • Wood Filler
  • Ornamental door Molding
  • Wall Sconce Corbel

Step by step:

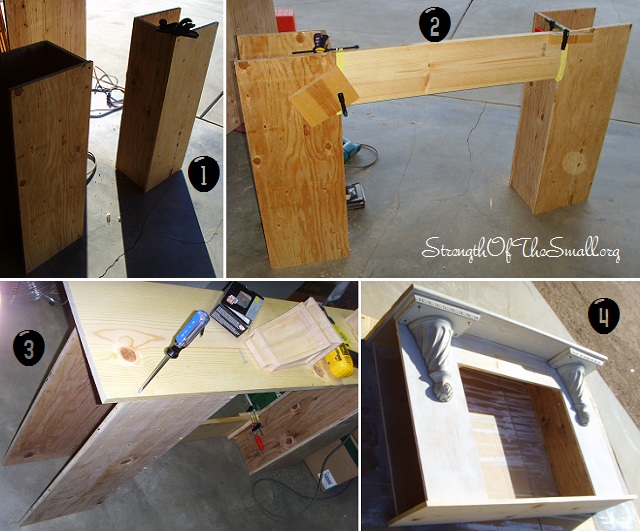
DIY Fireplace Mantel (Step by Step).
DIY Fireplace Mantel.

The two sides have shelves to hold DVDs and CDs measuring 8 inches wide by 11 inches deep and 34 inches high. The opening is 32 inches wide by 26 inches tall. overall it stands 60 inches wide, over 12 inches deep and about 36 inches tall.

DIY Fireplace Mantel.

I used Krylon Brushed Metallic Paint (Sparkling Canyon) spray paint for the Fireplace Mantel.

If you are interested on making your own, do not hesitate to contact me for the plans on this build.

Hesperia Civic Plaza Park: Lighted Tree

EPEngineer By EPEngineer1 min read879 views

We finally took a drive to the Hesperia Civic Plaza Park to see the Lighted Tree and all the fabulous decorations. Since we missed the Christmas Tree Lighting Ceremony on November 29th due to the bad weather; I decided to surprise the family tonight by driving them there. It was beautiful scenery and the kids were thrilled to see so many lights and all the lighted animated decorations. We took some pictures as well as videos.

Hesperia Civic Plaza Park.
Hesperia Civic Plaza Park (Lighted Tree).

Here I am, at home, wrapped in the warmth of my walls and feeling grateful for life and to be able to spend another day with my beautiful family. It’s a little harder to appreciate the peace and tranquility during the work days.

Want to know about upcoming events in the High Desert, click here and here for the High Desert Business Journal.

Trimming The Mulberry Tree

EPEngineer By EPEngineer2 min read1.7K views

Today we decided to trim our fruitless Mulberry Tree.

The Fruitless Mulberry Tree as opposed to Fruit Bearing Mulberry Tree is fast growing and less messy as it does not produce fruits. Mulberry trees in general have large and dense leaves with a large spreading head that provide full shade over wide areas. They prefer full sun (though partial shade works fine too). Plant these trees away from sidewalks, driveways, septic tanks, swimming pool, sprinkler system pipes, foundations, etc! Their strong roots are invasive and will damage almost everything on their path in search for nutrients.

Trimming The Mulberry Tree.

Every year, after the tree goes dormant, we trim the branches to maintain a desirable shape. We removed broken, dried and damaged branches from the tree to keep the tree healthy. We removed excess interior tree branches to help increase air flow throughout the tree and we pruned the top branches to train them into spreading. We are very careful as not to ruin the natural structure of the tree by severely cutting back its branches. These trees are great in providing shade and are heavily planted here in the High Desert.

Click here, here and here to learn about Pruning a Fruitless Mulberry Tree.
Click here and here to learn about Trimming a Fruitless Mulberry Tree.

In addition to their roots evasiveness, fruitless Mulberry Trees produce pollen and catkins, which will wreak havoc on allergy sufferers. Click here, here to read more on Tree allergies and how to fight back.

We also removed the sandbox and covered the hole with dirt.