Home Improvement

DIY: Uses of Laminate

EPEngineer By EPEngineer2 min read2.5K views

You bought Laminate for your Kitchen Counter tops and you have some left overs. What to do now that your project is complete? Do you get rid of your leftovers or save them for craft projects? When it comes to Laminates, the possibilities are endless. You could use your leftovers to build a play table for your kids, a garden table for your tools, an outdoor platform, a plant sand, an end table, a frame to hang your jewelry, Wall Art, Bookshelves, Cabinets, Coasters, create a Book Cover and so much more.

For our Kitchen renovation four years ago, we ended up with an extra base cabinet we couldn’t return and we had some leftover from the counter top. After almost a year of having both items sitting in the garage, we decided to build a custom counter top for the base cabinet and use as extra storage in the Patio.

Custom Countertop.
Custom Counter top.

Materials/Tools Needed:

  • Counter top piece
  • Wood (to build a frame)
  • Wood Screws, Power Drill, Drill Bits
  • Silicone Sealer (to seal the gaps)
  • Stain (for the Wood)
  • Heavy Duty Staple Gun and Staples

Step by step:

  • First step is to measure out the size of the piece that will be needed. I used a cutout from my counter top which came from the sink cutout. Since it was about 30 inches wide and the cabinet 34 inches, I used the wood to expand on all 4 sides.
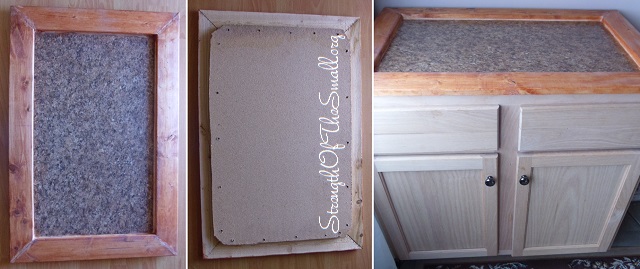
  • Based on my dimensions I cutout the four pieces to make a frame leaving enough of a lip to be able to screw them onto the counter piece.
  • I used the staple gun to secure all four corners together, then used the Power Drill to screw the frame onto the counter piece.
  • I used the sealer to fill in the gaps on the frame and between the frame and counter piece. This will stop any liquids from seeping onto the wood cracks.
  • The wood stain was used last and will go over the whole frame. You can also use it on the counter piece to give it a darker look.
  • The last step is to secure the whole piece onto the cabinet being used and enjoy!

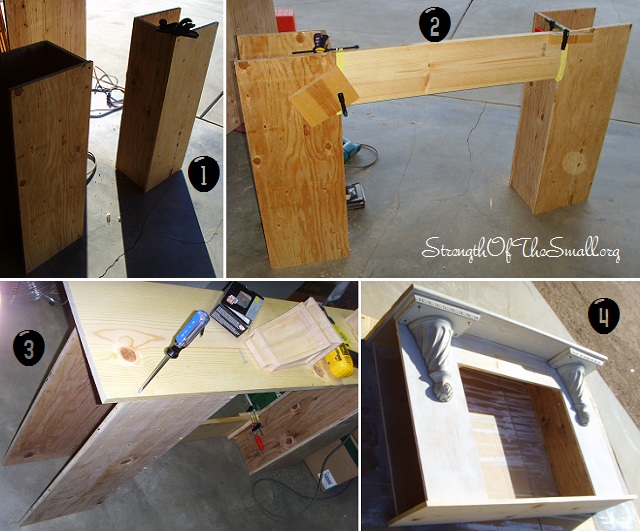
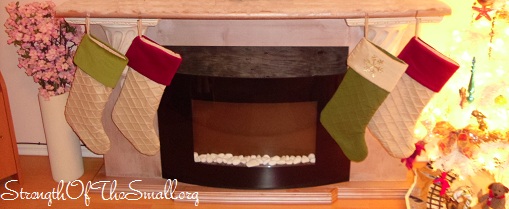
Checkout what others have accomplished using Laminate.

1. The Armadillo Chair. 2. Contemporary Wood Wall Light. 3. Bent Laminate Modular Form.

1. The Armadillo Chair. 2. Contemporary Wood Wall Light. 3. Bent Laminate Modular Form.

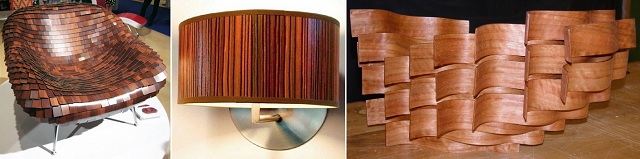
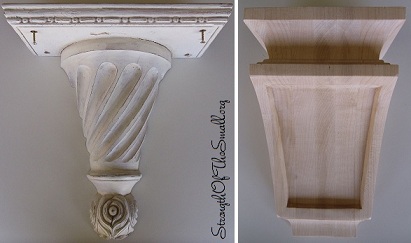
Love the Laminate/Wood Lampshade in the middle picture? You can make your own by clicking here and following the steps for this Wood Veneer Lampshade.

.

DIY: Chair Seat Reupholstered

JM Perez By JM Perez2 min read1.1K views

One of our goals last weekend was to drive down the hill for some Treasure Hunting, eat at one of our favorite Restaurants and see a few beautiful faces we haven’t seen in a while. Unfortunately for us, the weather decided otherwise. Everything ended up turning for the best as we had a marvelous time at home.

One of the things I wanted to get done in the playroom was to reupholster the seats and dye the slipcovers of the Harry Chairs my kids use during learning time (we bought the Ikea set a few years ago not realizing that Ikea doesn’t make cover replacements for this particular chair). Being a busy Mom with active kids, I can’t find time to make my own slipcovers (at least, not now). I ended up picking a pack of Tulip® Permanent Fabric Dye from Michaels on Saturday, a shade of grey, which to my amazement, turned out better than I expected after dyeing the slipcovers. We reupholstered the seats yesterday morning to make them more comfortable by adding extra padded cushion. I love the end result, my kids love them and what a difference to the tushies!

Ikea Harry Chair Dyed & Upholstered.
Ikea Harry Chair seat reupholstered & Slipcover dyed.

Materials/Tools Needed:

  • Chair(s)
  • Pliers (to remove existing staples)
  • Upholstery Fabric (or your existing Slipcover)
  • Heavy Duty Staple Gun and Staples
  • Quilters Batting/Memory Foam/Cotton Balls
  • Sewing Thread and Needle
  • Screw Driver (to remove and re-affix the seat)

Step by step:

  • Use your screw driver to remove the chair seat.
  • Removing the old staples, old fabric, old foam and replacing it all is up to you.
  • With the seat still down, trace and cut a few layers of Quilters Batting/Memory Foam as well as your Upholstery Fabric (can be done individually or simultaneously).
  • Once your done with the cutting, you can individually affix each one to the chair seat using your Staple Gun or you can affix all the pieces to the chair and cut off the excesses.
  • Place the upholstered seat on your chair and secure it.
  • Place your slipcover on and you’re good to go.

In my case, I didn’t remove the old staples, foam nor fabric (everything was is very good shape). I just wanted to make the seat more comfortable by adding extra padded cushion. I cut open a Wool Ball Pillow I no longer needed, affixing its fabric to the chair and using the Wool Balls for extra padding.

DIY: Fireplace Mantel

EPEngineer By EPEngineer2 min read3.1K views

Once upon a time, our old house was equipped with a gas fireplace (possibly double sided). Somewhere along the way, one owner decided that a Wall Heater would serve the needs of his family best. So, he removed the fireplace and replaced it with a wall heater and added a second wall heater in the hallway.

Now, as the owners of this house, we have decided to remove the wall heaters and add an electric fireplace (restoring what used to be). Early this year we purchased a Wall Mount Electric Fireplace and we decided to build a Mantel around it. So, after much procrastination, we decided to buy the necessary supplies to start building. That was on Friday. Yesterday, I started cutting and putting the pieces together. Today, I filled in the holes and cracks with plaster and sanded it down in preparation for painting. They are still a couple more minor things to do before it’s finished; however, you can see what it will look like from the picture below.

Vintage Wall Sconce Corbel & Raw Maple Corbel.

The White Vintage Wall Scone was purchased a couple of months ago in Downtown Pomona, at the Pomona Antique Mart. The Raw Maple Corbel was from Lowe’s. Though we love each pair of sconce equally, the Vintage Sconce stood out the most and complimented the Fireplace beautifully.

Materials/Tools Needed:

  • Wire Brush
  • Screwdriver
  • Tape Measure
  • Chop Saw
  • Router & Bits
  • Paintbrush, Tape, Paint or Spray Paint for the Mantel
  • Plaster
  • Stud Finder
  • Drill, Drill-bits and Wood Screws
  • Clamps (for holding the wood in place)
  • Hammer
  • Level
  • Black heat-resistant paint for the firebox
  • Sandpaper
  • Wood Glue
  • Wood Filler
  • Ornamental door Molding
  • Wall Sconce Corbel

Step by step:

DIY Fireplace Mantel (Step by Step).
DIY Fireplace Mantel.

The two sides have shelves to hold DVDs and CDs measuring 8 inches wide by 11 inches deep and 34 inches high. The opening is 32 inches wide by 26 inches tall. overall it stands 60 inches wide, over 12 inches deep and about 36 inches tall.

DIY Fireplace Mantel.

I used Krylon Brushed Metallic Paint (Sparkling Canyon) spray paint for the Fireplace Mantel.

If you are interested on making your own, do not hesitate to contact me for the plans on this build.

Little Home Updates

JM Perez By JM Perez1 min read559 views

We’ve had a very productive day today. The fruitless Mulberry Tree in the backyard has shed its last leaves and the Grasshoppers have somehow disappeared after nearly eating all of my Stella D’Oro Daylilies (surprisingly, these are the only plants they have been interested in). Most of bulbs I planted last month are sprouting including the Ice King Double Daffodil, Grape Hyacinth, Belladonna Amaryllis and the Pink Impression Tulips. I have also noticed a few sprouting from my Garden Huckleberry (Solanum scabrum). I am grateful for the warm weather.

Yesterday we went to Lowe’s and purchased a few Stainless Steel Cabinet Pulls/Handles, some electrical components as well as some wood for an upcoming project. We replaced the rest of the Switches and plates in the house as well as the cabinets pulls and the electrical outlets (using Pass & Seymour/Legrand 15-Amp Nickel Decorator Duplex Electrical Outlet).

Switches and Outlets.
Cabinet Pulls/Handles.

These are all little updates that will give your home a great lift.

DIY: Shovel Door Handle

EPEngineer By EPEngineer2 min read1.5K views

This is one of the first projects I worked on when we first bought our House in 2007. The original gate latch fell apart and we needed to keep the gate closed at all times. It is a fun and simple projects to do. It is so easy to maneuver and latches every time you push the gate closed behind you.

Materials Needed:

  • Shovel, Pitchfork, Rake, Hoe, Harrow, Fishtail Hand Weeder (or any garden tool with a wooden handle)
  • Screws
  • Gate Latch
  • Cable Rope
  • Drill and a Drill Bit (to make the holes)
  • A Spring (for pulling the Shovel)

Step by step:

  • First step is to use the drill and drill bit to make a hole that will allow the cable rope to go from the latch to the opposite side of the fence. Try and make the hole slightly bigger than the cable wire diameter since it will need to move freely back and forth.
  • Attach the cable rope to the gate latch and run it thru the hole you have drilled. Now choose the area on the object you want to use as the handle and line it up to the cable rope. Make sure that when the object gets pulled, the cable rope will move the latch open and closed freely.
  • Use the screws to screw the object to the fence. Once it is fastened to the fence, use the spring to calculate how far the object will be off the fence. As you can see from the picture I decided to place the spring lower on the gardening shovel to have it sit at an angle.
  • Screw the spring to the fence and then to the object. Once done you are ready to attach the cable rope to the object and test it. After pulling on the handle it should pull the latch open. When you release the handle the spring will pull the handle back in place and the latch will go down far enough where pulling the gate close will latch it closed.

Wrenches can be used as door handle as well as other tools. All you have to do is use your imagination.

Shovel Door Handle.

Make sure you apply clear coat on the wood handle to give a clear and shinning finish and most importantly, to protect the wood from scrapes, the weather and also to help it last as long as possible.