Do-It-Yourself Maintenance

DIY: Repair a Garden Solar Light

EPEngineer By EPEngineer2 min read1.3K views

There is something about Solar Lights that makes them attractive. Perhaps is because they come in different shapes, sizes and forms; or simply because they are solar powered. We all hope that once these lights are placed outdoors, they would last a lifetime; sometimes however, they malfunction or stop working all together, especially after being exposed to the elements for many years.

If you love your garden solar lights, they are all worth repairing. Dead batteries, rust from water damage, damaged wiring, bad connections are some common reasons for light failures. Fixing the issues usually involve replacing the batteries, LED, driver circuit, removing the rust, protecting the wires, or simply replacing the solar cells. Lately, some of our solar lights stopped working and it took me just a couple of hours to get them running like new.

Materials Needed:

  • Solar batteries
  • Solar battery charger
  • Wire
  • Wire Cutters
  • Pliers
  • Duct tape
  • Solar cells
  • Multimeter (to test the batteries voltage)
  • Soldering Iron (to solder wires together)
Garden Solar Light Problems.

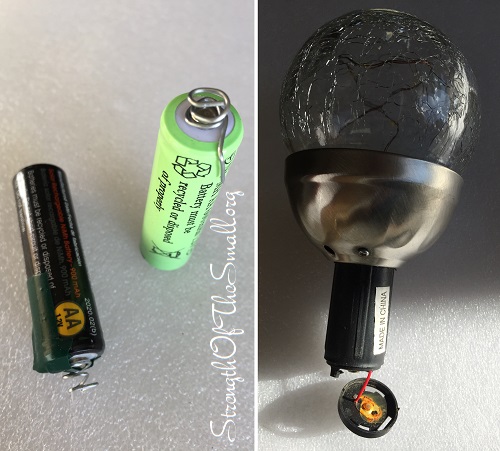
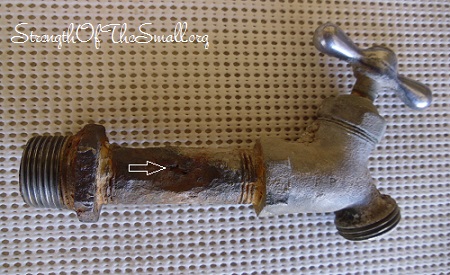
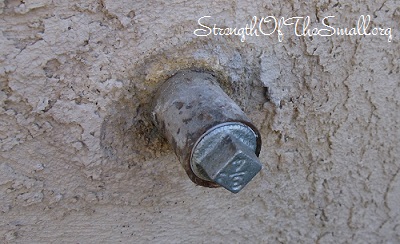
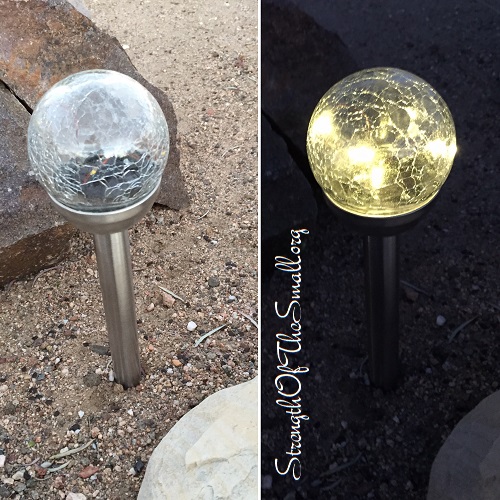
The issues we had with the Solar Crackle Ball Stake Lights is that some of the connectors were rusted (see picture above). All I did was clean and remove the rust and it turned back on. For others, the batteries were not making good contact with the circuit. All I did was increase the length of the spring by using wire and securing it with tape (as shown above).

Solar Crackle Ball Stake Lights.

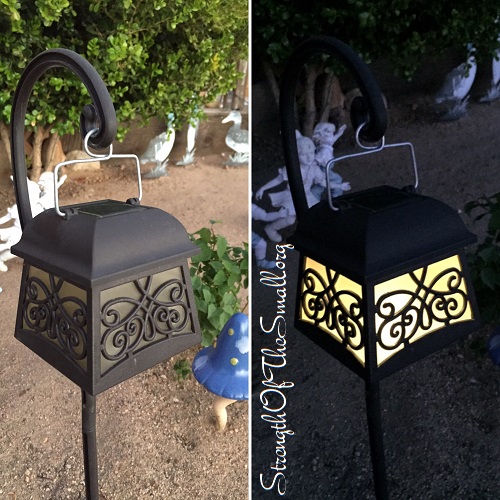
Sometimes during repairs parts get damaged, like the handle below. I was able to create a similar, stronger handle using wire.

Solar Shepherd Hook Lights.

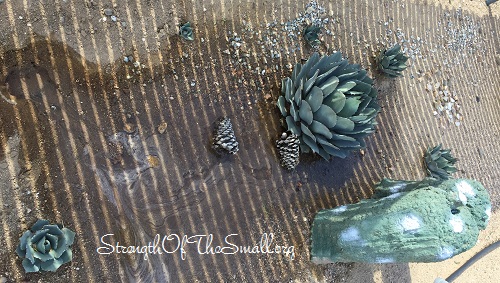
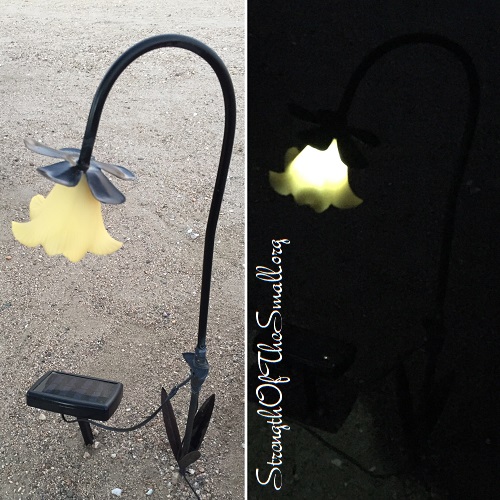
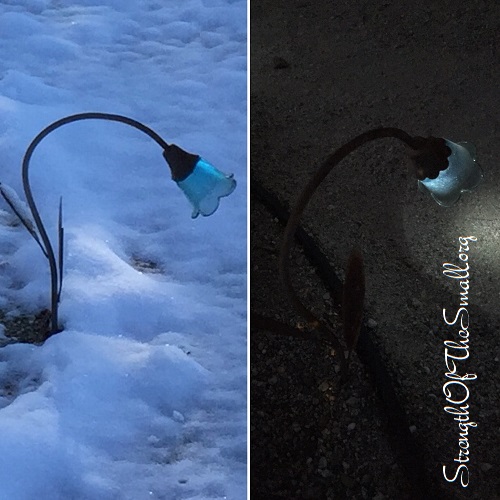
The Solar Powered Lily, Solar Blue Bell, and Solar Orange Art Glass Flowers Lawn Lights below are a few of our oldest solar powered path lights. They have faded significantly and after thirteen years, they stopped working all together. It turned out that their solar cells were damaged. All we did was purchase a few garden solar lights and swapped the solar cells and it solved the problem.

Solar Powered Lily Garden Stakes.
Solar Blue Bell Stake Lawn Lights.
Solar Orange Art Glass Flowers Path Lights.

In most cases, repairing a garden solar light is quite simple.

Sometimes, you are faced with a fixture that is quite hard to open up or every single part needs replacing. At that point you are faced with either repairing the fixture or just getting rid of it and buying a replacement or something new. In my case, there were a couple of lights that had rusted out due to water damage. I took the internal circuit from a good light and soldered all the wires into the damaged one. It’s usually 2 wires going into the solar cell, 2 wires for the battery and the light/LED that need transferring. I verified it lit up afterwards and put it back together. This process will be troublesome, but if you really like the solar light, then it will be worth it.

I hope this tutorial will help you save your precious solar fixtures.

Enjoying the Day

JM Perez By JM Perez2 min read786 views

It’s hot out here and there isn’t much to do, except walk around and enjoy the beautiful plants.

So what’s happening in my garden? A few day ago, I got rid of the perennial bulbs, all excluding the Allium Drumsticks which I really like. I pruned and shaped the Autumn Sage, Texas Sage, Lavender, Boxwood and the Dwarf Myrtle. We also completely removed and got rid of the second Navajo Globe Willow tree on our property. These trees are easy to grow from cuttings, but don’t thrive in the High Desert and are susceptible to diseases.

English Lavender.

The Daylilies have started to bloom.

Pretty Woman Daylily.
Stella D’Oro Daylily.

I planted a few Ornamental Grasses at the right corner of the end of my property along side some Spanish Lavender, Autumn Sage, Miniature Rose bushes and Agave Ovatifolia (which I recently transplanted).

Fountain Grass.

The Pomegranate tree is blooming and producing fruits.

Pomegranate tree.

I have quite a few Yellow Bird Of Paradise Bush ll around my property which I constantly prune and shape. They are one of my favorite ornamental trees along with the Desert Willow.

Yellow Bird Of Paradise Bush.
Desert Willow tree.

Once in a blue moon we have some unfortunate events going on around the garden. Today we found a damage on the irrigation tubing caused by either a thirsty gopher or Ground Squirrel. These rodents have figured out where things are around here and the are becoming quite sneaky. These Agave Ovatifolia ‘Frosty Blue’ have all been dug out and relocated. The mature Agave was damage by a Gopher.

Damaged drip irrigation tubing.

Happy gardening and have a wonderful day.

Quiet Afternoon

JM Perez By JM Perez1 min read459 views

These past few weeks in the High Desert have been quite hectic and like so many residents, I have been praying for more rain. In just a couple of days, Fall will be here.

I was pleasantly surprised in the garden when I found gorgeous delicate clusters of yellow flowers on one of my numerous Mexican Bird of Paradise evergreen shrubs. The plant is drought tolerant to a certain degree and can re-sprout after colder temperatures. I planted them last Summer from seed, in full sun, and they have been thriving ever since attracting hummingbirds, bees and butterflies.

Mexican Bird of Paradise flower buds.
Mexican Bird of Paradise flowers.

As I was deadheading my spent Roses, I spotted an Argiope Trifasciata (orb weaving spider) hanging head down in the center of its web above a miniature Rose bush. You can clearly see its web linear decoration, zig-zag band of silk  structure  also known as stabilimentum.

I wondered if it could be the same I captured last month by my garage door and released in the backyard.

Argiope Trifasciata, a Banded Garden Orbweaver.

Wishing you all a wonderful day.

DIY: Eliminating an Outdoor Faucet

EPEngineer By EPEngineer2 min read662 views

One of my outdoor faucet pipes has been leaking for a couple of months now from last Winters frost. It wasn’t so much a leak, but a couple of drops per every 5 hours or so every now and then from the rusted pipe, not the spigot. It turns out that whoever installed the faucet thirty-eight years ago decided to use a smaller pipe rather than a regular 3/4 inch spigot and because of that the smaller pipe started to get rust which ate thru the outer layers and slowly started to allow water to sweat out.

Damaged Outdoor Faucet.

First things first, I made sure I had all my tools and supplies on hand. I had everything except for the Galvanized Plug Fitting which I bought from Lowes.

Materials/Tools Needed:

  • Pipe wrenches (various sizes)
  • Teflon Tape
  • Mueller Proline 3/4-in Dia Galvanized Plug Fitting
  • Additional tools may be required depending on the type of faucet/tap you have.

Step by step:

  • I turned off the water to the whole house from the street.
  • Using a pipe wrench, I twisted the pipe off where the bigger pipe was adapted onto the smaller pipe which luckily, didn’t break.
  • Using a brush, I cleaned the interior of the pipe and I also cleaned off any rust or debris on the threaded fittings on the wall pipe.
  • I wrapped a few layers of Teflon Tape around the threads of the galvanized plug (this is very important as it ensures that no water leaks out).
  • I screwed the new galvanized plug onto the pipe by hand until it tightened and then used the appropriate wrench to tighten the fitting real tight.
  • I turned the water back on and checked that there was no leak.
Outdoor Faucet Eliminated.

For added precautions, I also picked up insulation for my other outdoor faucets to protect them from the Winter freeze. I am glad that everything worked for the best as this brings peace of mind.

Controlling Burrowing Rodents

EPEngineer By EPEngineer3 min read921 views

Have you awaken in the morning to find dead plants around your home (plants which are leaning on their side). When we look around without seeing any evidence of burrowing rodents (such as the appearance of tunnels and exit holes with mounds of dirt around it), we simply put the blame on White Curl Grubs, which are known to eat plants roots and kill the whole plant in the process.

Pocket Gophers, Groundhogs, Badgers, Voles, Prairie Dogs, Muskrats,  Moles, Ground Squirrel, just to name a few are to blame. These animals are highly active during Spring and live underground using tunnels to get to their food source. They damage lawns, plants, vegetable gardens, foundation walls and give an ugly  appearance to landscaped areas. Muskrats can be found around swamps, lakes and streams with vegetation at close proximity. They feed on plant roots, stems, bulbs, grass, tender bark of young trees, nuts, seeds and fruits. Some feed on mussels, crustaceans, insects, fish, earthworms, snails and slugs.

For the past six years, we’ve only had to deal with Gophers mostly and Ground squirrels.

Ground Squirrel.
Ground Squirrel.

Ground squirrels are highly active during the day and thanks to sunny days and warm weather, we are constantly having uninvited guests. Fortunately for us and unfortunately for them, we wrapped chicken wire around our plants last years, protecting the plants we know for sure they love. Every now and then, I will catch a glimpse of a squirrel searching for food in the empty lot behind our Home.

Just like Yersinia Pseudotuberculosis in Rabbits which is transferable to Humans, Ground squirrels can harbor diseases harmful to humans such as bubonic plague which is transmitted to humans by fleas that the squirrels carry (killing about two-thirds of infected humans within 4 days without treatment). It is highly advised to use extreme caution when disposing a dead squirrel or notify public health officials.

Dead Pocket Gophers.
Dead Pocket Gophers (2008-2010).

We spent our first three years in the High Desert hunting Pocket Gophers after they nearly destroyed all of our plants. We’ve seen a couple of holes in the backyard with mounds of dirt around them. This afternoon I found a hole around our Agapanthus plants and I used a shovel to destroy the hole. These vertebrates will destroy anything on their path while creating holes leading them to their desirable food source. They are also capable of destroying irrigation lines and buried utility cables which are not properly protected.
Click here and here to learn about trapping Gophers.

How Can You Control Rodents?

They are so many options available out there. We’ve tried Gopher Gassers, Gopher Probe and poisons, none of which worked. The best and only method which has worked for us is traps with snapping latch placed near an opening (the latch is triggered when the animal steps on the trap) as you can see on the picture above. Some of these traps can be purchased at your local hardware stores and they can be hand made as well.

How Can You Protect Your Plants?

  • Use Raised Garden Beds
  • Raise your Planters/Pots (using pedestals or whatever you can think of)
  • Use Chicken Wire around your most cherished plants
  • Use Chicken Wire to protect the base of your plants (the roots) before planting them

Regardless of which rodents you are dealing with, always remember to be cautious around them.