DIY: Vintage Chalkboard Tray
What can you do when you own a gorgeous vintage piece that you either don’t use often or can’t use for its original intent? For one you could re-purposed the item to meet your needs.
Well, I have been wanting to make some chalkboard for my kitchen and I thought it would be great on a tray. At the same time, I was looking for a vintage metal tray and was lucky enough to find one out at the Estate Liquidators in Hesperia, CA. I instantly fell in love with this lovely Stainless Steel Vintage Tray with charming gold handles (to top it all of, it was brand new and still in its original packaging). I knew at that moment that I had just found what I have been looking for: a plain and simple metal tray.
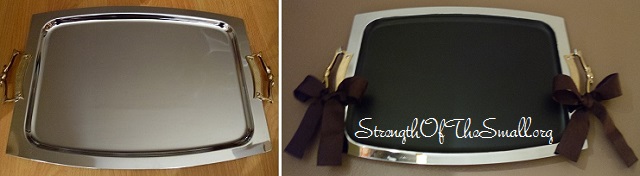
Today, I finally decided to re-purposed my stainless steel vintage metal tray and it turned out great.
Materials/Tools Needed:
- Metal Serving Tray
- Chalkboard Paint/Spray Paint
- Paintbrush/Sponge brush (if you’re using Paint and not Spray Paint)
- Painter’s Tape (if you’re not planning to paint the whole tray)
- Vinegar (to prevent the paint from chipping)
How to proceed:
- Clean/sand your tray (if needed).
- Clean the area you need painted with vinegar to insure that your paint doesn’t chip.
- Tape the borders (if you’re not planning on painting the whole tray).
- Start painting in a well ventilated area and let it try at least one hour.
- When you’re done and satisfied, remove the tape around the borders.
Now that your chalkboard tray is complete, you can write/draw on it and display it in your favorite place with pride. I hope you enjoy yours as much as I am enjoying mine.
