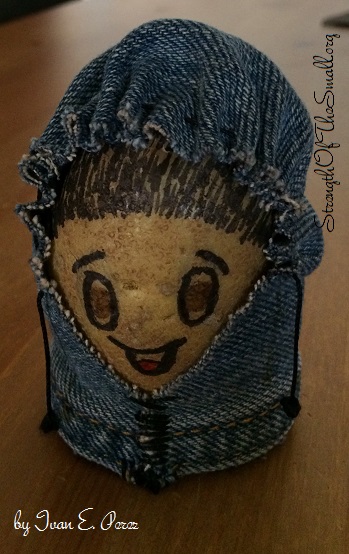
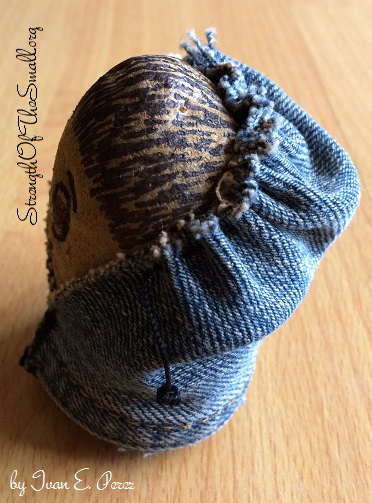
Education

3D Penguin Project [2]

JM Perez By JM Perez2 min read2.4K views

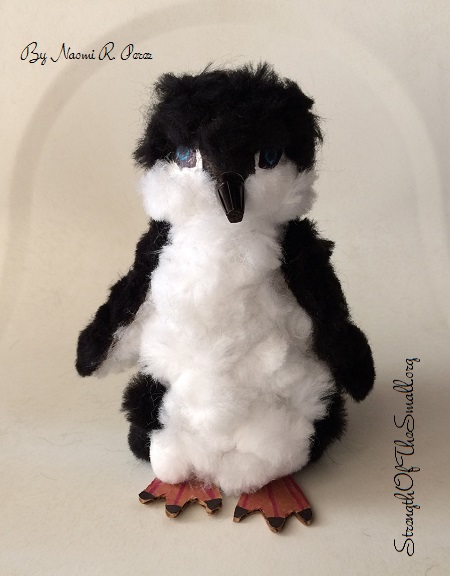
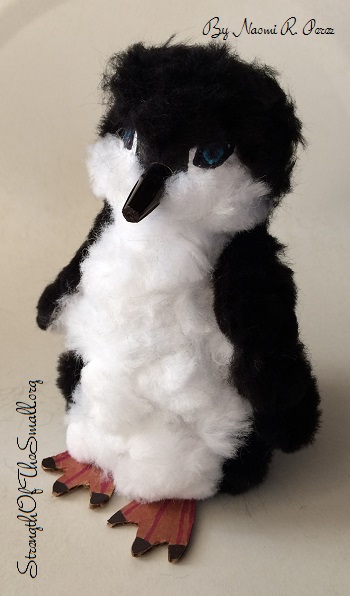
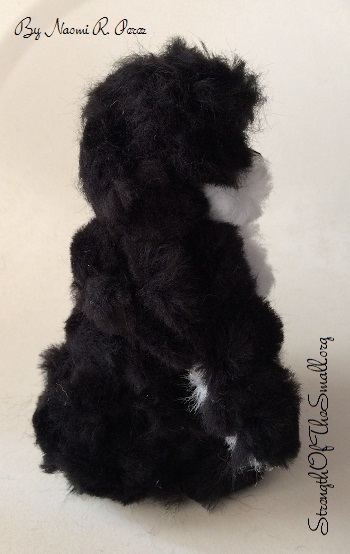
For the past week, we have been assisting our daughter in creating her first 3D Penguin. It’s a school project she’s been looking forward to and she had so much fun researching and working on it.

3D Penguin Project.

Materials/Tools Needed

  • School Glue
  • Tissue Paper
  • Cardboard
  • Scissors
  • Craft Foam Balls
  • Craft Pom-poms
  • Sharpies/Markers
  • Electrical Wire Cap
  • Screw and Screwdriver
  • Juice Barrel

Step by Steps (for this project):

  • Get the screw and screwdriver and insert it through the back of the foam ball until it comes out the front half ways. Now, get the electrical wire cap and screw it on.
  • Apply school glue around the bottle neck of the juice barrel and sit the foam ball.
  • Generously apply school glue at the base of the juice barrel neck and around the foam ball.
  • Cut out strips of tissue paper and lay them from the base of the juice barrel neck to the top of the foam ball. This will help secure the foam ball to the barrel and give you a paper surface to glue the craft pom-poms to.
  • Generously apply glue to the rest of the juice barrel and cover with more tissue paper. Let dry.
  • Cut out flippers and legs out of cardboard. Use strips of tissue paper to attach the flippers to the sides of the juice barrel.
  • Draw the feet of the penguin and apply glue to the base of the juice barrel and secure the feet to it.
  • Use a sharpie to color the electrical wire cap and draw its eyes/features.
  • Using your scissors, cut each pom-pom in half, apply glue to the coverage area and secure it. Repeat until its all covered to your liking.
3D Penguin Project.
3D Penguin Project.

You can click here to view my son’s project from three years ago.

DIY: Zebra Habitat

JM Perez By JM Perez1 min read3.1K views

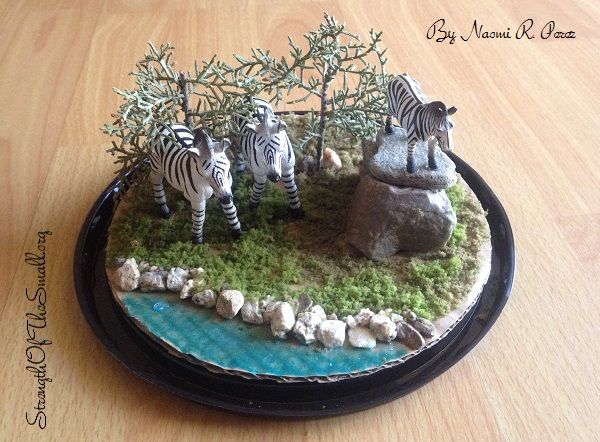
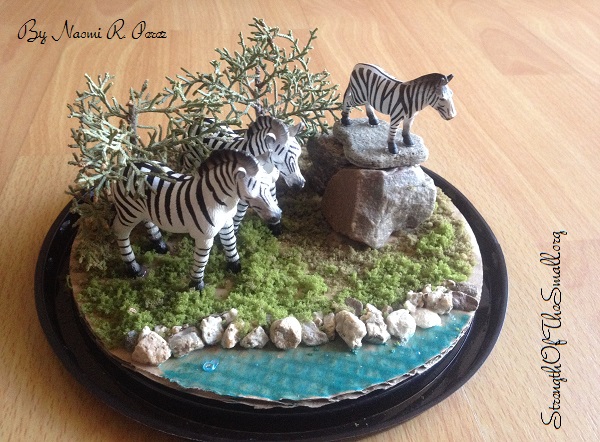
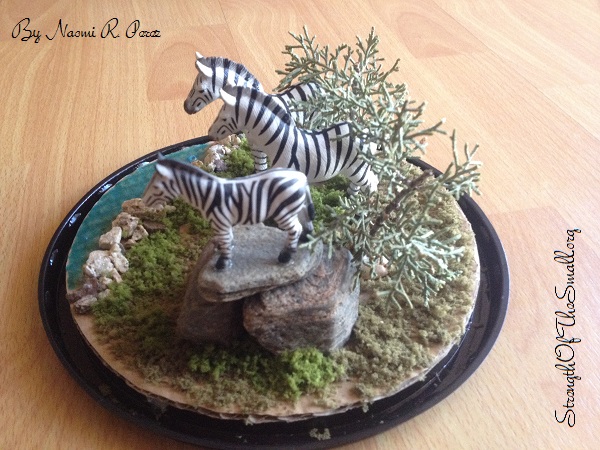
We had so much fun creating a Zebra Habitat for my daughter’s school project. Each child was given a specific animal and was asked to create a unique habitat for their animal.

Zebra Habitat.
Zebra Habitat.

Materials/Tools Needed

  • School Glue
  • Scissors
  • Synthetic Trees/branches
  • Stones
  • Craft Moss
  • Cardboard
  • Markers
  • Glue Gun and Glue Sticks
  • Box/container (we used the base of a Plastic Cake Container)
  • Desert Toy Animals (or cutouts from drawings or Magazine)

Step by Steps (for this project):

  • Figure out the placement of the Animals and Plants.
  • Generously apply school glue at the base of the cardboard, sprinkle your craft moss and let it dry. Use the Glue Gun to glue down the larger items like the Animals, Stones and Synthetic Trees/Branches.
  • For the stream, use a blue marker (for the water) to paint and then apply some glue and let it dry.
Zebra Habitat.
Zebra Habitat.
Zebra Habitat.
Zebra Habitat.

Have fun assisting your little ones with this project.

DIY: A Fancy Feather Coat

JM Perez By JM Perez1 min read963 views

My children’s school is celebrating the 100th day of school today.
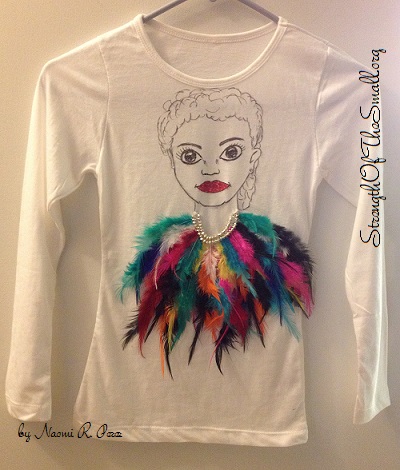
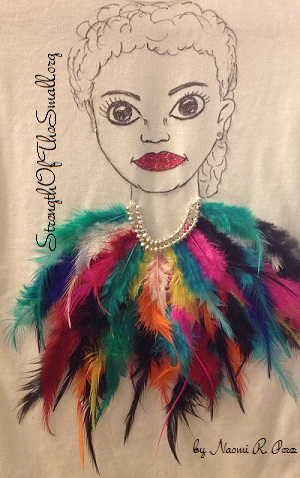
My daughter’s class was asked to create and decorate their T-shirts for a fashion show.  She looked forward to this day with much anticipation to show off her creation.

We had a totally different design idea for the T-shirt, but a slight mistake led us to what you now see, “The Lady and her Fancy Feather Coat.” Regardless, I think it turned out great.

100th Day of School Fancy Feather Coat.
“The Lady and her Fancy Feather Coat”
(100th Day of School T-Shirt Project).
“The Lady and her Fancy Feather Coat” (100th Day of School T-Shirt Project).
“The Lady and her Fancy Feather Coat”
(100th Day of School T-Shirt Project).

Materials/Tools Needed

  • T-shirt
  • Fabric glue
  • Fabric glitter
  • Fabric markers
  • Beads
  • Decorative feathers
  • Crystal cut diamond

Now, I hope they all have a great fashion show.

Snow Lady Decorating Project

JM Perez By JM Perez1 min read670 views

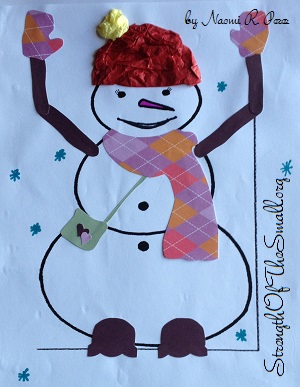
On cold days like these I am grateful for fun projects and activities to keep kids busy.

Today we worked on my daughter’s third decorating project and we all teamed up to help her decorate her “Snow Lady,” as she calls it. Here‘s my son’s project from three years ago.

Snowman Decorating Project.
“Snow Lady” Decorating Project.

Materials/Tools Needed

  • Scissors
  • Scrapbook Scissors
  • Gift Bag Tissues
  • Crayons/Sharpie Markers
  • Elmer’s glue
  • Scrapbook Paper/Construction Paper

We had so much fun decorating her Snow Lady and getting her ready for display at school tomorrow.