Vintage 3 Faces Toothpick Holder

EPEngineer By EPEngineer2 min read916 views

Excited and anxious for a relaxed and fun afternoon; we took a trip up into the beautiful San Bernardino Mountains. We had planned a trip to Crestline, CA and today was that day, rain or shine. Regardless of the winding roads and the motion sickness, Crestline is a city we fell in love with four years ago. Crestline is a small town. It’s charming, welcoming and it feels like a World of its own. The sights are breath-taking, the locals are friendly, helpful and the shops are full of little treasures. When it comes to buying Vintage/Antique pieces, this is one of the places we trust and go to. We’ve been in luck so far.

Our first stop was at the Garden Shed & Co. Shop. The kids instantly fell in love with a Cowboy Screw Sculpture which we ended up buying. Myself on the other hand, who is into rare Vintage Wrenches, added a new tool to my collection: a Vintage Garden Pruner. From there we proceeded to My Favorite Things, where we met shop owner Yolanda and stayed a while admiring her huge selection of treasures. Read about her shop here.
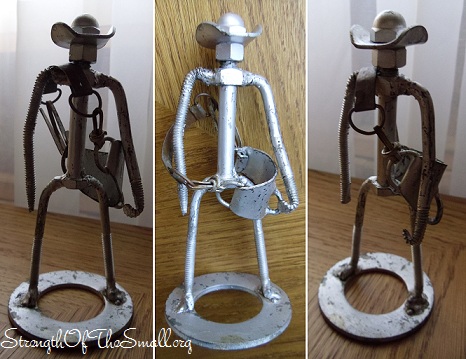
Cowboy Screw Sculpture.

At the Crest Forest Senior Citizens Thrift Shop, I bought a Nautical Wooden Decorative Anchor as well as a Three Faces  Toothpick Holder for our collection (this piece is also known as Three Graces, Three Sisters and Three Fates). It is from the 1960’s and it is a reproduction by L.G. Wright. The original was produced by Duncan Miller in the Late 1880’s. What fascinates Joan the most is the history behind the art work.
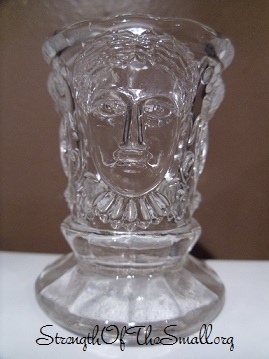
1960’s Three Faces Toothpick Holder by L.G. Wright.

After remembering taking some courses in Philosophy and learning about “Three Graces and Fates” in High School; my wife did some research to refresh her memory (knowledge does not update itself). She finally stumbled upon an article while searching for additional information on this Toothpick Holder. The article was written by Zsuzsanna E. Budapest on The Fates and Destiny. While recounting a life changing incident that happened to her and to which she now sees as fate; she proceeded by giving us a bigger picture of the Mythological Goddesses. They are Females portrayed as Fates and Sisters. It is said that when they are in good spirits, they become the Three Graces and when angered, they are called the Furies.

Silverwood Lake SRA & the beautiful Mountains of San Bernardino National Forest.
Silverwood Lake State Recreation Area.

What a beautiful way to start the weekend.

Beautiful Fall Skies

EPEngineer By EPEngineer1 min read411 views

The day today started with some cloudy/stormy skies which have always been to me  a mysterious and yet mesmerizing sight to see. You can literally sit there and watch the clouds roll in and change their shape as the wind plays havoc with them. And then, there you see an opening in the clouds as if a divine force has willed it so.

Stormy Sky.

After getting my Son ready for school, we headed out and he was witness to the dark and moving clouds. He asked me if it had rained and I assured him it had. On our last leg of the journey to school we turned onto the last road and witnessed a sight to see. There before us stood a beautiful rainbow which I pointed out to him. He was so amazed by the colors and the location as it seemed to start on top of his school. The picture below does the rainbow no justice. What a beautiful way to start the day for him.

Rainbow after the Rain.

DIY: Sprinkler Robot Sculpture

EPEngineer By EPEngineer2 min read821 views

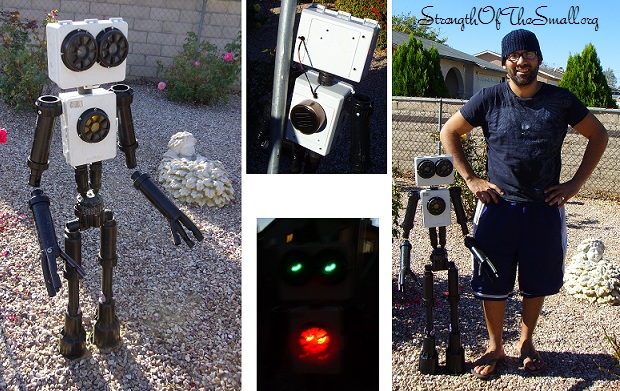
On a Saturday morning while in the garage organizing, we found some of the sprinklers that had been used on the home and which I replaced to run a Drip Watering System instead. They where not much by themselves but gave me an idea which had been working itself on my head for a while. I knew what I wanted it to look like and after talking to my son about it, We decided that it should stand on our front yard and that the eyes and chest should light up (Like Iron Man).

I used plastic piping for the fingers, some of the skinnier sprinklers for the arms and the thicker sprinklers for the legs. To screw everything together I used a drill bit to make a preliminary hole to make it easier to screw the pieces together easier. All together it took about 6 to 8 hours to assemble which some of that time used up by trial and error on part placement.

For the electronic part of the project I decided to use a Solar Light that I got from the local 99¢ Only Stores and which I hacked into to remove the LED and be able to run 4 LEDs from it. I placed all 4 LEDs in parallel and gave them plenty of wire to be able to run them from the Chest all the way to the Head for the eyes. I also attached a second battery holder in parallel to provide the system extra power.

Sprinkler Robot Sculpture.

My boy really enjoyed working on the project as well as working on the routing of the wiring which he called “Open Chest Surgery”. As you can see from the picture, the bot stands at about 4 foot.

Enjoy!

DIY: Shovel Door Handle

EPEngineer By EPEngineer2 min read1.6K views

This is one of the first projects I worked on when we first bought our House in 2007. The original gate latch fell apart and we needed to keep the gate closed at all times. It is a fun and simple projects to do. It is so easy to maneuver and latches every time you push the gate closed behind you.

Materials Needed:

  • Shovel, Pitchfork, Rake, Hoe, Harrow, Fishtail Hand Weeder (or any garden tool with a wooden handle)
  • Screws
  • Gate Latch
  • Cable Rope
  • Drill and a Drill Bit (to make the holes)
  • A Spring (for pulling the Shovel)

Step by step:

  • First step is to use the drill and drill bit to make a hole that will allow the cable rope to go from the latch to the opposite side of the fence. Try and make the hole slightly bigger than the cable wire diameter since it will need to move freely back and forth.
  • Attach the cable rope to the gate latch and run it thru the hole you have drilled. Now choose the area on the object you want to use as the handle and line it up to the cable rope. Make sure that when the object gets pulled, the cable rope will move the latch open and closed freely.
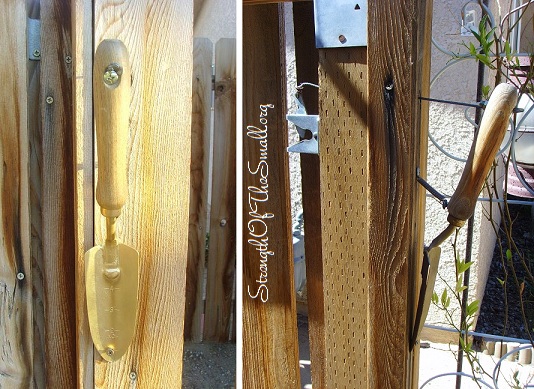
  • Use the screws to screw the object to the fence. Once it is fastened to the fence, use the spring to calculate how far the object will be off the fence. As you can see from the picture I decided to place the spring lower on the gardening shovel to have it sit at an angle.
  • Screw the spring to the fence and then to the object. Once done you are ready to attach the cable rope to the object and test it. After pulling on the handle it should pull the latch open. When you release the handle the spring will pull the handle back in place and the latch will go down far enough where pulling the gate close will latch it closed.

Wrenches can be used as door handle as well as other tools. All you have to do is use your imagination.

Shovel Door Handle.

Make sure you apply clear coat on the wood handle to give a clear and shinning finish and most importantly, to protect the wood from scrapes, the weather and also to help it last as long as possible.

DIY: Mummy Pumpkin

EPEngineer By EPEngineer1 min read537 views

After much deliberation on which craft to make, we decided to make a Mummy Pumpkin.

Materials Needed:

  • Pumpkin
  • First aid gauze/Toilet Paper/White duct Tape/White linen
  • Googly Eyes/Draw your own eyes
  • Black sticky back craft foam (for the mouth)
  • Scissors/ Crafts knife (to carve out the mouth)
  • Craft Glue/ Hot glue Gun (for the eyes)
  • Toilet Paper Roll/Vegetable can (for body, if desired)
  • Q-tips/Straws/Toothpick/ Wooden Skewers (for arms, if desired)

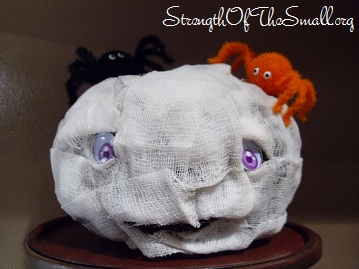
All we needed for our Mummy Pumpkin was a Grapevine Pumpkin, First aid gauze, and a pair of Googly eyes.

Mummy Pumpkin.

Step by step:

  1. Wrap the gauze around the pumpkin, leaving a few openings for the eyes and the mouth. Tuck the other end in. Some people glue one end of the gauze to the pumpkin as well as the other; I just wrapped away, loosely.
  2. Carefully place googly eyes

For a creepier effect you could use different eyes and red paint to randomly give it a bloody look.