Last night we finally made the decision to take a trip to Big Bear, California, before we are faced with triple-digit temperatures. Today was the day and it was awesome!
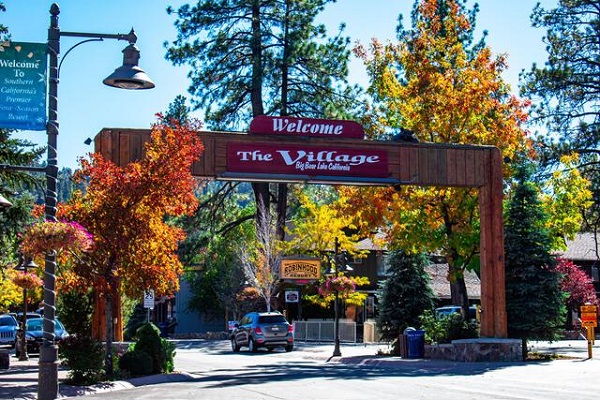
Big Bear Lake CA – The Village Welcome Sign. Image source: Alamy.com .
We took Highway 18 through Lucerne Valley, CA.
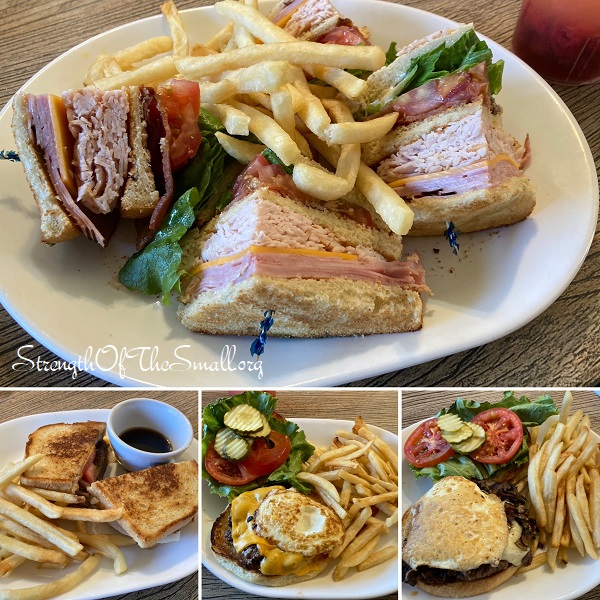
We had brunch at Teddy Bear Restaurant:
– Club Sandwich
– Bears Best Sandwich
– Fried Egg Burger
– Mushroom Burger
Brunch at Teddy Bear Restaurant.
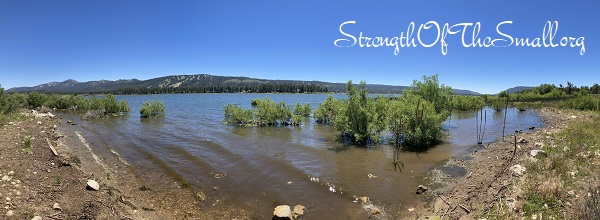
After our brunch, we visited a few shops, and took a walk around the lake.
Big Bear Lake, CA.Big Bear Lake, CA.
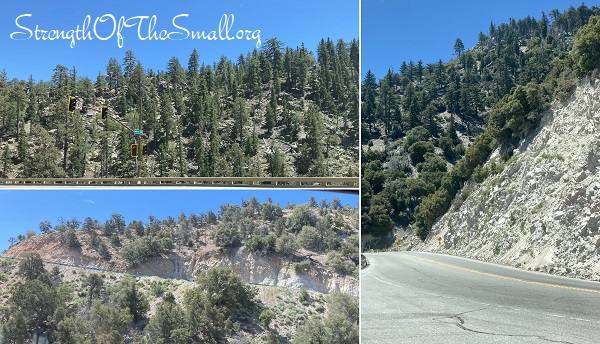
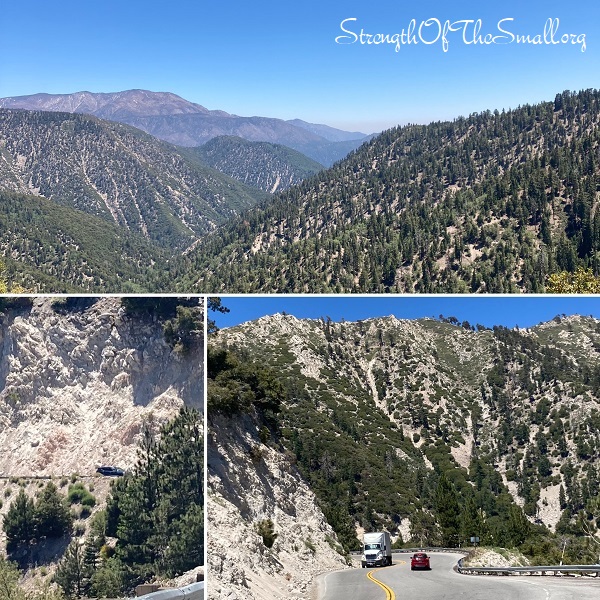
On our way home, we took the Rim of The World Highway.
There’s a high school at the top of the mountain overlooking the San Bernardino Valley.
Rim of The World High School.
The view is breathtaking.
Rim of The World Hwy.Rim of The World Highway.Rim of The World Hwy.
There is something about Solar Lights that makes them attractive. Perhaps is because they come in different shapes, sizes and forms; or simply because they are solar powered. We all hope that once these lights are placed outdoors, they would last a lifetime; sometimes however, they malfunction or stop working all together, especially after being exposed to the elements for many years.
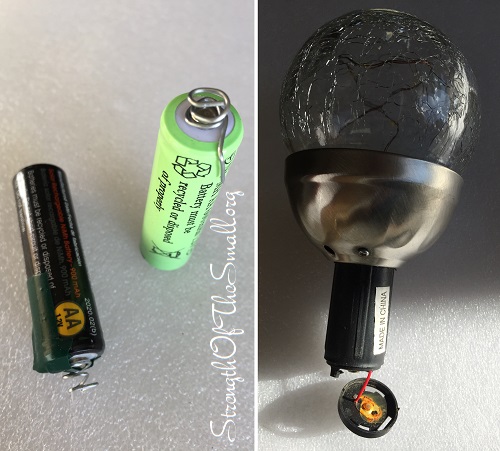
If you love your garden solar lights, they are all worth repairing. Dead batteries, rust from water damage, damaged wiring, bad connections are some common reasons for light failures. Fixing the issues usually involve replacing the batteries, LED, driver circuit, removing the rust, protecting the wires, or simply replacing the solar cells. Lately, some of our solar lights stopped working and it took me just a couple of hours to get them running like new.
Materials Needed:
Solar batteries
Solar battery charger
Wire
Wire Cutters
Pliers
Duct tape
Solar cells
Multimeter (to test the batteries voltage)
Soldering Iron (to solder wires together)
Garden Solar Light Problems.
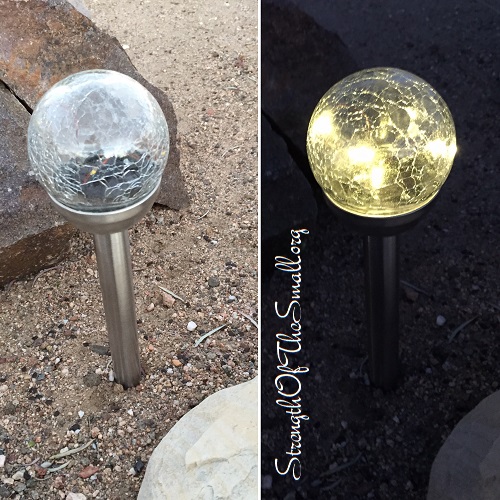
The issues we had with the Solar Crackle Ball Stake Lights is that some of the connectors were rusted (see picture above). All I did was clean and remove the rust and it turned back on. For others, the batteries were not making good contact with the circuit. All I did was increase the length of the spring by using wire and securing it with tape (as shown above).
Solar Crackle Ball Stake Lights.
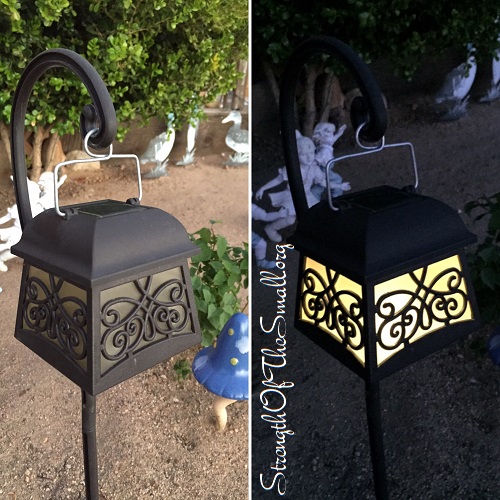
Sometimes during repairs parts get damaged, like the handle below. I was able to create a similar, stronger handle using wire.
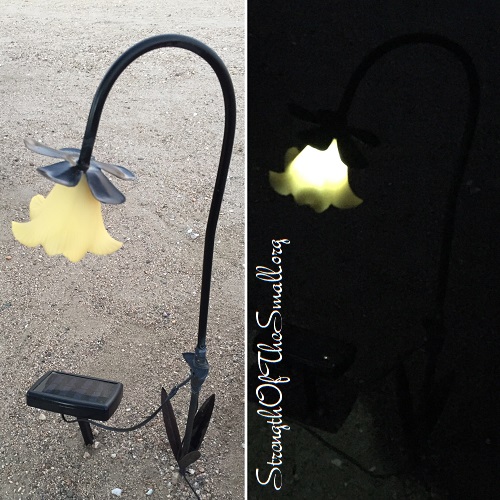
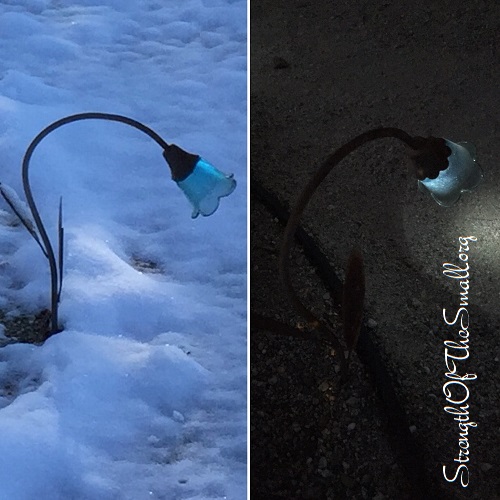
The Solar Powered Lily, Solar Blue Bell, and Solar Orange Art Glass Flowers Lawn Lights below are a few of our oldest solar powered path lights. They have faded significantly and after thirteen years, they stopped working all together. It turned out that their solar cells were damaged. All we did was purchase a few garden solar lights and swapped the solar cells and it solved the problem.
Solar Powered Lily Garden Stakes.Solar Blue Bell Stake Lawn Lights.Solar Orange Art Glass Flowers Path Lights.
In most cases, repairing a garden solar light is quite simple.
Sometimes, you are faced with a fixture that is quite hard to open up or every single part needs replacing. At that point you are faced with either repairing the fixture or just getting rid of it and buying a replacement or something new. In my case, there were a couple of lights that had rusted out due to water damage. I took the internal circuit from a good light and soldered all the wires into the damaged one. It’s usually 2 wires going into the solar cell, 2 wires for the battery and the light/LED that need transferring. I verified it lit up afterwards and put it back together. This process will be troublesome, but if you really like the solar light, then it will be worth it.
I hope this tutorial will help you save your precious solar fixtures.
Bureau of Land Management Needles Field Office Needles, CA 92363
Phone: 760-326-7000 Email: BLM_CA_Web_NE@blm.gov
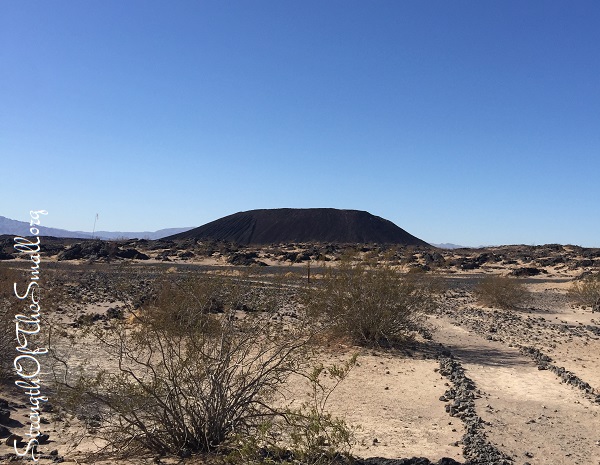
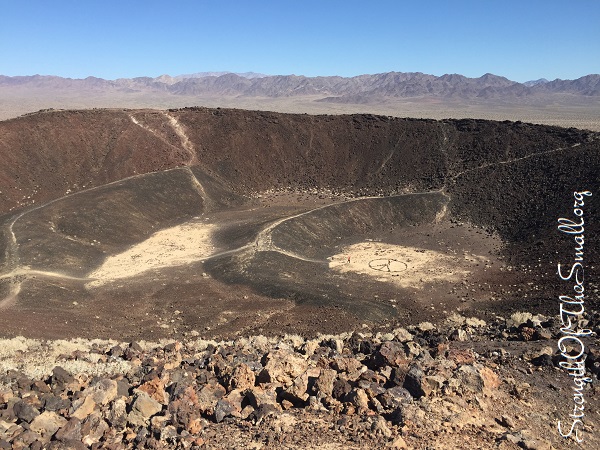
After many years of procrastinating, today we finally made it to Amboy Crater. Well, it wasn’t so much about procrastination as my kids really wanted to go on a hike and/or long walk, but we thought they were too young to make it. After weeks of planning, we were excited to hike the Amboy Crater on Thursday especially as the weather was getting cooler.
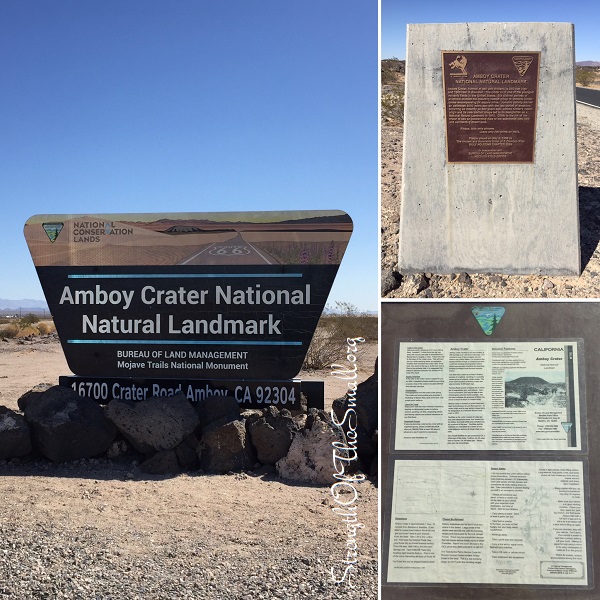
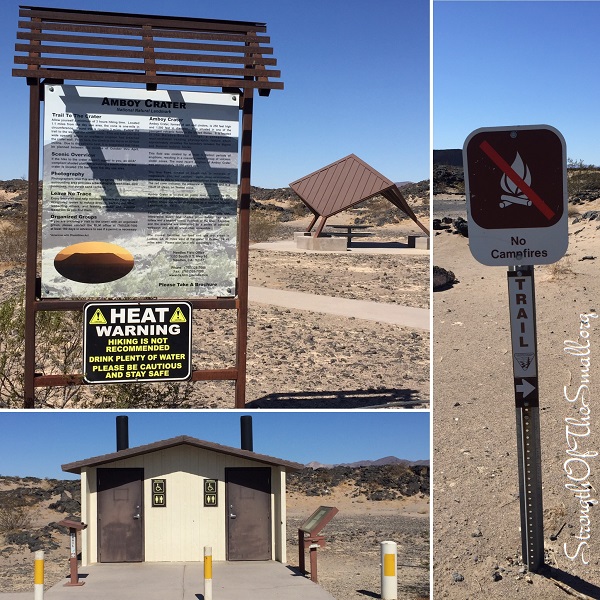
Amboy Crater National Natural Landmark Monument & Information.
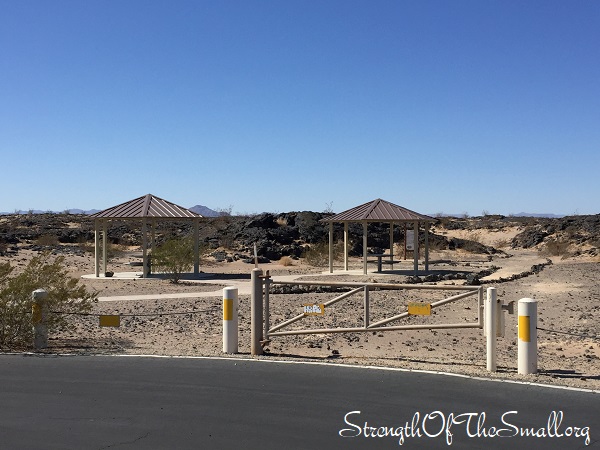
There are a few shaded picnic areas, crater information, warning signs and a well kept restrooms.
My kids and I decided to stop at the center of the crater, while my husband climbed up to the rim.
Center of the crater.
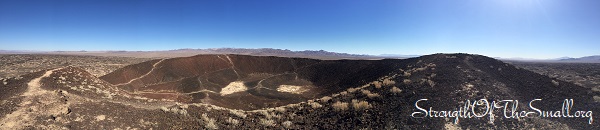
At the top of the crater you get a vast and beautiful view of the surrounding landscape.
View into the middle crater from the rim.
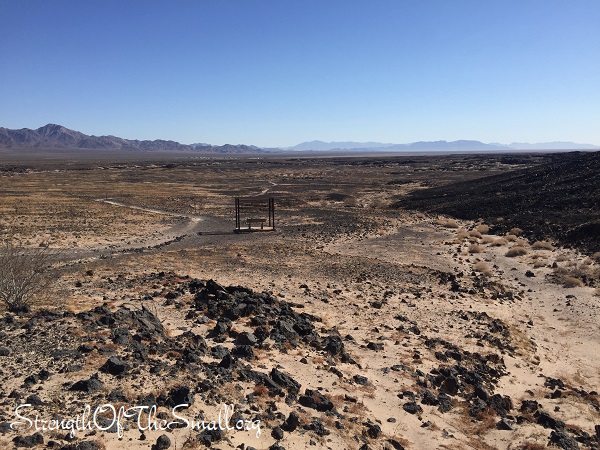
Head back the same way you came …
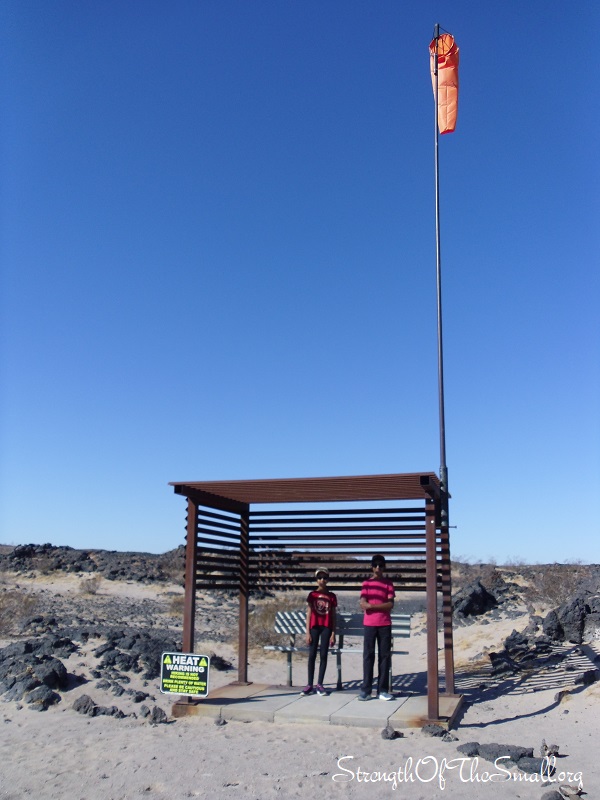
Second Rest Area Heading-down.
Be advised that there is no water at the site; therefore, you should bring your own, and plenty of it. Watch out for rattlesnakes and other desert wildlife along the trail.
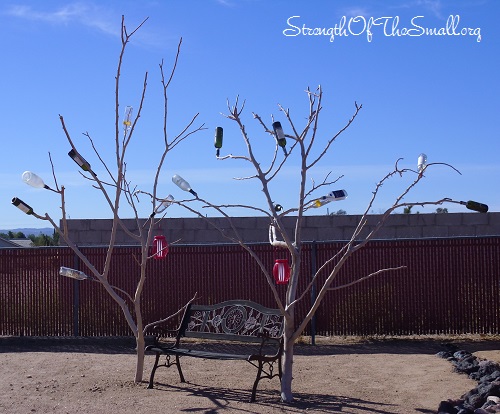
Early March of this year, I cut off all the branches from our fruitless Mulberry tree.
The idea of re-purposing the branches came after having removed the leaves and smaller branches and noticing that the branches themselves resembled trees. It was also an alternative to disposing of them over time. We decided to use the bare branches as Bottle Trees (read all about it here).
Bare Branch Bottle Tree.
Materials/Tools Needed
Natural Tree Branches
Cement Bags/Mixing Tools
Shovel
Ropes
Glass Bottles
Step by Steps:
Cut some branches from a Tree
Smooth out the tips of the branches to slide the bottles in.
Using the shovel dig out a small hole about 12 to 16 inches deep and about 10 inches in diameter to bury the branch base. The bigger the branch the deeper the hole that will be needed.
Mix the cement making sure that you follow the mixing instructions on the bag.
Pour the cement into the hole and push the branch onto the cement to the desired dept.
At this point you will need to use the ropes to secure the branch in place so that the cement can dry.
Let the cement dry for 24 hours before removing the ropes.
Insert the bottles into the prepared branches and enjoy.
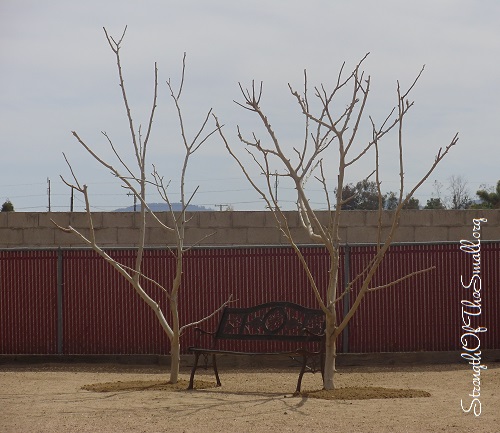
Bare Tree Branches. (March 2014)
We decided to place the branches on both sides of a bench to create a beautiful sitting area. The effect is unique and we enjoy it immensely.
Inspire yourself or someone else this weekend with your creativity.
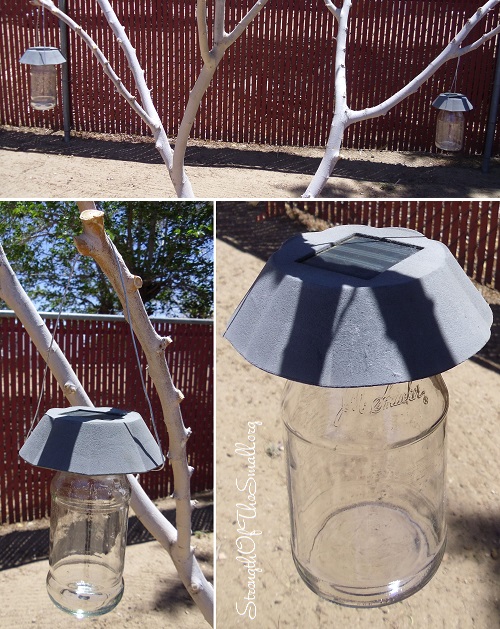
Today we gave a facelift to a set of old solar lights.
DIY: Solar Powered Jars.
Materials/Tools Needed
Solar Lights
Glass Jars
Screw Driver
Small Screws
Wire
Pliers
Drill and Drill Bits
Step by Steps:
Remove lid from Jar and drill a hole in the center of the lid for the light bulb/LED bulb to go thru
Remove both stake and globe off the Solar Light top
Remove the lid off the jar and screw the lid onto the Solar Top making sure the screws do not damage the light electronics
Take the wire and loop the wire around the neck of the Jar. Use the pliers to tighten up the end, shape a handle, loop the end and tighten it using the pliers.