Garden Improvement

Little Pleasures

JM Perez By JM Perez2 min read563 views

It’s a new month and a new leaf has been turned …

It’s hot, it’s scorching hot! It’s a huge relief to know that we have had less brush fires since the start of Summer, and I hope it stays this way. What we really need now is a good rainfall. It rained last night; it rained for less than five minutes, but it rained hard. The downside of Summer showers is the intense heat the next day; but still, a good rainfall is always welcomed.

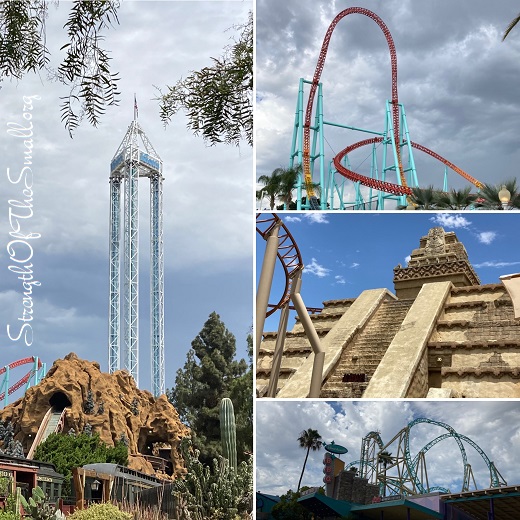
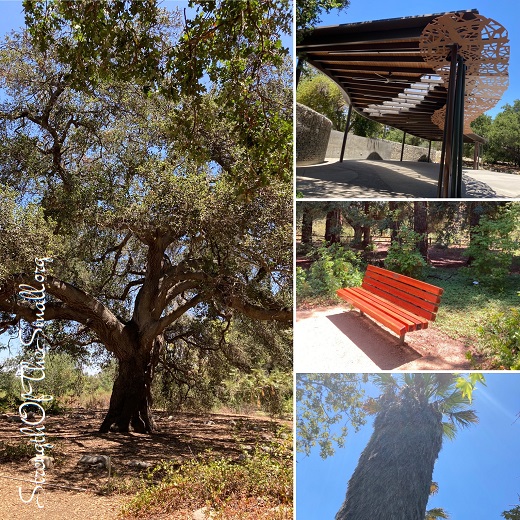
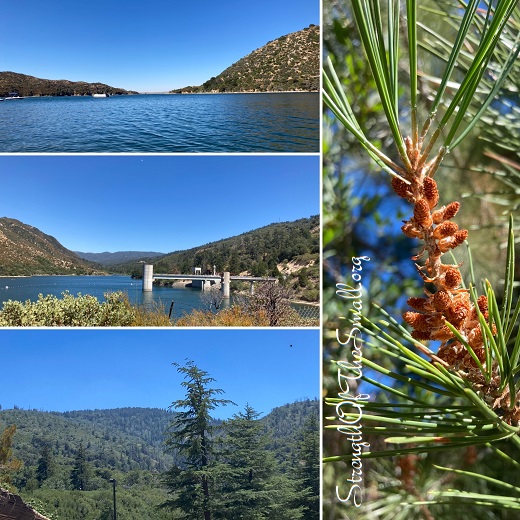
We visited a few places these past months. We let the kids loose at Knott’s Berry Farm, we enjoyed a peaceful walk at the California Botanic Gardens, we went to a couple of Lakes, and we are planning to have some fun at the Disney California Adventure Park this Fall, when the weather cools down.

Knott’s Berry Farm rides.
California Botanic Gardens.
Silverwood Lake.

I didn’t know how much Gophers love the Gopher plants, until I lost a few in the backyard; I lost everything from the side next to the fence, I lost one plant in the front yard and started seeing holes around the other plants in the front yard. The fix was simple at that point: I got rid of the remainder of the Gopher plants. They came looking once and haven’t disturbed my garden since. What I have learned fighting rodents for the past fifteen years is that they end up winning when they set their eyes and incisors on something.

Most of the succulents are blooming …

Succulents bloom.

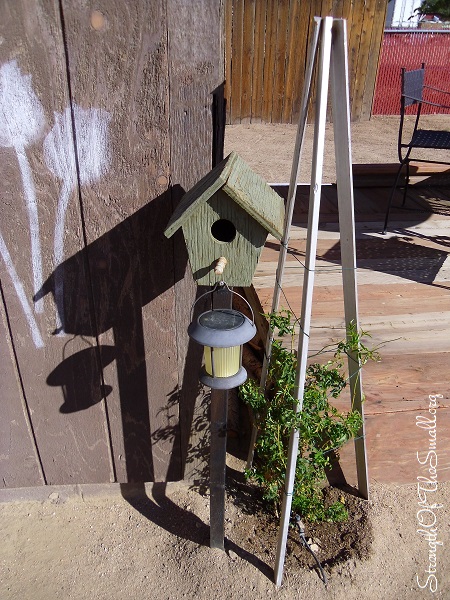
I also got rid of all the Salvia Greggii around the Horsetail Reed growing in barrels and my husband spray painted all four barrels white. I got rid of all the Creeping Myrtle planted in the ground, and left the potted one untouched.  I think having less plants in the front yard will make it a little easier to maintain the garden.

Happy New Month and Happy Gardening!

DIY: Repair a Garden Solar Light

EPEngineer By EPEngineer2 min read1.4K views

There is something about Solar Lights that makes them attractive. Perhaps is because they come in different shapes, sizes and forms; or simply because they are solar powered. We all hope that once these lights are placed outdoors, they would last a lifetime; sometimes however, they malfunction or stop working all together, especially after being exposed to the elements for many years.

If you love your garden solar lights, they are all worth repairing. Dead batteries, rust from water damage, damaged wiring, bad connections are some common reasons for light failures. Fixing the issues usually involve replacing the batteries, LED, driver circuit, removing the rust, protecting the wires, or simply replacing the solar cells. Lately, some of our solar lights stopped working and it took me just a couple of hours to get them running like new.

Materials Needed:

  • Solar batteries
  • Solar battery charger
  • Wire
  • Wire Cutters
  • Pliers
  • Duct tape
  • Solar cells
  • Multimeter (to test the batteries voltage)
  • Soldering Iron (to solder wires together)
Garden Solar Light Problems.

The issues we had with the Solar Crackle Ball Stake Lights is that some of the connectors were rusted (see picture above). All I did was clean and remove the rust and it turned back on. For others, the batteries were not making good contact with the circuit. All I did was increase the length of the spring by using wire and securing it with tape (as shown above).

Solar Crackle Ball Stake Lights.

Sometimes during repairs parts get damaged, like the handle below. I was able to create a similar, stronger handle using wire.

Solar Shepherd Hook Lights.

The Solar Powered Lily, Solar Blue Bell, and Solar Orange Art Glass Flowers Lawn Lights below are a few of our oldest solar powered path lights. They have faded significantly and after thirteen years, they stopped working all together. It turned out that their solar cells were damaged. All we did was purchase a few garden solar lights and swapped the solar cells and it solved the problem.

Solar Powered Lily Garden Stakes.
Solar Blue Bell Stake Lawn Lights.
Solar Orange Art Glass Flowers Path Lights.

In most cases, repairing a garden solar light is quite simple.

Sometimes, you are faced with a fixture that is quite hard to open up or every single part needs replacing. At that point you are faced with either repairing the fixture or just getting rid of it and buying a replacement or something new. In my case, there were a couple of lights that had rusted out due to water damage. I took the internal circuit from a good light and soldered all the wires into the damaged one. It’s usually 2 wires going into the solar cell, 2 wires for the battery and the light/LED that need transferring. I verified it lit up afterwards and put it back together. This process will be troublesome, but if you really like the solar light, then it will be worth it.

I hope this tutorial will help you save your precious solar fixtures.

Fairy Stepping Stones

JM Perez By JM Perez1 min read595 views

Today my kids and I took great pleasure in painting a set of twelves Lily and fairy stepping stones.

These stepping stones were purchased over twelve years ago and as time went by, their colors faded. Last Friday, we collected and cleaned them up, then we proceeded to give them a new life.

Fairy Stepping Stone. When fairies sing … flowers blossom.

– Fairies dance … among the butterflies
– When fairies sing … flowers blossom
– Fairies dream in the morning dew.

Fairy Stepping Stones.

The Lily stepping stones were the easiest to paint. We spray painted each stone a different color and concentrated on the filaments and anthers.

Lily Stepping Stones.

These stepping stones all have a metal tooth hanger attached to the back so they can easily be hung or displayed on any wall. For our project however, we used screws to hold the stepping stones in place since we wanted to angle them rather than hang them straight.

DIY: Garden Trellis

JM Perez By JM Perez1 min read536 views

The weather is great today, making it is a good day to get busy in the garden.
I got to bury the legs of the Garden Trellis that my husband build a few years back. This trellis will support the young vine (Common Jasmine), as well as provide proper training and maintenance.

This simple/primitive garden trellis was built using old pieces of some baseboard we removed from the house when we were doing the upgrades, a medium size screw to hold the top together as well as some twines.

Garden Trellis for  Common Jasmine.

Materials/Tools Needed:

  • Old baseboard pieces
  • Jute Twine
  • Wood Screws, Power Drill, Drill Bits
  • Stain (for the Wood) or Paint/Spray Paint

Step by step:

  • Get your baseboard and cut them into three pieces of your desire height
  • Hold the three pieces and screw them together at the top
  • Paint/Stain the finish product (you could paint/stain the pieces of wood before or after screwing them)
  • Let dry
  • Wrap the twine around the tripod, keeping it nice and tight and it’s ready to be used.