Fun Activities

Simple Gnome Craft Project

Rachel By Rachel2 min read769 views

Hello! Good day everyone!
It feels good to post something here after such a long time.

Distance learning has been okay, I’ve been doing all my work while still finding time to hang out with my family. I listen to my teachers and ask questions when needed to maintain my A’s. I’ve also been reading a lot of Harry Potter lately. It’s really interesting seeing how many times he can get in trouble and almost die every school year by not listening to his teachers.

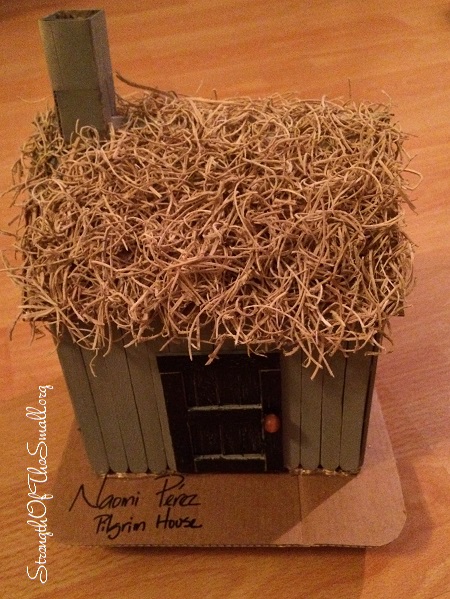
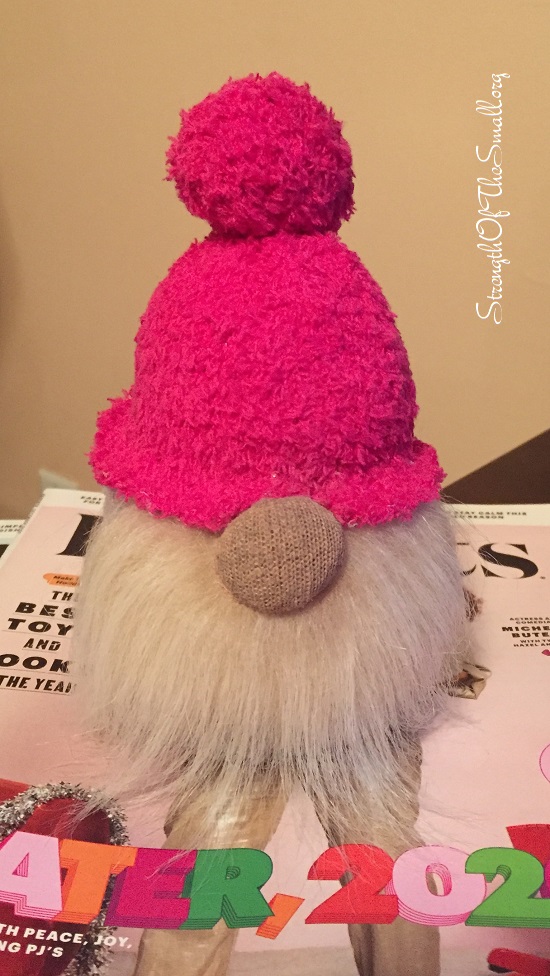
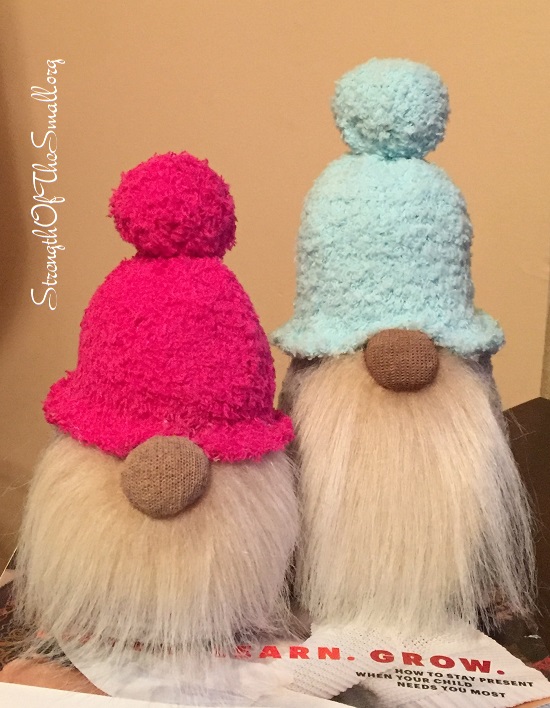
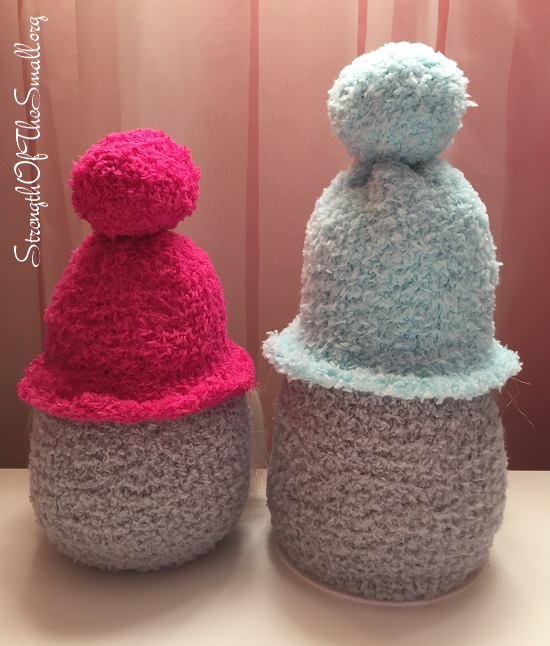
This afternoon, my mom helped me and my brother create our own gnomes using supplies we already had on hand.

Little Sister Gnome.

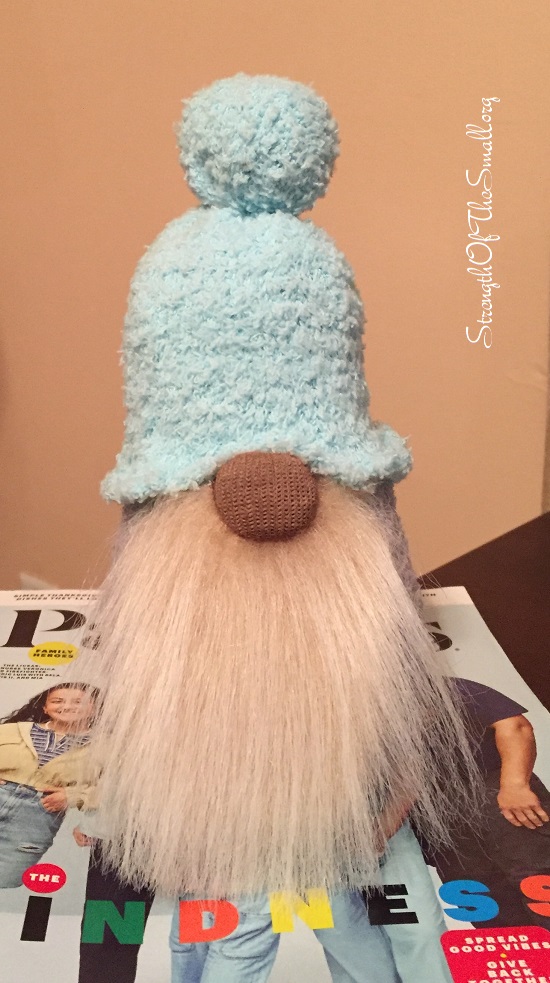
The second gnome with the longer beard is my brother’s. It’s taller than mine and has a blue hat.

Big brother Gnome.

Materials/Tools Needed

  • Scissors
  • Craft Fur
  • Hot Glue Gun and Glue Sticks
  • Socks (various colors) for the base body, the body and the hat
  • Cardboard (optional, to help the gnome balance)
  • Rice/Tiny Pebbles
  • Small Rubber band or Craft Rope/Twine
  • Eyeshadow Palette and a paint brush (for the nose)
  • Cotton Stuffing
  • Small Pom Pom balls

Step by Step (for this project):

  • Build the body. Get the first sock, cut it at the heel and fill it up with rice (or your filling of choice). Once you are satisfied with the size, get some twine or a rubber band and secure the opening of the sock.
  • For the nose, grab an area close to the top, to form the nose and secure it with some twine or a rubber band. Using your paint brush, choose a color from your eyeshadow palette for the nose.
  • Dress up the gnome. Get another sock and cut it slightly above the heel. Cover the gnome from the heel to the top and secure the opening with a glue gun.
  • Give it a beard. Get a piece of fur and shape it to your liking. Cut a small V shape at the top of the piece of fur so that the nose can fit through. Tuck the fur right under his nose and secure the area with a glue gun.
  • The beanie hat. Get your last sock and cut it on the heel. Get some cotton, stuff it in the toe area and secure it with some twine or a rubber band to create a small pom pom. Add a little cotton batting into the sock to give it shape and tuck it around the gnome’s head (above its nose) and secure it with a glue gun.
Sibling Gnomes.
Sibling Gnomes.

Stay safe out there!

DIY: Pilgrim House

JM Perez By JM Perez1 min read4.5K views

Today I am going to share a DIY Pilgrim House we helped our daughter build for her class project.

Pilgrim House.

Materials/Tools Needed

  • Popsicle sticks
  • Glue Gun and Glue Sticks
  • Cardboard
  • Beads
  • Hay (we used Aspen pads for the roofing)
  • Elmer’s glue
  • Spray Paints
  • Paint or Markers

Step by Step (for this project):

  • Cut out pieces of cardboard and put the walls of your house together
  • Cut out a piece of cardboard for the roof and set aside
  • Build your chimney and attach it unto the roof
  • Using your glue gun, glue the Popsicle sticks unto the walls of the house, except the roof
  • Spray paint the walls of the house, let dry and secure the roof
  • Build a door and window using Popsicle sticks and paint them
  • Generously apply Elmer’s glue unto the roof and secure your hay
  • Apply glue using the glue gun to the base of the house and stick to the floor.
Pilgrim House.
Pilgrim House.

It was a fun project to work on and the reward was equally great!

Topiaries Art & Sculptures

JM Perez By JM Perez2 min read1.5K views

The weather is beautiful, Spring is nearing and I am so excited. My entire property is now 100% weed free as of last Sunday. The Mini Pergola is up and by next weekend we will begin building a Dry Creek Bed next to the structure. One of the many good things I did in my backyard was use shrubs as well as entertaining areas as dividers for different sections. With the weeds gone it’s easier to look at the backyard and imagine the possibilities for landscaping and designing since that’s where most of the magic is waiting.
This Spring, I will be creating a Mosaïculture piece of artwork (also known as Living Sculpture) which I know my kids will enjoy. For the first project I will be starting with something fairly small and simple using Chicken Wire to form a shape. My backyard is ready for the next stage in its evolution.

Mosaïculture, according to Mosaïcultures Internationales de Montréal, an international Mosaïculture competition held in Montréal, Canada, is a refined horticultural art that involves creating and mounting living artworks made primarily from plants with colorful foliage (generally annuals, and occasionally perennials).

I love Living Sculptures. They are inspiring and incredibly beautiful thanks to the talented Gardeners who work hard to nurture and shape them. Out of everything I have seen so far, I love the Garden Bed Topiary best.

Easter Island Heads, Montreal Botanical Gardens. Image Credit:  Deanna Young
Easter Island Heads, Montreal Botanical Gardens.
Image Credit: Deanna Young.
Mother Earth, Montreal Botanical Gardens.
Mother Earth, Montreal Botanical Gardens. Image Credit: Guy Boily.
Montreal Botanical Gardens. Image Credit: Guy Boily.
Owl Topiary.
The Giant Flower Owls In Nantou County, Taiwan.
Image Credit: Ernesto Huang.
Garden Bed Topiary.
Garden Bed Topiary.
Image Source.
'Sleeping Chicken' by Claude Ponti, Jardin des plantes, Nantes Image Credit: InTheSideCar.com
‘Poussin Endormi (Sleeping Chicken)’ by Claude Ponti, Jardin des plantes, Nantes
Image Credit: InTheSideCar.com
'Monsieur et Madame Génie', Claude Ponti, Jardin des plantes, Nantes.
‘Monsieur et Madame Génie’, Claude Ponti, Jardin des plantes, Nantes.

Just like growing Moss, growing and maintaining a living sculpture is time consuming and requires dedication. In the end, the hard work which consist of preparing and shaping the soil, growing the plants, pruning and training them to give shape to the desired art is a rewarding work of art to any gardener.

Click here to learn about creating your own living sculpture.

Fun Edible Spookiness

JM Perez By JM Perez1 min read995 views

Halloween is just around the corner and this year my kids are looking forward to it with excitement.  They love their costumes which they will be sporting for Howl Fest on Friday at my Son’s school. In the interim, we are still figuring out what to do for Halloween; especially treats we can make at home.

Be it food, drawings, movies or costumes, my kids have no interest in anything scary. I am sharing with you a few edible ideas that are kid-friendly, spooky and fun. When it comes to Halloween and food, creativity is endless. You can imagine and make something fun or you can find ideas on Pinterest.

Mummy Cupcake. Source.
Mummy Cupcake.
Source.
Mummy Pizzas. Source.
Mummy Pizzas.
Source.
Melting Witch Cookies
Melting Witch Cookies.
Source.
Ghoulish Breadsticks. Source.
Ghoulish Breadsticks.
Source.
Broomstick Pretzel Treats. Source.
Broomstick Pretzel Treats.
Source.
Spider Deviled Eggs.
Albino Black Widow Spider Deviled Eggs.
Source.
Eyeball Caprese. Source.
Eyeball Caprese.
Source.
Witch Hat Cookies. Source.
Witch Hat Cookies.
Source.
Oreo Pudding Graveyard.
Source.
Cheesy "Ham-witch." Source.
Cheesy “Ham-witch.”
Source.
Frankenstein Baked Pepper. Source.
Frankenstein Baked Pepper.
Source.
Sweet Ghost Crisps. Source.
Sweet Ghost Crisps.
Source.
Rat Meatballs. Source.
Rat Meatballs.
Source.
Freakish Frog with Fly. Source.
Freakish Frog with Fly.
Source.
Tentacle Pot Pie. Source.
Tentacle Pot Pie.
Source.
Frankenstein Kiwi. Source.
Frankenstein Kiwi.
Source.
Frankenstein Cupcakes. Source.
Frankenstein Cupcakes.
Source.
Zombie Pinapple. Source.
Zombie Pineapple.
Source.

Have a fun and safe Halloween!

Moss Art & Sculpture

JM Perez By JM Perez2 min read1.6K views

Green. Such a vibrant color which makes most things beautiful and gives a sense of Hope. I love this color.

According to Empower Yourself with Color Psychology, green is the color of balance and harmony, creating equilibrium between the head and the heart. Green is also the color of growth, the color of spring, of renewal and rebirth. It is an emotionally positive color, giving us the ability to love and nurture ourselves and others unconditionally. The color green is also associated with jealousy and envy.

What is it about Moss that makes it so appealing? It adds simplicity and charm to the area it’s growing on.
When I was five and a half years old, we moved to a one acre property surrounded mostly by tall trees. There was a forest right next to our house and I enjoyed watching all the “green” growing heavily on the tree trunks. At one point I convinced myself that it was an enchanted Forest.  Each time I see Moss, I get reminded of that Forest.

Imagine waking up every single day to a gorgeous low maintenance evergreen lawn that requires no mowing, no fertilizers, no pesticides, little to no weeding and less watering once established. How about waking up to a beautiful sight within your backyard? Moss will do the trick and tolerates drought longer than grass.

Sculptures from The Lost Gardens of Heligan

Grey Lady by Susan & Pete Hill. Lost Gardens of Heligan.
The Dreaming Girl by Susan & Pete Hill. Lost Gardens of Heligan.
The Giant's Head by Susan & Pete Hill. Lost Gardens of Heligan.
The Giant’s Head by Susan & Pete Hill. Lost Gardens of Heligan.
Mud Maid by Susan & Pete Hill. Lost Gardens of Heligan.

What about the Moss Couch below? I find it quite charming and what a great idea! It will look awesome in my backyard. Click here for a step by step tutorial on Moss covered chair for your garden.

Moss Couch, Memphis Botanic Garden.
Moss Couch, Memphis Botanic Garden (My Big Backyard).
Bruno's Art & Sculpture Garden.
Bruno’s Art & Sculpture Garden.
Abandoned Car covered in Moss. Image Credit: Fine Art America.
Abandoned Car covered in Moss.
Image Credit: Fine Art America.

Six years ago when I first saw the pictures above, I knew it would be a wonderful idea to create one of those sculptures in the backyard. We quickly realized that we didn’t have enough shady areas at the back and this fact alone made it difficult to grow Moss around here. It was quite a disappointment to say the least.

Growing Moss in the High Desert is possible provided a shaded area. Maintaining it however, might be challenging and time consuming as we have hot, dry and humid weather in the High Desert. Not only must one plant Moss in shady areas, but the soil must constantly be kept moist (which will increase water bill costs).

Click here to learn about growing Moss.