Repurposing

DIY: Primitive Garden Table

EPEngineer By EPEngineer1 min read557 views

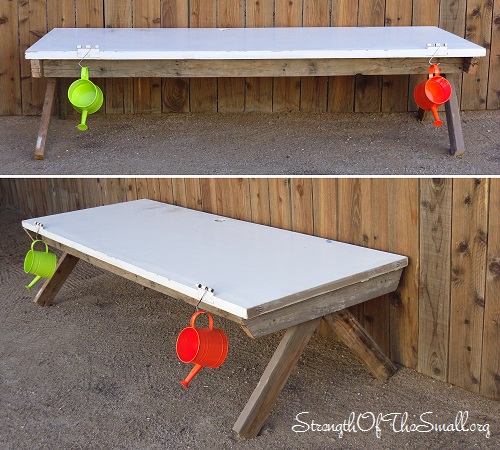
Today we decided to make use of a spare door that was laying around our storage shed. Since my daughter has been very eager to help out in the garden, I thought she would enjoy an area where she can create her own container garden. This will give her opportunities to learn about plants and how to grow them. She will also have more responsibilities in the garden as she takes pride in tending to her plants.

Being that the door is hollow in the middle I had to reinforce the edges to hold the weight it will need to hold. The base is a big rectangle that allows me to screw onto the wood pieces that are inside the door for added strength. The legs I cut onto an upside down V and screwed it to the inside of the rectangle. You can see from the pictures below how everything fits together.

Materials/Tools Needed:

  • Old Door
  • Scrap/Reclaimed Wood
  • Screws
  • Drill, Drill-bits
  • Spray Paint/Paint/Stain
  • Wood Chop Saw
  • Wood File
Primitive Garden Table.
Primitive Garden Planting Table.

My wife has always involved our children in selecting plants and lending a pair of hands or two in the garden. We will be visiting a few nurseries this weekend and we hope they will have a wonderful time choosing beautiful plants, accessories and additional gardening tools.

Allowing children to do things on their own fuels their desire to learn more and achieve more.

Finally, Some Sunshine

JM Perez By JM Perez1 min read651 views

After nearly three days of rain, the High Desert is starting to see some sunshine and blue skies.

Mountains covered in Snow.

I awoke this morning to a beautiful view of the Mountains, which were covered in snow. The soil on the other hand, is still damped from the excess humidity and moisture in the air. As I walk around the property, I am pleased that there are no damages to the plants and the structures. All the plants look a lot happier and healthier.

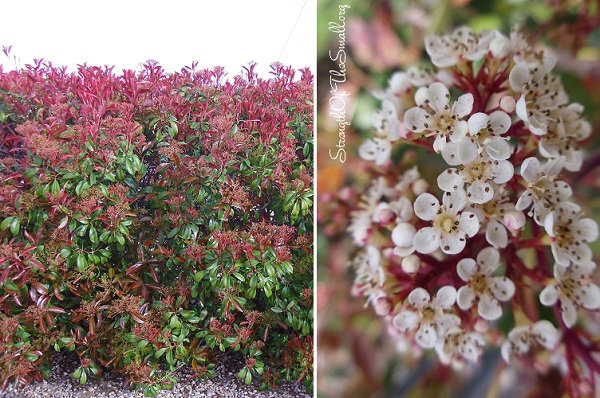
Flowering Photinia Fraseri.

A few of my Photinia Fraseri shrubs are already showcasing their small white flowers and red color of new growth. Fraser’s Photinia is a beautiful drought tolerant shrub that is great for hedges and privacy.

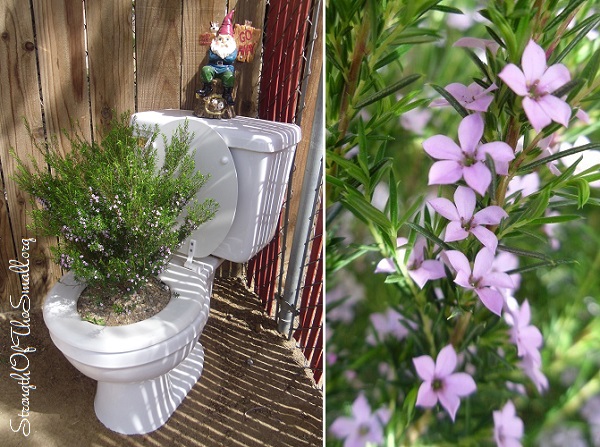
Coleonema Pulchrum (Pink Breath-of-Heaven).
Coleonema Pulchrum (Pink Breath of Heaven).
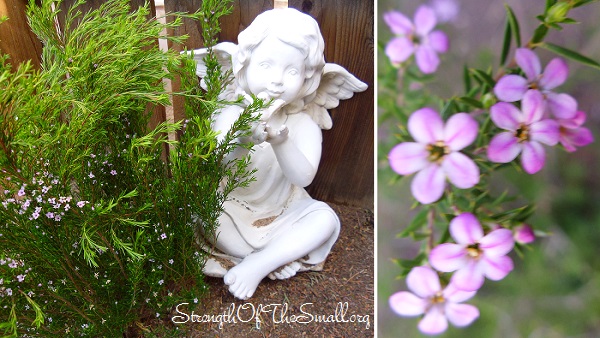
Coleonema Pulchrum (Golden Breath of Heaven).

My Coleonema Pulchrum “Pink Breath of Heaven” and Golden Breath of Heaven” are covered with beautiful tiny delicate pale pink flowers and fragrant leaves. What I love most about this shrub is that it’s drought tolerance, wind tolerant, non-invasive, evergreen and has an aromatic fragrance when crushed. It blooms from late Winter through late Spring.

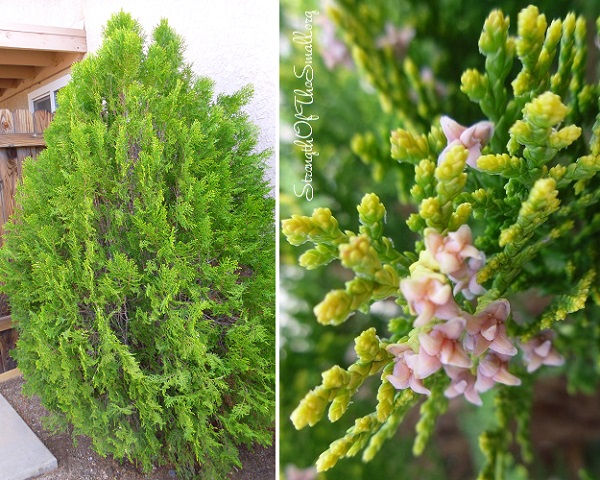
Thuja orientalis 'Berkmans Golden.'
Berkman’s Golden Arborvitae (Thuja orientalis ‘Berkmans Golden’).

This time of year, the Berkman’s Golden Arborvitae in my backyard are looking lovely with their delicate and attractive golden foliage. I have a few of these disease free, hardy and drought tolerant evergreen shrubs with the tallest being on each side of the entryway to my enclosed Patio. The shrubs are starting to produce cones.

Wishing you a wonderful time in your Garden today!

DIY: Reclaimed Wood Pergola

EPEngineer By EPEngineer2 min read1.4K views

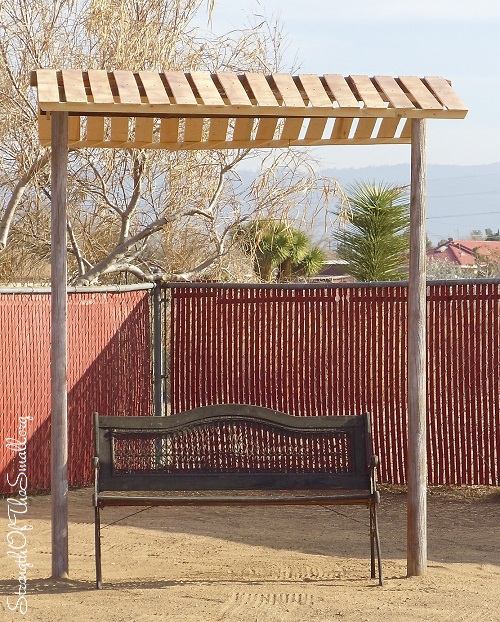
This afternoon we finished putting together a Pergola we built entirely from reclaimed wood and pieces of a dismantled wooden pallet. We decided on a canopy that not only provided some shade, but also resemble that of a water well in case we decide to change the design later on.

Mini Pergola.
Mini Pergola.

Materials/Tools Needed:

  • Scrap/Reclaimed Wood
  • Screws
  • Drill, Drill-bits
  • Cement
  • Bucket/Cement working tools
  • Spray Paint/Paint/Stain
  • Wood Chop Saw
  • Wood File

Step by step:

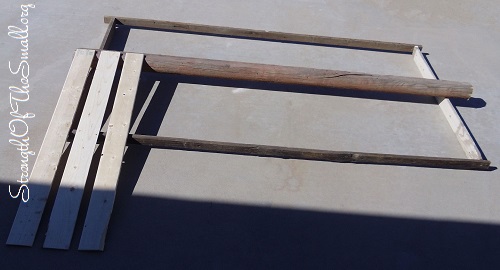
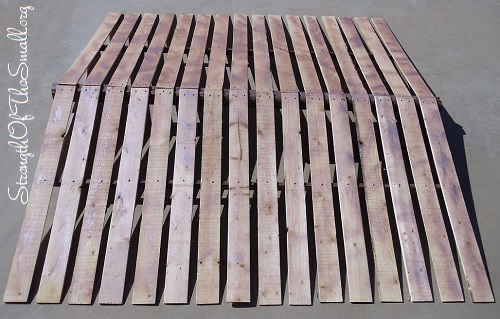
  • We used screws to fasten the pieces of wood together and used a scrap piece of wood to keep the spacing between pieces even. Once done we sprayed the top to give it a slightly weathered look.
Building The Canopy.
Building the Canopy.
Canopy.
Canopy built before the raising.
  • Once the canopy was finished we measured the distance between the two ends of the canopy to determine the post spacing. The measurement was then used to dig the holes according to the spacing. We used almost a whole 90 lb bag of cement to secure the posts. All we did was dig the holes, add water to the cement after pouring some in the bucket and mixed it. We poured it onto the hole and inserted the post making sure to keep it straight. We repeated the same steps for the second post and used a rope to tie the two posts together to maintain the spacing.
  • After 20 hrs of drying the cement was ready to take the weight of the canopy so we proceeded to lift it and place on top of the posts. We used 10 inch screw to screw the cross-piece of the canopy onto the top of the post after using a drill bit to drill a hole to guide the screw. Once screwed in, we finished fastening the rest of the canopy and did the finishing details.
Pergola Posts.
Pergola Posts.

A weekend project that we will enjoy for years to come.

DIY: Restore Cast Iron Furniture

JM Perez By JM Perez1 min read2.8K views

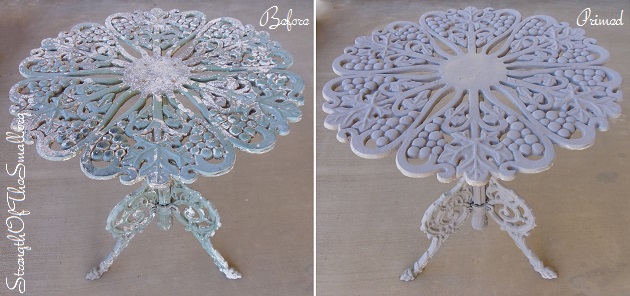
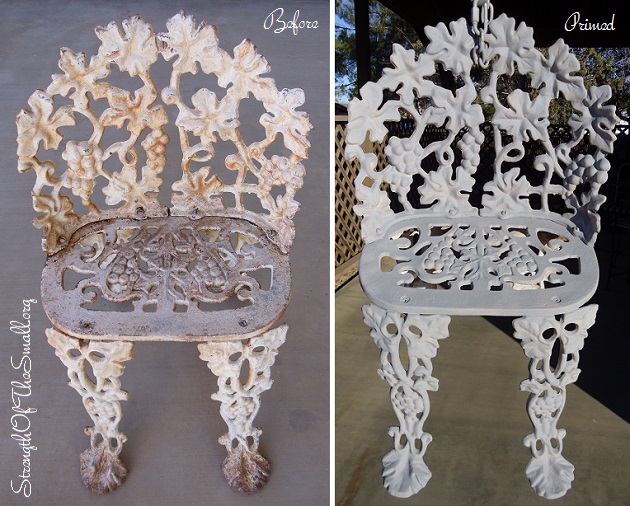
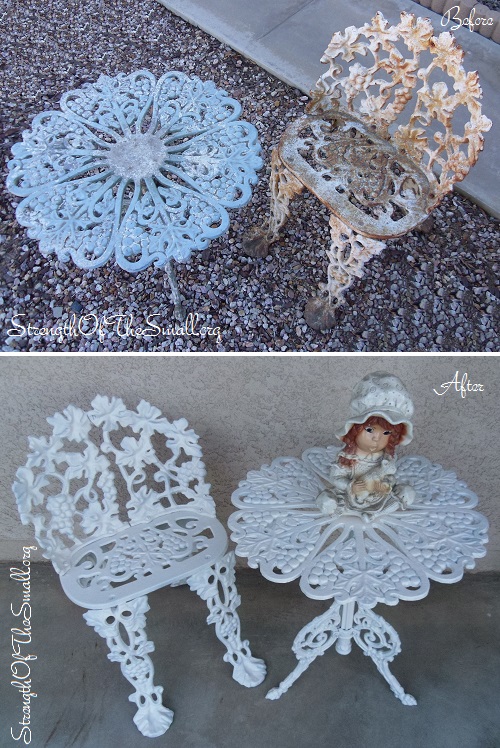
I recently found an Antique Cast Iron Chair and a matching Vintage Cast Aluminum Side Table with adjustable legs. What I love about this tiny set is the fact that it has a Grapevine pattern similar to an Antique Victorian Cast Iron set I own (read about it here). The set was weathered, the paint was flaking and chipping. As expected, there was some mild surface rust and wear especially on the chair.

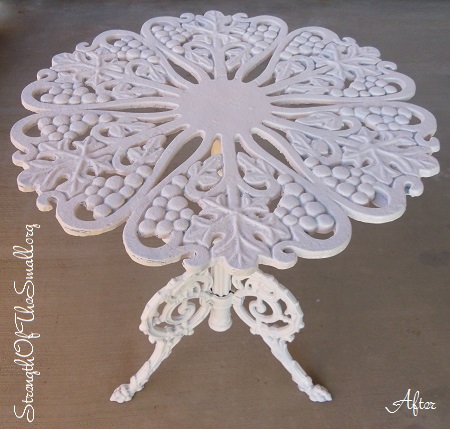
Vintage Cast Aluminum Side Table.

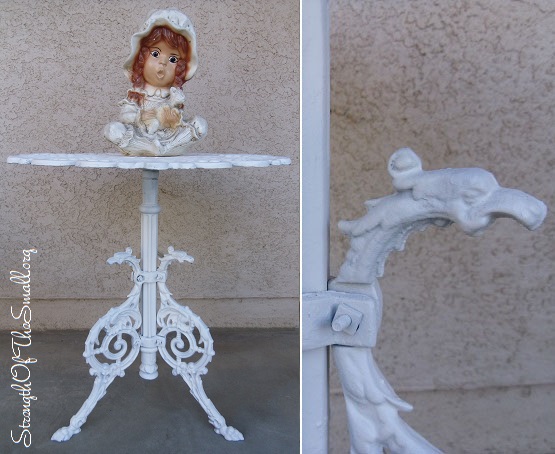
The side table has three legs with the pattern of a Phoenix head at the top and claw foot at the base.

Vintage Cast Aluminum Side Table.

Though time consuming, the restoring process is simple.

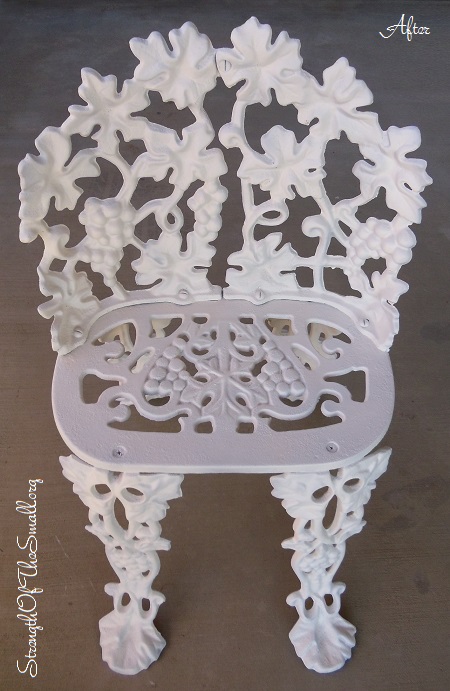
We started by removing the rusted and flaking areas with a wire brush. Once that was done, we washed the set with soap and water to rid it of any debris and to ensure that the paint sticks to it. We let it dry and applied spray primer to seal the metal surface and prevent future rusting and finally, we spray painted it.

Vintage Cast Iron Chair.
Antique Cast Iron Chair.
Vintage Cast Iron Chair.
Antique Cast Iron Chair.

Now restored, the set will make a great addition to the rest of the collection. It was an exciting finishing project we all were eager to get our hands on.

Vintage Cast Iron Chair and Cast Aluminum Side Table.
Antique Cast Iron Chair and Vintage Cast Aluminum Side Table.

This was a fun project and we are looking forward to the next one.

Some Things Shabby

JM Perez By JM Perez1 min read990 views

It’s the day after Christmas and the Sun is shining bright. It feels good to step outside, take a moment to breathe in and count my blessings. There’s no place like Home and as I sit here surrounded by so many lovelies; I realize that I have, not just a fondness for Victorian Cast Iron garden furniture, but a weakness as well.

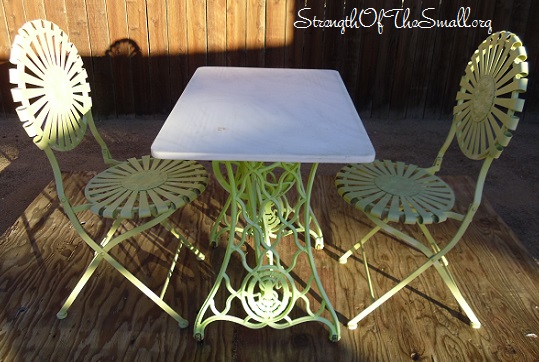
The Patio Set below is an old Singer Sewing Machine Base with a half an inch Polypropylene tabletop (a Craigslist purchase). The chairs are Shabby Chic and the Table is Antique. The cross-piece on the Sewing Machine base has a patent date which reads Patented Jan. 4, 1887. All the wheels on the base still function as they should. I had the option to use it either as a Console Table or as a Desk, but I decided to use it as an outdoor table.

Shabby Chic Patio Set.
Shabby Chic Patio Chairs with Antique Singer Sewing Machine Base.

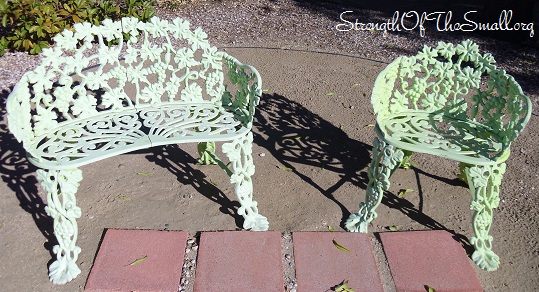
I have bought gorgeous Garden Sets over the years and the ones I cherish the most is this set of Antique Victorian Cast Iron Grapevine pattern matching Bench and Arm Chair.

Antique Cast Iron Bench and Arm Chair.

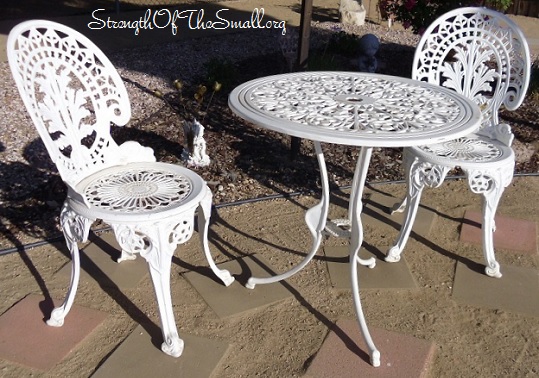
I also have a lovely American Harvest Cast Aluminum Bistro Set which I have owned for a couple of years now and which I absolutely adore. This set sits pretty in my front yard, next to my Raywood Ash tree.

American Harvest Cast Aluminum Bistro Set

As I sit here, enjoying the moment in my garden, I wish you all a wonderful day.