Upcycling & Recycling

Christmas Tree Ideas

JM Perez By JM Perez1 min read1.4K views

With Christmas around the corner, we are all excited to start decorating our homes.
What to do and where to start? Are you tired of decorating the same Christmas Tree year after year? Are you looking for something different? A fun project you can tackle on your own or with the whole family? Below are some inspiring and fun ideas you might want to try.

Source
Source
Source
Source
Source
1. Source                                                                                                             2. Source
Source
1. Source                                                                                          2. Source
Source
1. Source                                               2. Source                                                   3. Source
1. Source                                                                                                          2. Source
1. Source                                                                                   2. Source                                                              3. Source
Source
Source
Source
Source
Source
Succulent Christmas Tree.
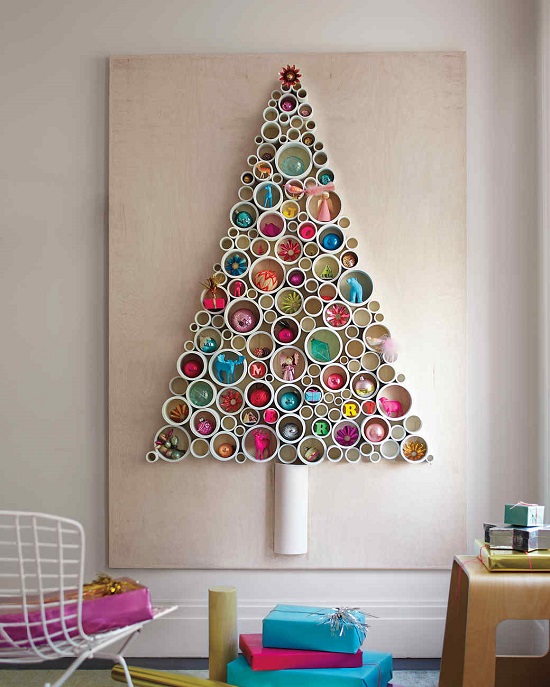
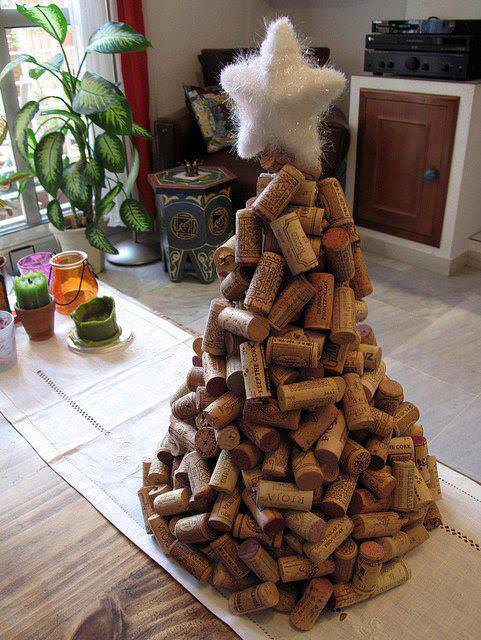
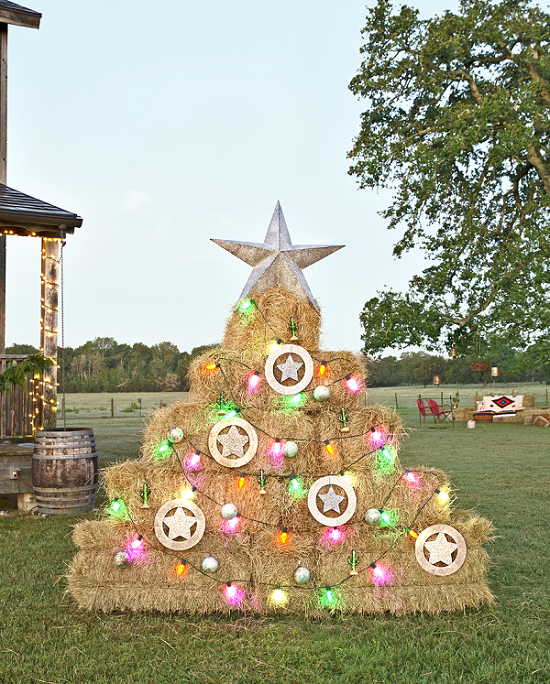
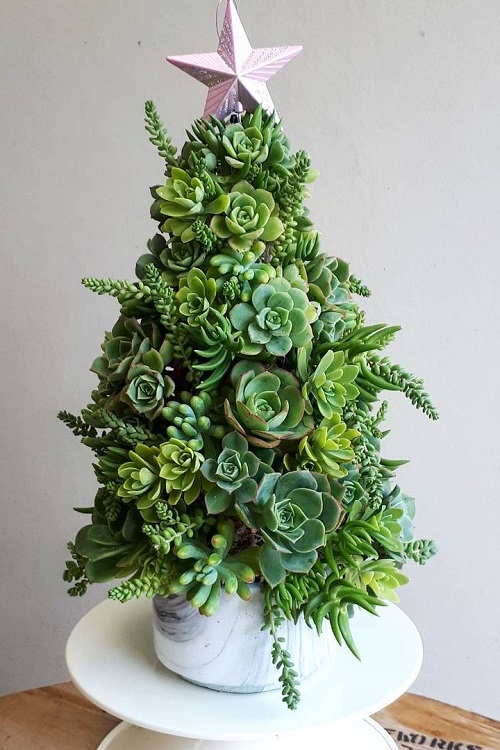
Image Source: ElleDecor.com
Christmas Tree on Canvas.
Image Source: DigsDigs.com
Kraft Paper Christmas Tree.
Image Source: LiaGriffith.com.
Macramé Christmas Tree.
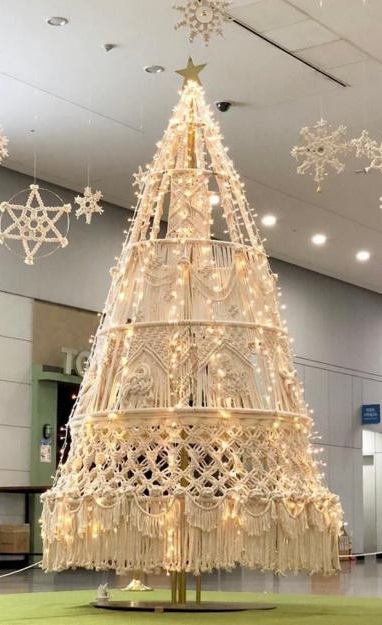
Image Source: LusHome.com
Wall Hanging Christmas Tree
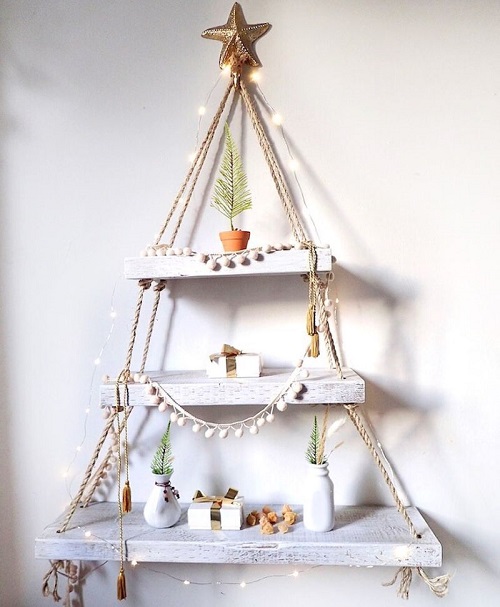
Image Source: NatMonde.com
Pom Pom Christmas Tree.
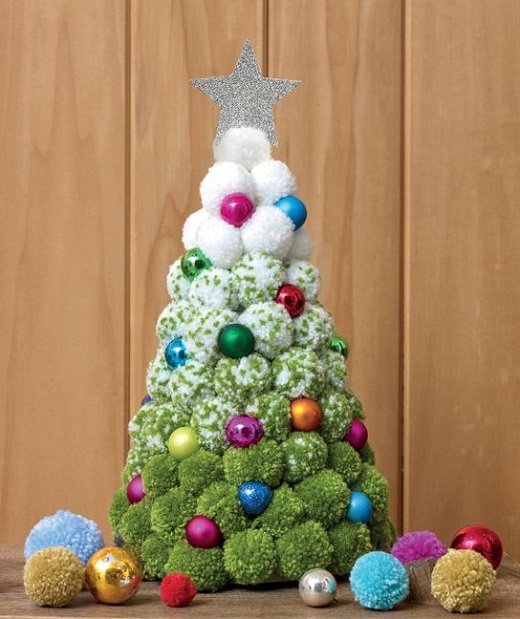
Image Source: Hikendip.com.
Seashell Christmas Tree.
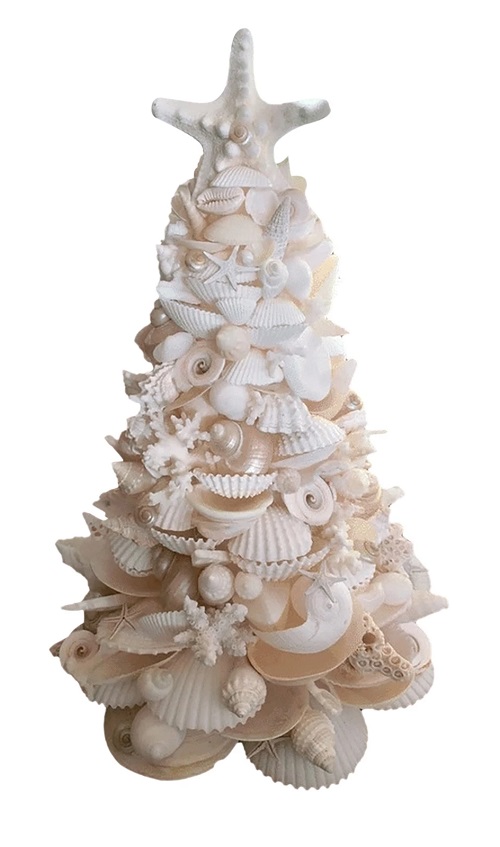
Image Source: aliexpress.us.
Twig Christmas Tree.
Image Source: stock.adobe.com.

How about we decorate some Christmas Trees and then we eat them?

Fruit Tree. Vegetable Tree.  Cheese Tree.
Crescent Tree. Pizza Tree. Pizza Tree.

I hope these ideas brighten your day and encourage you to try at least one.

“Garden Shed & Co.” Shop

JM Perez By JM Perez1 min read1.1K views

While going to visit one of our local Antique shops, we realized that there was a difference in the building. The normal entrance was closed and the annex was the new entrance. As we walked up to it we noticed that the sign of the business had changed as well. The feel of the new setup and the quality of the antiques, as well as their diversity was surprising to say the least. After our initial visit we knew that we had to go back and check it out again, since every time we visit antique shops we find and notice items we had missed before.

The shop carries beautiful and unique Antique furniture, some of which are 100 years old (such as a matching Victorian Desk and Chair as well as a huge American Flag with 48 stars). You will also find furniture from the 1800 (such as a Cigar Counter). The shop also carries stunning Shabby Chic furniture such as arm chairs, benches, chandeliers, mirrors, picture frames, candle holders. There’s so much to see at the Garden Shed & Co.

Bobbie, the store owner is cheerful and always available for questions and to help.

Shop Locations:

Antique Station (Space #54)
19176 National Trails Highway Oro Grande, CA 92368
‎1 (760) 951-2421

‎23443 Crestforest Dr, Crestline, CA
1 (760) 220-0302
Located in the Old Historical Top Town.

Shop Hours:

Tuesday – Saturday,  from 10:00 AM to 4:00 PM
Sunday and Monday by appointment only.

Like their Facebook Page and check back for updates.

I will let the pictures speak for themselves.

.

DIY: Plexiglass on Tree Trunk

EPEngineer By EPEngineer2 min read663 views

About 3 years ago I came across a piece of thick plexiglass which I knew that I wanted, but did not know what to use it for. Time passed and about a month ago, while cleaning the garage, I came across it again. This time I decided to file down the edges to round them off and make it usable. As luck would have it, I needed to place it on a surface to round it off and after looking around for a bit; found myself a tree trunk that was the perfect size.

An hour later and the piece of plexiglass was ready to use and while looking at it from different angles I found my answer. “A TABLE”. I used wood screws to drill it down to the plexiglass and used a drill bit to make the holes on the plexiglass to not crack it. Here is the result. I hope you enjoy it.

Table made with Plexiglass on salvaged Tree Trunk.

After numerous trips to Lowe’s and Home Depot, my wife asked me once again to make her a Primitive Wooden Bench. I had spotted a couple of choice piece on a pile of used wood behind our garage and now was the time to fish them out. I had seen the leg pattern from other benches and knew what they looked like, so I started with them. Once I got the correct angle in place, I cut two pieces of each for the legs and screwed them together to verify the angle.

Once done with the legs I started working on the sitting part and the back rest for it. This two pieces where cut the same size and rounded off to eliminate the possibility of splinters. I used to pieces to unite the back rest to the legs and the rest is history. You can see for yourselves the end result.

Reclaimed Wood Bench.

Enjoy!

DIY: Robot Creation

EPEngineer By EPEngineer2 min read851 views

Ever since I was a little boy I have had a fascination with the electro-mechanical from steam works to electronics and to robotics. I am always thinking of new things to make/build.

OG (Original) ‘Bot

This was the first creation that was spawned by this parts which stood out from the rest. You can look at thousands of parts and at times, they come together to form a unique figure. This was the first creation that screamed to come out of my brain and materialize into what you see before you. All the parts were scavenged from scraps and drilled together to form this Bot. It has a 9Volt battery to power the lights and a toggle switch to turn it ON and OFF.

OG (Original) ‘Bot

Electro Tester

This Bot was built to help me do my work faster and more efficiently. It has a connection and switches to run 110Volts to test leads and also a 24Volt transformer to test leads. My testing required to verify that 24 Volts where present on the output of the units, so I wired the eyes to function on 24 Volts. So, if the unit output was good, then the eyes would light up. If not, then they would stay off. When working with power  you need to have fuses to protect your equipment and this bot has one fuse per line. This Bot was not only my most useful creation, but also the most requested by my co-workers.

Electro Tester

Impact Bug

After coming across this a couple of Impact Sprinklers I noticed the top section looked like the top read area of a bug and so, the Impact Bug was born. This Bug is powered by a 3Volt battery attached to a toggle switch to power the eyes. This became a great gift idea for co-workers who were moving along after their contracts where up.

Impact Bug

Music ‘Bot

The evolution of the OG ‘Bot after about 8 different variations in style. This ‘Bot was a present for a co-workers birthday and it went to a good home.

Music ‘Bot

Robot Hand

This hand/arm was built for a Science Fair project for a co-worker. He wanted to build a hand that could grip an empty soda can and lift it. After some deliberation and some research on the internet, the Robot Hand was born. Each finger can move independently from the others or all together by pulling on all 5 wires at once. The springs for finger joints help the fingers to straighten up while the double string on the thumb allowed up to not only pick an empty can, but also a full can of soda and hold it while all 5 wires where being pulled on.

Robot Hand

These are a few of my creations.

DIY: Medicine Cabinet Makeover

JM Perez By JM Perez1 min read2.3K views

Most of us have at least one Medicine Cabinet in our home. It is an area where we store our everyday essentials for quick access, such as toiletries. If like me, you bought an older home, then I am sure, it came with one of those old school Medicine Cabinets (plain with silver or gold metal frame around it). There’s absolutely nothing wrong in having one of those as long as it’s been placed at the right location.

In my case, I didn’t like the location of the Medicine cabinet, which was placed on the left wall. After all the turning to look at the mirror it took a toll on my neck and it was time for the cabinet to go.
I started by removing the screws from the inside panels of the cabinet and then I pulled it free from the wall. I build my recessed shelving then I installed the shelves and trim.

Medicine Cabinet as Display Cabinet.

It’s a fun and very simple project which can be accomplished in just a couple of hours.