The weather is great today, making it is a good day to get busy in the garden.
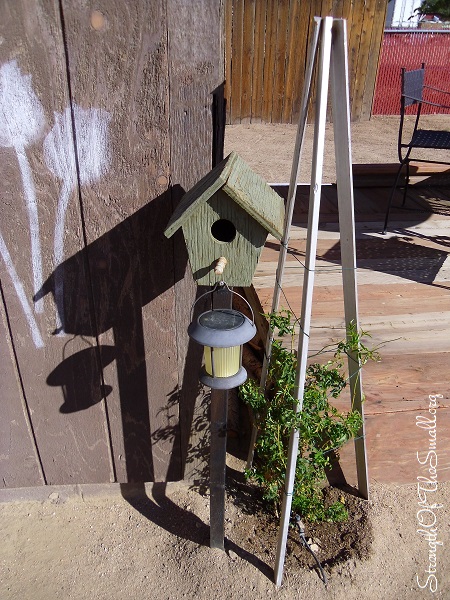
I got to bury the legs of the Garden Trellis that my husband build a few years back. This trellis will support the young vine (Common Jasmine), as well as provide proper training and maintenance.
This simple/primitive garden trellis was built using old pieces of some baseboard we removed from the house when we were doing the upgrades, a medium size screw to hold the top together as well as some twines.
Garden Trellis for Common Jasmine.
Materials/Tools Needed:
Old baseboard pieces
Jute Twine
Wood Screws, Power Drill, Drill Bits
Stain (for the Wood) or Paint/Spray Paint
Step by step:
Get your baseboard and cut them into three pieces of your desire height
Hold the three pieces and screw them together at the top
Paint/Stain the finish product (you could paint/stain the pieces of wood before or after screwing them)
Let dry
Wrap the twine around the tripod, keeping it nice and tight and it’s ready to be used.
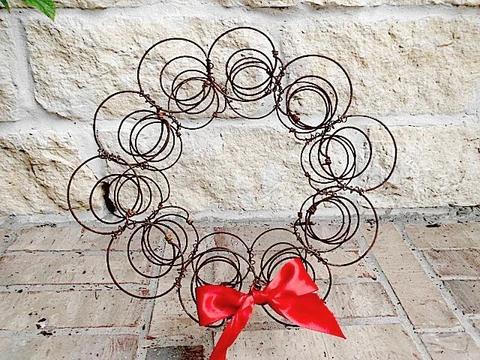
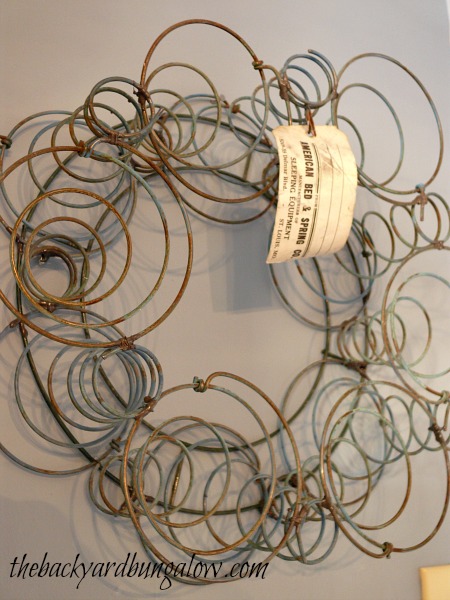
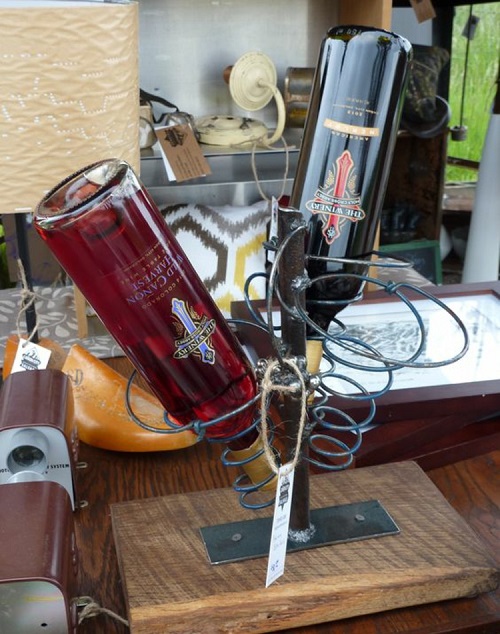
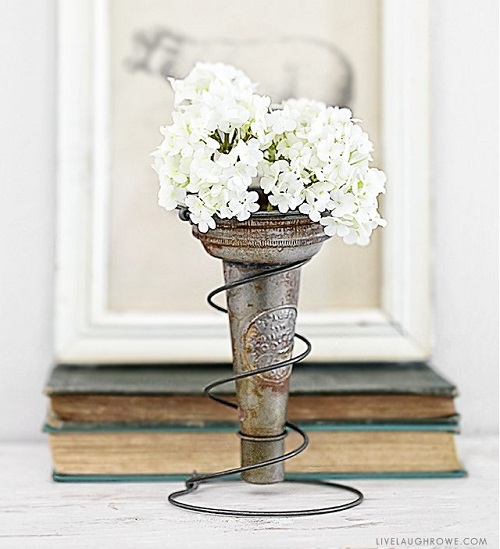
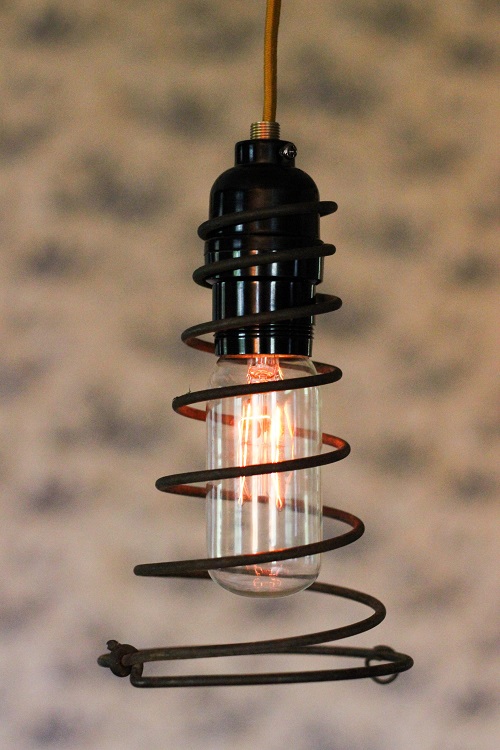
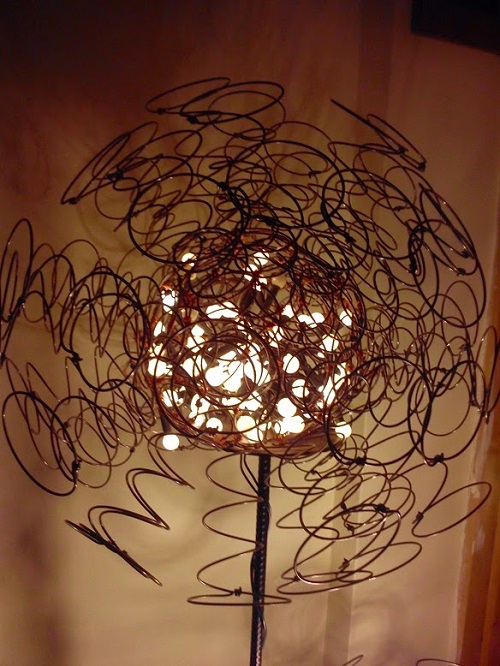
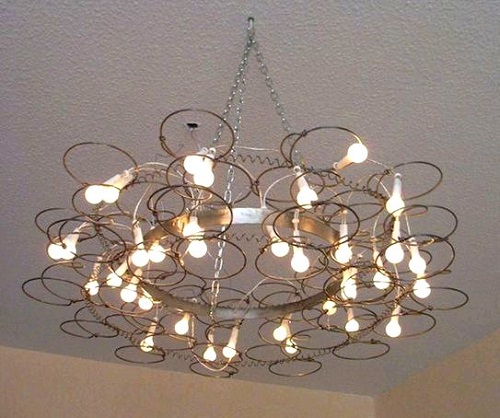
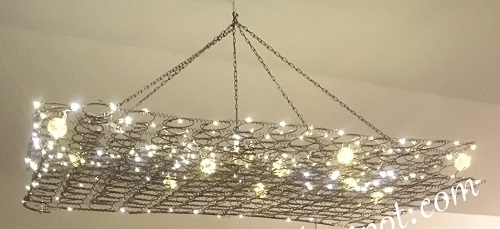
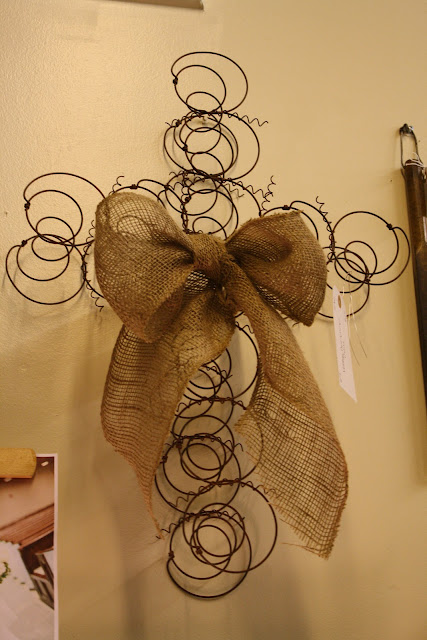
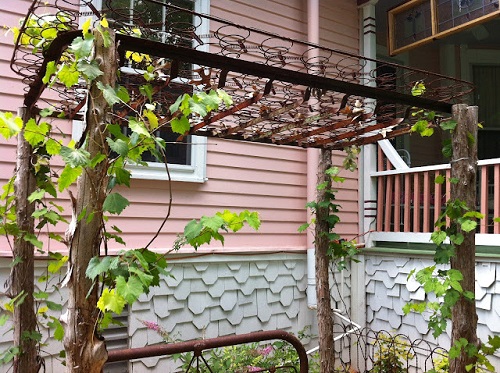
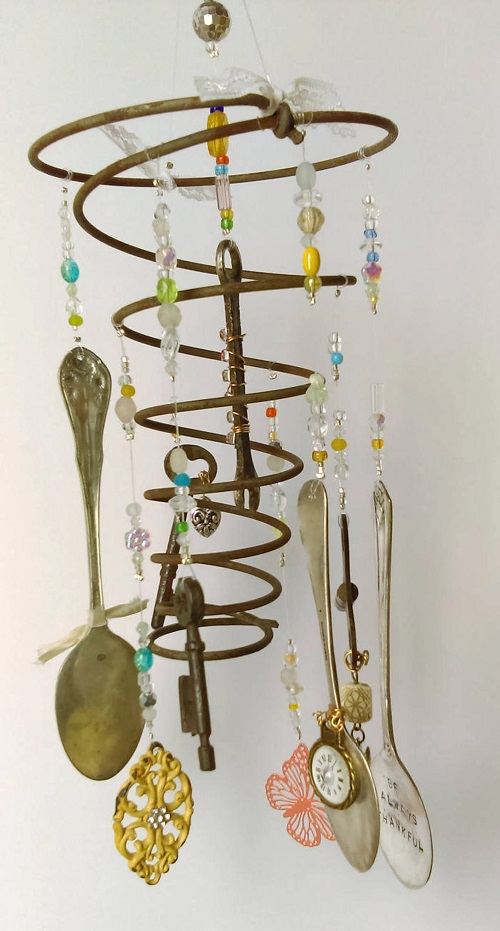
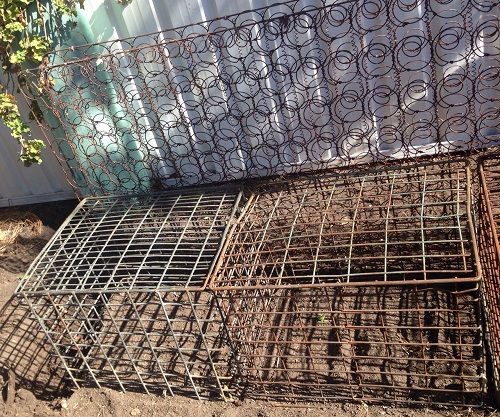
Last weekend, I walked into a Vintage store and was taken aback by the use of an old box spring. There were two actually; one was used as a wall accent and the other as a ceiling light.
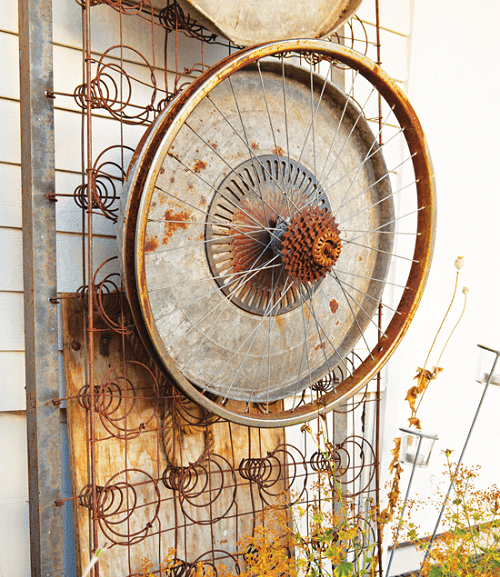
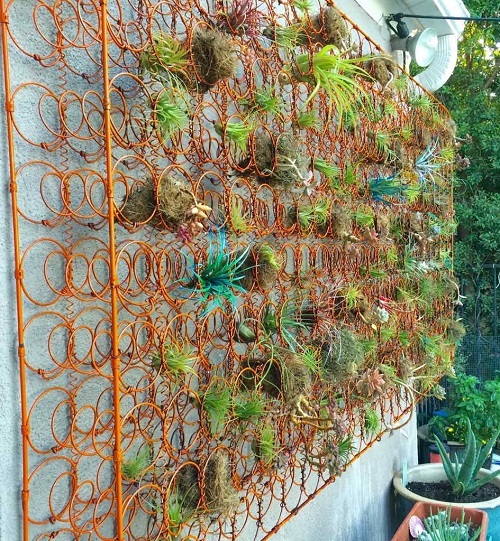
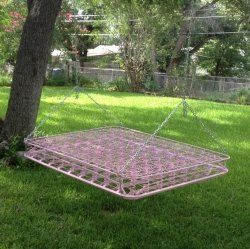
That got me thinking about the endless possibilities of an old box spring mattress: holders, storage, wall accent and decor, gates and fences, trellises, garden swings, yard arts, centerpieces, ceiling light fixtures, room dividers, and so much more.
This year I have enjoyed some of the free items from some of my favorite companies. Some items I have signed up for myself and others I have received at no cost to me, like the Latina Magazine, a subscription given to me by a good Samaritan (thank you, whoever you are).
Materials Needed:
Handwoven Gift Basket
Spray Paint
Choice Fabric for Bow (hand tie a bow or use a glue gun)
Glue gun
Hot glue sticks
Magazine Holder.
Clean your Handwoven Gift Basket, spray paint it, hot glue or just hand tie a bow and you have a beautiful, eye-catching Holder to store your favorite Books, Magazines or whatever you wish.
Ever since I was a little boy I have had a fascination with the electro-mechanical from steam works to electronics and to robotics. I am always thinking of new things to make/build.
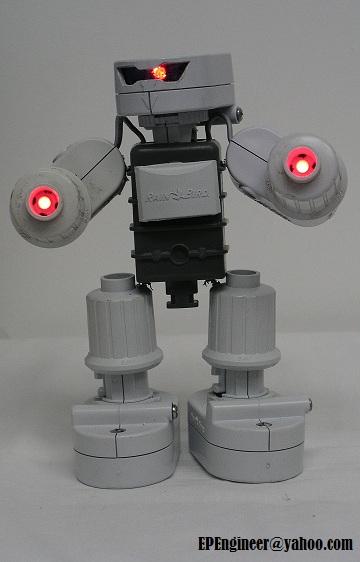
OG (Original) ‘Bot
This was the first creation that was spawned by this parts which stood out from the rest. You can look at thousands of parts and at times, they come together to form a unique figure. This was the first creation that screamed to come out of my brain and materialize into what you see before you. All the parts were scavenged from scraps and drilled together to form this Bot. It has a 9Volt battery to power the lights and a toggle switch to turn it ON and OFF.
OG (Original) ‘Bot
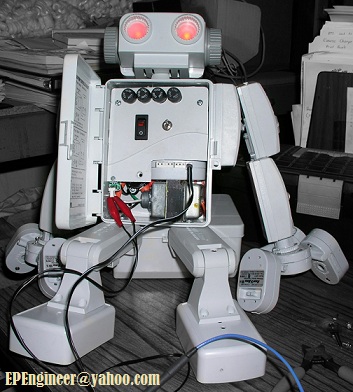
Electro Tester
This Bot was built to help me do my work faster and more efficiently. It has a connection and switches to run 110Volts to test leads and also a 24Volt transformer to test leads. My testing required to verify that 24 Volts where present on the output of the units, so I wired the eyes to function on 24 Volts. So, if the unit output was good, then the eyes would light up. If not, then they would stay off. When working with power you need to have fuses to protect your equipment and this bot has one fuse per line. This Bot was not only my most useful creation, but also the most requested by my co-workers.
Electro Tester
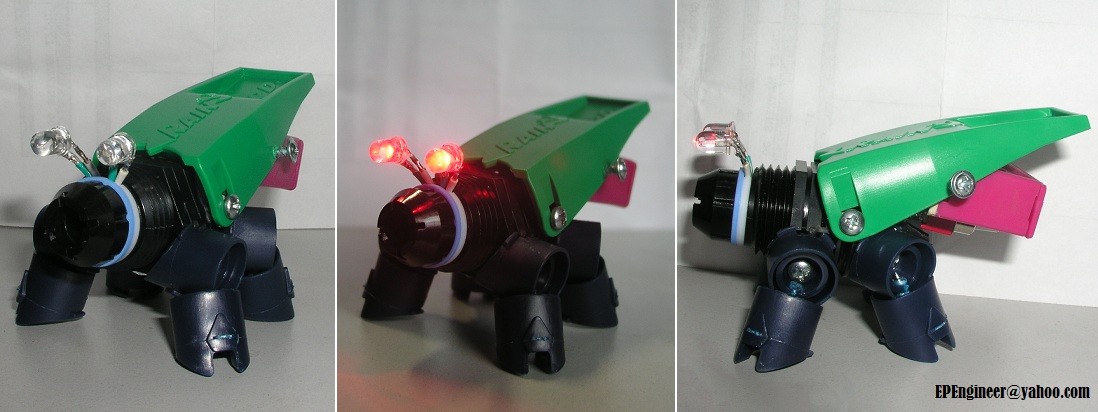
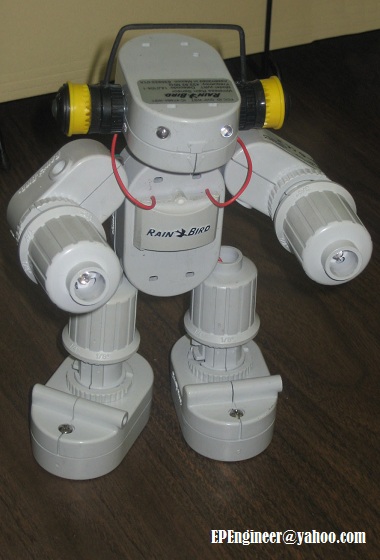
Impact Bug
After coming across this a couple of Impact Sprinklers I noticed the top section looked like the top read area of a bug and so, the Impact Bug was born. This Bug is powered by a 3Volt battery attached to a toggle switch to power the eyes. This became a great gift idea for co-workers who were moving along after their contracts where up.
Impact Bug
Music ‘Bot
The evolution of the OG ‘Bot after about 8 different variations in style. This ‘Bot was a present for a co-workers birthday and it went to a good home.
Music ‘Bot
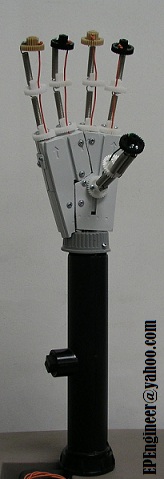
Robot Hand
This hand/arm was built for a Science Fair project for a co-worker. He wanted to build a hand that could grip an empty soda can and lift it. After some deliberation and some research on the internet, the Robot Hand was born. Each finger can move independently from the others or all together by pulling on all 5 wires at once. The springs for finger joints help the fingers to straighten up while the double string on the thumb allowed up to not only pick an empty can, but also a full can of soda and hold it while all 5 wires where being pulled on.
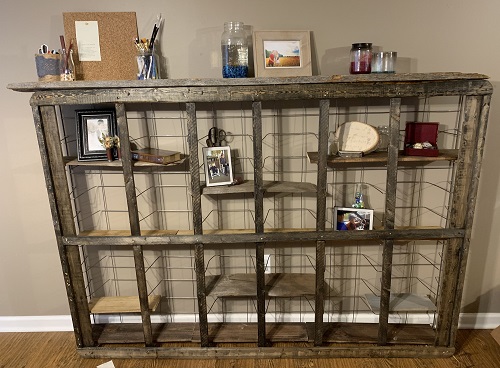
Most of us have at least one Medicine Cabinet in our home. It is an area where we store our everyday essentials for quick access, such as toiletries. If like me, you bought an older home, then I am sure, it came with one of those old school Medicine Cabinets (plain with silver or gold metal frame around it). There’s absolutely nothing wrong in having one of those as long as it’s been placed at the right location.
In my case, I didn’t like the location of the Medicine cabinet, which was placed on the left wall. After all the turning to look at the mirror it took a toll on my neck and it was time for the cabinet to go.
I started by removing the screws from the inside panels of the cabinet and then I pulled it free from the wall. I build my recessed shelving then I installed the shelves and trim.
Medicine Cabinet as Display Cabinet.
It’s a fun and very simple project which can be accomplished in just a couple of hours.