Kids Craft

DIY: Grass Pet {Making Shoes}

JM Perez By JM Perez1 min read602 views

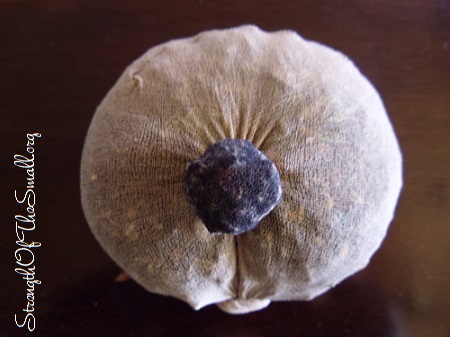
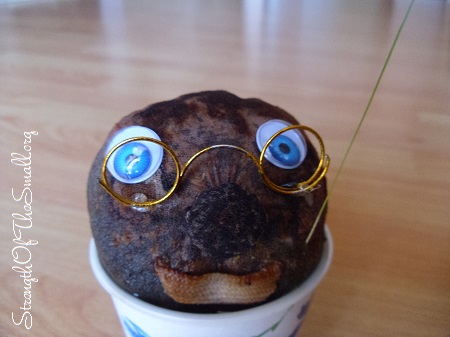
A week and a half ago we decorated my Son’s Grass Head Pet.

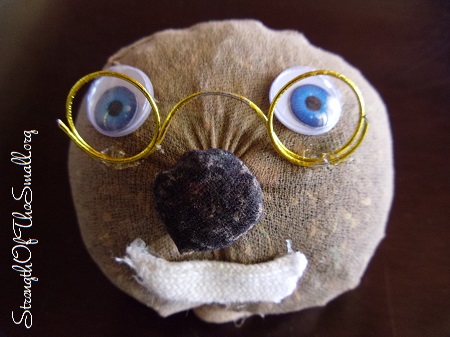
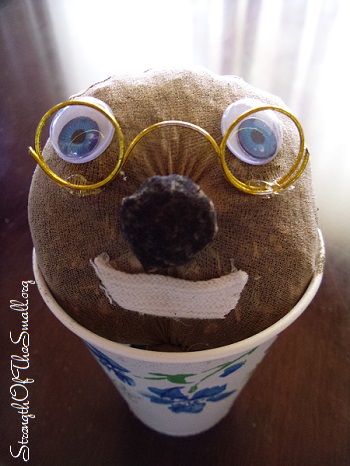
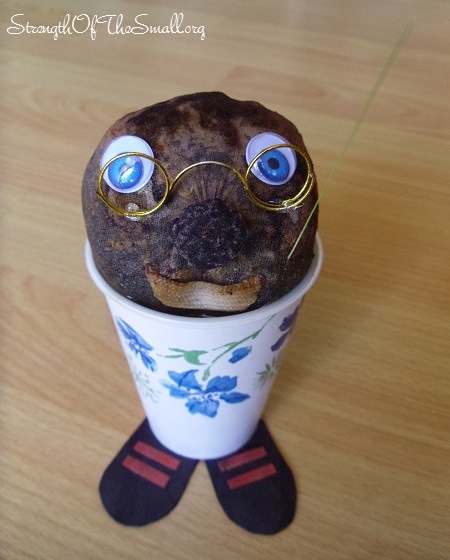
After watering it and placing it on the kitchen window sill for some warm Sun light, it grew its first hair six days later. Today we spotted two more tiny hairs underneath and above its nose. We gave it some feet/shoes.

Grass Pet Face with one hair.

Materials/Tools Needed:

  • Scissors
  • Craft glue, Hot glue gun
  • Toilet Paper roll, Craft Paper, Card Board (for the shoe)
  • Pencil, Permanent Marker (to draw and decorate the shoes)
  • Small Ice Cream/Yogurt container or Toilet Paper Roll (for the body)

How to proceed:

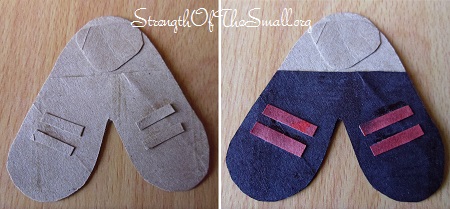
  • Squeeze the toilet paper roll to make it flat. If you are using craft paper, fold the paper in two
  • Using a Pencil, draw a foot or shoe on one side of the toilet paper roll or the craft paper
  • Use your scissors to cut around your drawing (you will end up with a set of foot or shoe)
  • Use your Hot glue gun to glue the shoes/feet to the bottom of your body.
DIY: Grass Pet Shoes.
Grass Pet with Shoes.

On my next update I will show you how to make an outfit for the Grass Pet.

DIY: Grass Pet

JM Perez By JM Perez2 min read627 views

For Earth Day, my son was given a round shaped pantyhose filled with sod and grass seed. All he had to do was place it next to a window for some warm Sun light, water and watch it grow. I stored it somewhere in the Patio and forgot about it until this morning. It’s a really fun and easy activity for kids and adults alike. This Grass Pet is almost similar to the Chia Pet, remember those?

Today, we will turn this plain round shaped ball of sod and grass seeds into a cute face.

Faceless Grass Pet.
Faceless Grass Pet.
Grass Pet all decorated.

Materials/Tools Needed:

  • Pantyhose, Socks, Nylon stockings
  • Scissors (to cut the pantyhose)
  • Grass Seeds
  • Potting Mix
  • Small Ice Cream and Yogurt container or Toilet Paper Roll (for the body)
  • Spray Paint (for the body)
  • Painter’s Tape (if you’re not planning to paint the container)
  • Chenille Stems, Googly Eyes, Permanent marker, yarn (for the eyes and mouth)
  • Thread to fasten the nose.
  • Craft Paper (to design the outfit for the body)
  • Craft glue, Hot glue gun
  • Bowl and Water

How to proceed:

  1. Mix the soil and grass seed together
  2. Fill the pantyhose, shaping it into a ball and then tie off the open end (leaving enough material for the nose).
  3. Grab a bit of the stocking with some dirt and twist it to shape the nose. Use some thread to fasten it.
  4. Start decorating your grass pet whichever way you want
  5. Place it in a bowl, water daily, sit back and watch it grow.
Grass Pet Face.
Grass Pet Face with Body.

How about some Shoes for your Grass Pet? Click here.
I hope you enjoy making your own Grass Pet and watching the hair grow.

DIY: LEGO BoyBot

Kashiro By Kashiro1 min read437 views

School has been out for Summer vacation since last Thursday and I am busy working on my LEGO creations. Today I build a LEGO BoyBot (Boy Robot). I was playing with a house I build last night when I decided to use some of the extra pieces from the house to build a Boy Robot for myself and a Girl Robot for my little sister.

LEGO BoyBot.
LEGO BoyBot.
LEGO GirlBot.
LEGO GirlBot.

I like it very much and I think it turned out great. The best thing about this creation was the expression on my parents faces when they saw it for the first time. Like my Mom would say, priceless!

Until next time, have a good day.

DIY: LEGO Creations

EPEngineer By EPEngineer1 min read1K views

Today, after picking up my son from school and having lunch, I decided to pull out the huge box of mixed LEGOs that we had stored in his bedroom closet. Lately he wanted to build something that could carry items in it and he was able to build that today as you can see in the pictures below.

LEGO Mail Truck/Carrier.

The LEGO Mail Truck/Carrier has two boxes with lids which face back and can hold tiny LEGO pieces.

LEGO Mail Truck/Carrier.

The next three creations are various desert racers. He was so proud of his creations that he has not modified them since making them.

LEGO Racer.
LEGO Racer.
LEGO Racer.
LEGO Racer.
LEGO Racer.
LEGO Racer.

This two creations are made from spare parts that I had from previous LEGOs that I owned. He was thrilled when he saw them and like his own creations; has not modified them yet.

LEGO Walker.
LEGO Walker.
LEGO Desert Rider.
LEGO Desert Rider.

DIY: LEGO Snowmobile

JM Perez By JM Perez1 min read1K views

Living in the High Desert can sometimes be challenging even more so for those of us with children.
My kids are super active and can’t stand not having something to do indoors. They love outdoors activities above all else and when given an opportunity, they suit up like real explorers ready for new discoveries. They don’t like dreadful weather and I don’t either.

The weather has been really bad these past few days. It is cold outside and we are having severe, gusty winds, blowing sand and dust as well as reducing driver visibility at times making driving difficult and even potentially hazardous. Last week I found pieces of cardboard lying in my backyard as well as plastic bags blown by the wind.  I have found a few broken branches here and there, but nothing major.

Today, after completing his homework, my awesome little boy pulled out his box of LEGOs and started building. He has such a creative mind and I am always amazed at his creations. After helping his sister build a few things, he decided to build a few cars and trucks for himself, among them this LEGO Snowmobile below.

LEGO Snowmobile.
LEGO Snowmobile.

The wind is still howling outside, we had a good day and I hope tomorrow will be even better.