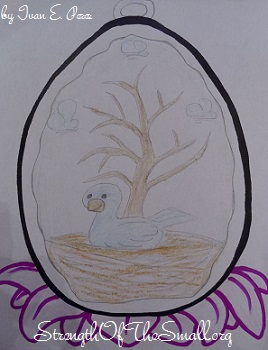
This afternoon we had another opportunity to work on a Family Decorative Project for my Son’s class. We had so much fun coloring the Easter Egg Canvas below. He was very specific on what he wanted and I think it turned out just wonderful. My kids are looking forward to decorating some Eggs for Easter.
Easter Egg Decorating Project.
Tomorrow, along with the other kids, they will be decorating some Eggs. He’s quite excited!
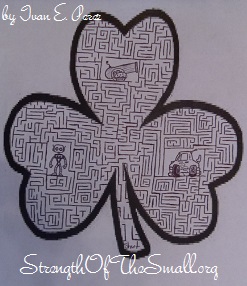
Tonight we worked on a Family Decorating Project. As with the other projects, we were asked to decorate a Shamrock which will be displayed for viewing on St. Patrick’s Day. This time too, we kept it simple while making it unique and interesting. For this project, we decorated this Shamrock by drawing a maze pattern within the leaf clovers and adding the kids favorite things: Robot, Car and Cupcake with a cannon behind it.
Shamrock Decorating Project.
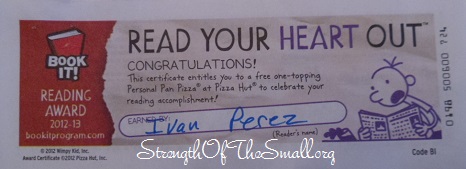
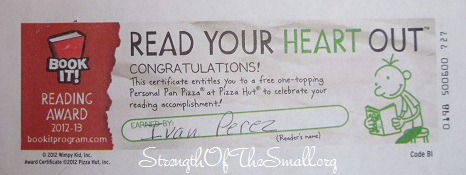
My Kindergartener received another Pizza Hut® Book It!® Reading Program Certificate. He has been wanting to eat some Pizza and now he’ll be having one for free (not free since he worked really hard for it).
Book It!® Reading Program Certificate.
Today is such a bright and beautiful day; too bad we have to stay indoors due to the high gusty winds. I was really looking forward to gardening and tending to my plants. All the tasks have been completed. We will be watching fun movies for the next couple of hours (while having some healthy and nutritious snacks) and then we will do some reading and other challenging activities before calling it a night.
It’s been very quiet around here lately. The Flu has made its last round in the house and just as everyone is finally recovering and looking forward to an adventurous weekend of Treasure Hunting, the weather has a different opinion. Unless you are a ‘go getter, rain or shine’; the weather is a major factor to take into consideration when living in the High Desert (followed by weeds). We spend most of our time reading and watching movies.
My Kindergartener has been doing really well at school. He has received another Pizza Hut® Book It!® Reading Program Certificate and this afternoon he wrote me a heartfelt story using a heart shape note pad he received from school. He has a way of melting my overjoyed heart and making me such a proud Mother.
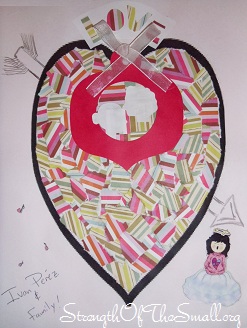
Heart Decorating Project.
Tonight we worked on a Family Decorating Project. We were asked to decorate a Heart which will be displayed for viewing on Valentine’s Day. Like with the other projects, we try to keep it simple while making it unique. For this project, we decorated this Heart using scrapbook papers (the kids favorite colors). We cut the paper into small pieces and randomly glued them inside the heart and added two silhouettes in a heart shaped frame.
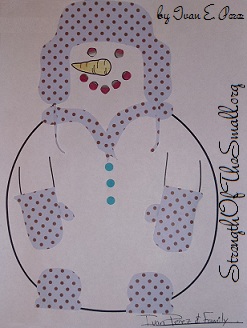
Today we worked on our third Family project for my Son’s assignment and it was a fun Family affair.
I gathered all the tools and materials necessary to complete the project (scissors, scrapbook papers, hole puncher, crayons, paper bits and Elmer’s glue) while my little guy was busy writing the last entry of the week activities in his school journal. He wanted the Snowman to have matching beanie hat, scarf, gloves and boots. I opened my hole puncher collection area and collected the bits from the punched papers, which we used for the Snowman’s eyes, mouth and buttons for his rather large coat. We tried to keep it clean and simple as possible.
Snowman Decorating Project.
Today he received his fourth Pizza Hut® Book It!® Reading Program Certificate to celebrate another reading accomplishment. He is moving on to list nine of his sight words (though he can pretty much read anything). I ordered a bunch of books for them a few days ago. I can’t be more proud of my little boy! ♥
Growing up as a little boy, I was always fascinated by everything that could move.
While watching a kid show that involved Marionette, I got the idea to make my own. That crude design was bird-like in nature but it provided hours and hours of fun as well as the pride of knowing that it was one of a kind.
After my kids reminded me for the tenth time that they really, really wanted to do some craft; this project came to mind and I proceeded to scavenge the whole house for supplies. As with all my creations, I am not sure what I would need until I see it.
Materials/Tools Needed:
Toilet Paper Roll
Disposable Ear Plugs
Wooden Skewers
Metal Bottle Caps
Plastic Bottle Caps
Sewing Thread or Fishing Wire
Empty Krazy Glue Tube (for the neck)
Wire Cutters
Pliers
Power Drill and Drill Bits
Precision Knife/Blade
Materials & Tools Needed.
Step by step:
First get your Ear Plugs and cut off the cushion part to use as the eyes. Then cut the rope into 2 equal lengths which will be passed thru small holes made on the paper roll. Put a knot on each rope close to the paper roll so as not to have the rope move (See picture below).
Once done, drill thru the middle of the bottle caps so that you can pass the ear plug rope thru it and make a knot at the end to stop the cap from sliding out.
Now, get the 2 metal caps and drill thru the middle of them. Once done you will get the Foam plugs and make 2 holes thru the side so that they can be tied down (or hot glue them if you prefer). Loop a piece of black thread from the underside of one of the metal caps, thru the foam plug and back into the metal cap. Do the same for the second metal cap and foam plug and tie the two pieces together to form the head.
You will then make 2 small holes onto the Crazy glue cap and pass the black thread thru those and knot it together to hold the head in place. By now it should look like the picture below.
Now, take your 2 skewers and cut off the sharp end and discard the sharp ends. Use your black thread to make either of the 2 designs pictured above for the handle. Once done you are ready to tie everything together.
Make a hole onto the middle of the Crazy glue bottle and make sure it goes thru. Make 2 holes onto the paper roll to tie the head onto the body. As you pass the black thread from the paper roll thru the Crazy glue bottle and back thru the paper roll make sure that it’s all nice and tight. Once the thread is knotted you will leave some slack and tie it to your handle ( See below pics for reference).
Now that the first thread is connected you can start doing each leg individually. Drill the hole on the cap, knot the thread and take it up to the handle and fasten. Repeat for the rest of the legs and you are done.
Step by Step Instructions.
Once the parts have been successfully put together, it will look similar to the picture below.
Bug Marionette (Close Up).Bug Marionette.
Have a fun time making your own Bug Marionette and don’t hesitate to share the link for us to see your creation.

")
")


