Tie the yarn in a knot around the wreath and start wrapping. You can also chose to hot glue the end of the yarn to the back of the wreath.
Keep wrapping the yarn tightly around the wreath to keep it thick. If you run out of yarn, start a new one. Continue wrapping the yarn until it’s all covered (the aim is to hide the wreath underneath). Once it’s done and you are satisfied with the end result, make a tight knot at the end and cut off the excess yarn or just hot glue the end.
Hot glue your Owl to the piece of wood.
Hot glue the piece of wood (with the Owl on it) to the bottom center of your wreath.
Using a placement of your choice, hot glue the bottom of the flowers to the wreath.
I hope this Tutorial helps. Have fun making our own!
I have been up most of the night, updating and transferring data from my old computer Hard Drive into the new one. Though it took me a while, I’m happy. I now have all the information I need in one place and I am relieved. The best part about this process is the amount of knowledge I gained along the way.
I owned a Fujitsu Laptop for over 7 years, which I really liked. I finally parted with it because its video chip was getting bad and couldn’t be replaced. I got a Dell as a replacement. Just as I was creating more memories; I placed it into hibernation mode one afternoon early this month and it never came back up. I had it for just a year and it gave up on me. You would think that with the advancement in technology, devices would last longer and perform better. Older computers, though slower, tend to be more reliable.
I bought a new Laptop replacement and ordered a USB 22 Pin SATA Adapter Cable to allow me to transfer all the content from my Dell Hard Drive into the new Laptop. As you can see on the picture below, I had to use a computer monitor to access the content of the old Hard Drive because my current laptop only has one USB port on each side and the Adapter Cable wasn’t long enough to reach both sides.
Computer Data Retrieval.
What you need:
A computer
Two USB ports
USB 2.0 For 2.5″ HDD Hard Disk Drive Laptop to SATA 7+15 Pin 22Pin Adapter Cable
Connect the Adapter to the Hard Drive being careful not to touch the underside of the Hard Drive since it has its electronic circuit exposed.
Connect the 2 USB connectors to your computer/laptop and let it recognize it.
Double-click the Hard Drive icon and access your files.
My advice to anyone is to always back up your data to an external drive (weekly, monthly and in extreme cases, daily). It’s quite a scare and nightmare when you suddenly lose all your data or can’t access your important information because of a computer crash/malfunction.
Turn your Firewall on. Get an Anti-Virus software and a Registry Cleaner to protect your computer files from malicious software and from being broken into as well as to help keep them safe.
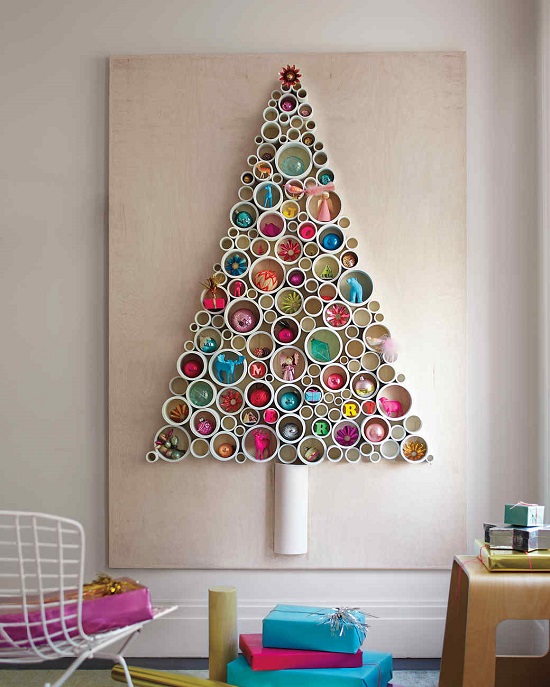
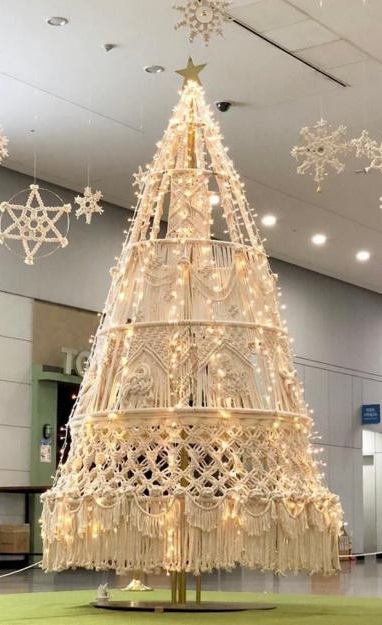
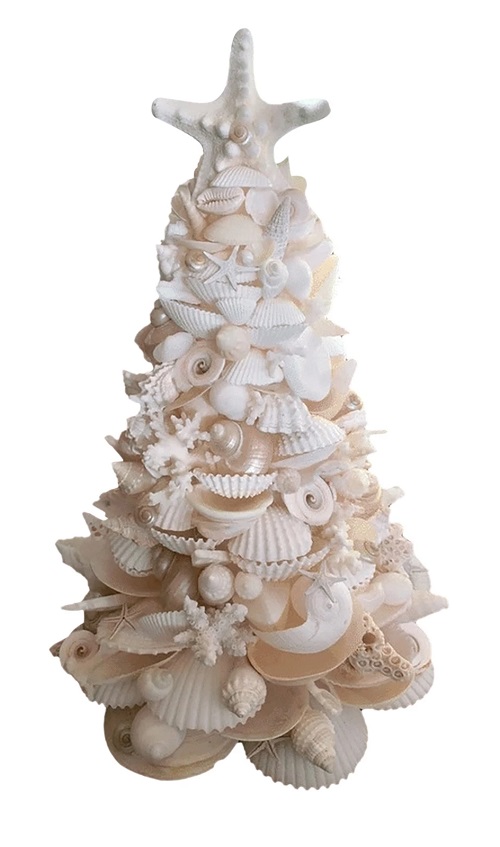
With Christmas around the corner, we are all excited to start decorating our homes.
What to do and where to start? Are you tired of decorating the same Christmas Tree year after year? Are you looking for something different? A fun project you can tackle on your own or with the whole family? Below are some inspiring and fun ideas you might want to try.
Early this week Ivan came home with a project that involves the whole family. Along with his weekly homework, he was given a plain drawing of a Turkey. As a family project, we were asked to decorate the Turkey using whatever we wanted. After making a few suggestions, he decided to proceed with Cereal (for the feathers, caruncles and wattle), Crayons and a button (for the eye). Though time consuming, it was more fun than we thought it would be.
Turkey Decorating Project.
The project was then displayed at school for a couple of weeks and then returned to the students.
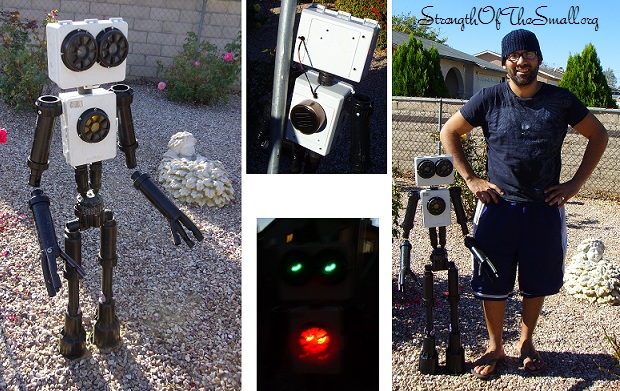
On a Saturday morning while in the garage organizing, we found some of the sprinklers that had been used on the home and which I replaced to run a Drip Watering System instead. They where not much by themselves but gave me an idea which had been working itself on my head for a while. I knew what I wanted it to look like and after talking to my son about it, We decided that it should stand on our front yard and that the eyes and chest should light up (Like Iron Man).
I used plastic piping for the fingers, some of the skinnier sprinklers for the arms and the thicker sprinklers for the legs. To screw everything together I used a drill bit to make a preliminary hole to make it easier to screw the pieces together easier. All together it took about 6 to 8 hours to assemble which some of that time used up by trial and error on part placement.
For the electronic part of the project I decided to use a Solar Light that I got from the local 99¢ Only Stores and which I hacked into to remove the LED and be able to run 4 LEDs from it. I placed all 4 LEDs in parallel and gave them plenty of wire to be able to run them from the Chest all the way to the Head for the eyes. I also attached a second battery holder in parallel to provide the system extra power.
Sprinkler Robot Sculpture.
My boy really enjoyed working on the project as well as working on the routing of the wiring which he called “Open Chest Surgery”. As you can see from the picture, the bot stands at about 4 foot.


")
")
2")
")
")
")
")
")
")
")
")
")
")