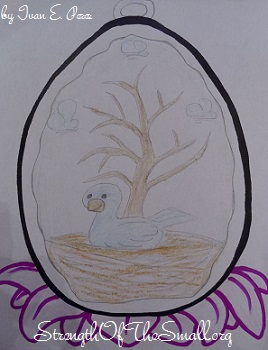
This afternoon we had another opportunity to work on a Family Decorative Project for my Son’s class. We had so much fun coloring the Easter Egg Canvas below. He was very specific on what he wanted and I think it turned out just wonderful. My kids are looking forward to decorating some Eggs for Easter.
Easter Egg Decorating Project.
Tomorrow, along with the other kids, they will be decorating some Eggs. He’s quite excited!
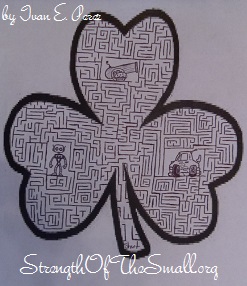
Tonight we worked on a Family Decorating Project. As with the other projects, we were asked to decorate a Shamrock which will be displayed for viewing on St. Patrick’s Day. This time too, we kept it simple while making it unique and interesting. For this project, we decorated this Shamrock by drawing a maze pattern within the leaf clovers and adding the kids favorite things: Robot, Car and Cupcake with a cannon behind it.
Shamrock Decorating Project.
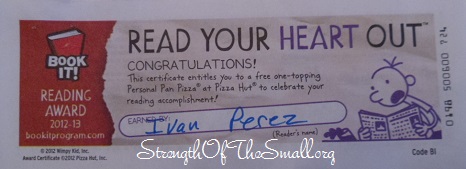
My Kindergartener received another Pizza Hut® Book It!® Reading Program Certificate. He has been wanting to eat some Pizza and now he’ll be having one for free (not free since he worked really hard for it).
Book It!® Reading Program Certificate.
Today is such a bright and beautiful day; too bad we have to stay indoors due to the high gusty winds. I was really looking forward to gardening and tending to my plants. All the tasks have been completed. We will be watching fun movies for the next couple of hours (while having some healthy and nutritious snacks) and then we will do some reading and other challenging activities before calling it a night.
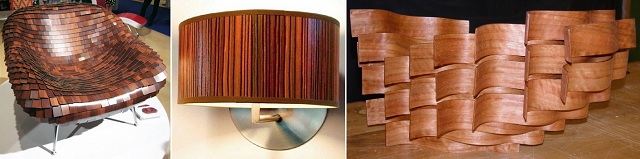
You bought Laminate for your Kitchen Counter tops and you have some left overs. What to do now that your project is complete? Do you get rid of your leftovers or save them for craft projects? When it comes to Laminates, the possibilities are endless. You could use your leftovers to build a play table for your kids, a garden table for your tools, an outdoor platform, a plant sand, an end table, a frame to hang your jewelry, Wall Art, Bookshelves, Cabinets, Coasters, create a Book Cover and so much more.
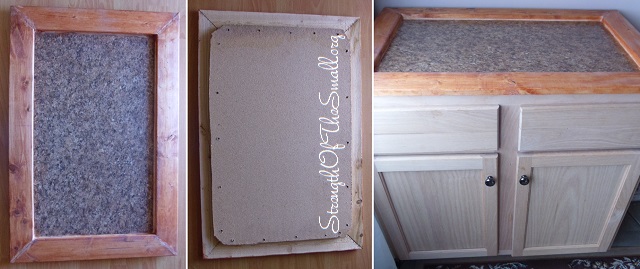
For our Kitchen renovation four years ago, we ended up with an extra base cabinet we couldn’t return and we had some leftover from the counter top. After almost a year of having both items sitting in the garage, we decided to build a custom counter top for the base cabinet and use as extra storage in the Patio.
Custom Counter top.
Materials/Tools Needed:
Counter top piece
Wood (to build a frame)
Wood Screws, Power Drill, Drill Bits
Silicone Sealer (to seal the gaps)
Stain (for the Wood)
Heavy Duty Staple Gun and Staples
Step by step:
First step is to measure out the size of the piece that will be needed. I used a cutout from my counter top which came from the sink cutout. Since it was about 30 inches wide and the cabinet 34 inches, I used the wood to expand on all 4 sides.
Based on my dimensions I cutout the four pieces to make a frame leaving enough of a lip to be able to screw them onto the counter piece.
I used the staple gun to secure all four corners together, then used the Power Drill to screw the frame onto the counter piece.
I used the sealer to fill in the gaps on the frame and between the frame and counter piece. This will stop any liquids from seeping onto the wood cracks.
The wood stain was used last and will go over the whole frame. You can also use it on the counter piece to give it a darker look.
The last step is to secure the whole piece onto the cabinet being used and enjoy!
Checkout what others have accomplished using Laminate.
One of our goals last weekend was to drive down the hill for some Treasure Hunting, eat at one of our favorite Restaurants and see a few beautiful faces we haven’t seen in a while. Unfortunately for us, the weather decided otherwise. Everything ended up turning for the best as we had a marvelous time at home.
One of the things I wanted to get done in the playroom was to reupholster the seats and dye the slipcovers of the Harry Chairs my kids use during learning time (we bought the Ikea set a few years ago not realizing that Ikea doesn’t make cover replacements for this particular chair). Being a busy Mom with active kids, I can’t find time to make my own slipcovers (at least, not now). I ended up picking a pack of Tulip® Permanent Fabric Dye from Michaels on Saturday, a shade of grey, which to my amazement, turned out better than I expected after dyeing the slipcovers. We reupholstered the seats yesterday morning to make them more comfortable by adding extra padded cushion. I love the end result, my kids love them and what a difference to the tushies!
Ikea Harry Chair seat reupholstered & Slipcover dyed.
Removing the old staples, old fabric, old foam and replacing it all is up to you.
With the seat still down, trace and cut a few layers of Quilters Batting/Memory Foam as well as your Upholstery Fabric (can be done individually or simultaneously).
Once your done with the cutting, you can individually affix each one to the chair seat using your Staple Gun or you can affix all the pieces to the chair and cut off the excesses.
Place the upholstered seat on your chair and secure it.
Place your slipcover on and you’re good to go.
In my case, I didn’t remove the old staples, foam nor fabric (everything was is very good shape). I just wanted to make the seat more comfortable by adding extra padded cushion. I cut open a Wool Ball Pillow I no longer needed, affixing its fabric to the chair and using the Wool Balls for extra padding.
It’s been very quiet around here lately. The Flu has made its last round in the house and just as everyone is finally recovering and looking forward to an adventurous weekend of Treasure Hunting, the weather has a different opinion. Unless you are a ‘go getter, rain or shine’; the weather is a major factor to take into consideration when living in the High Desert (followed by weeds). We spend most of our time reading and watching movies.
My Kindergartener has been doing really well at school. He has received another Pizza Hut® Book It!® Reading Program Certificate and this afternoon he wrote me a heartfelt story using a heart shape note pad he received from school. He has a way of melting my overjoyed heart and making me such a proud Mother.
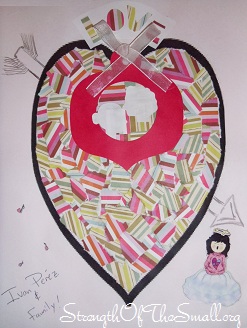
Heart Decorating Project.
Tonight we worked on a Family Decorating Project. We were asked to decorate a Heart which will be displayed for viewing on Valentine’s Day. Like with the other projects, we try to keep it simple while making it unique. For this project, we decorated this Heart using scrapbook papers (the kids favorite colors). We cut the paper into small pieces and randomly glued them inside the heart and added two silhouettes in a heart shaped frame.