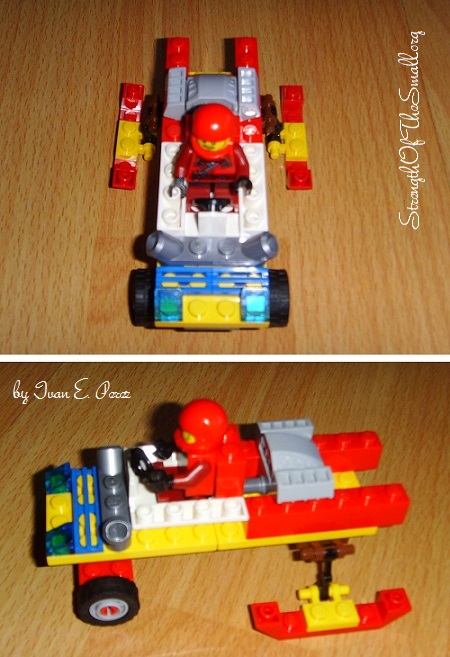
My sister and I are having so much fun with our LEGO® bricks. Last month our parents took us to our local LEGO® store where we created people and bought more bricks. Today I created a LEGO Ice Mobile.
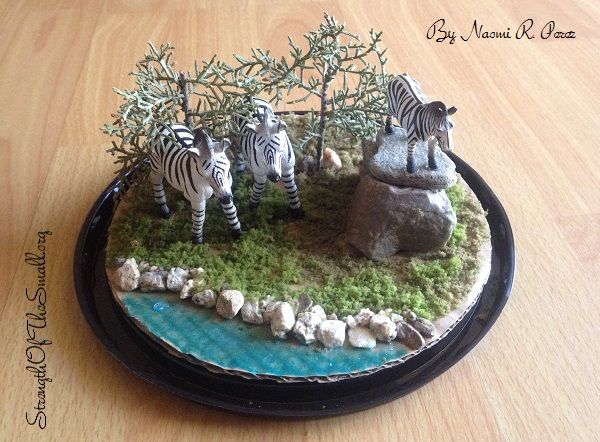
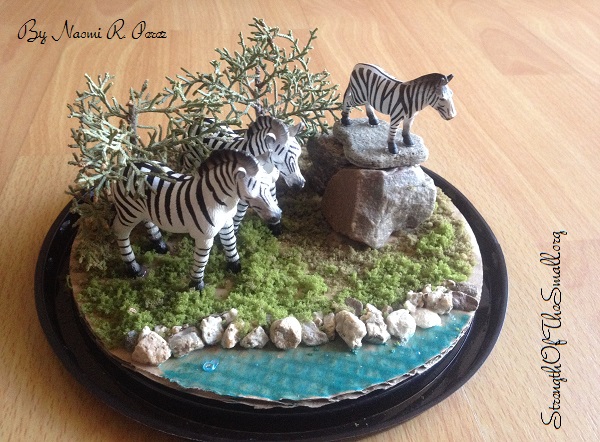
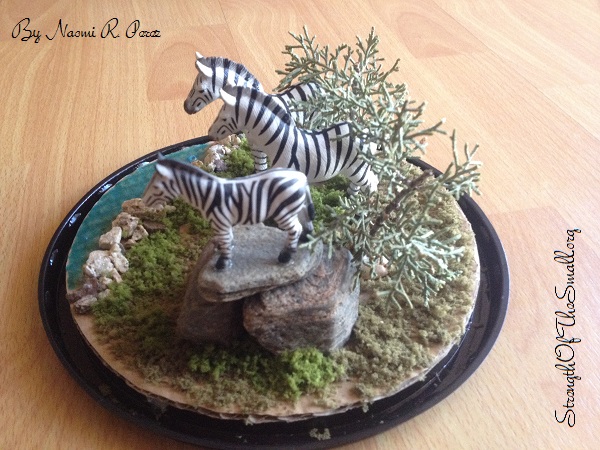
We had so much fun creating a Zebra Habitat for my daughter’s school project. Each child was given a specific animal and was asked to create a unique habitat for their animal.
Zebra Habitat.
Materials/Tools Needed
School Glue
Scissors
Synthetic Trees/branches
Stones
Craft Moss
Cardboard
Markers
Glue Gun and Glue Sticks
Box/container (we used the base of a Plastic Cake Container)
Desert Toy Animals (or cutouts from drawings or Magazine)
Step by Steps (for this project):
Figure out the placement of the Animals and Plants.
Generously apply school glue at the base of the cardboard, sprinkle your craft moss and let it dry. Use the Glue Gun to glue down the larger items like the Animals, Stones and Synthetic Trees/Branches.
For the stream, use a blue marker (for the water) to paint and then apply some glue and let it dry.
Zebra Habitat.Zebra Habitat.
Have fun assisting your little ones with this project.
My children’s school is celebrating the 100th day of school today.
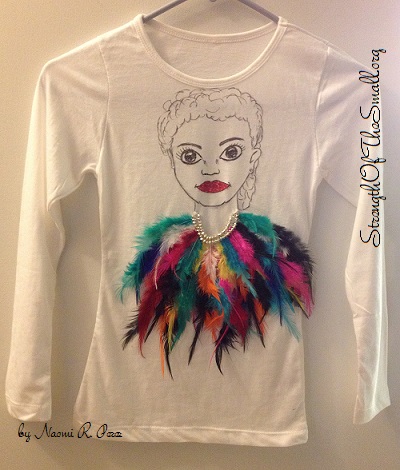
My daughter’s class was asked to create and decorate their T-shirts for a fashion show. She looked forward to this day with much anticipation to show off her creation.
We had a totally different design idea for the T-shirt, but a slight mistake led us to what you now see, “The Lady and her Fancy Feather Coat.” Regardless, I think it turned out great.
“The Lady and her Fancy Feather Coat” (100th Day of School T-Shirt Project).“The Lady and her Fancy Feather Coat” (100th Day of School T-Shirt Project).
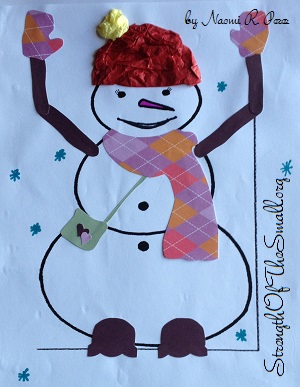
On cold days like these I am grateful for fun projects and activities to keep kids busy.
Today we worked on my daughter’s third decorating project and we all teamed up to help her decorate her “Snow Lady,” as she calls it. Here‘s my son’s project from three years ago.
“Snow Lady” Decorating Project.
Materials/Tools Needed
Scissors
Scrapbook Scissors
Gift Bag Tissues
Crayons/Sharpie Markers
Elmer’s glue
Scrapbook Paper/Construction Paper
We had so much fun decorating her Snow Lady and getting her ready for display at school tomorrow.
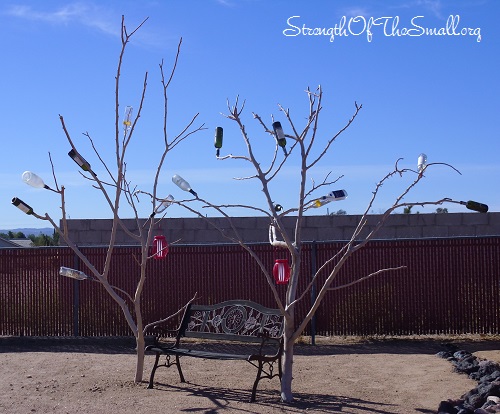
Early March of this year, I cut off all the branches from our fruitless Mulberry tree.
The idea of re-purposing the branches came after having removed the leaves and smaller branches and noticing that the branches themselves resembled trees. It was also an alternative to disposing of them over time. We decided to use the bare branches as Bottle Trees (read all about it here).
Bare Branch Bottle Tree.
Materials/Tools Needed
Natural Tree Branches
Cement Bags/Mixing Tools
Shovel
Ropes
Glass Bottles
Step by Steps:
Cut some branches from a Tree
Smooth out the tips of the branches to slide the bottles in.
Using the shovel dig out a small hole about 12 to 16 inches deep and about 10 inches in diameter to bury the branch base. The bigger the branch the deeper the hole that will be needed.
Mix the cement making sure that you follow the mixing instructions on the bag.
Pour the cement into the hole and push the branch onto the cement to the desired dept.
At this point you will need to use the ropes to secure the branch in place so that the cement can dry.
Let the cement dry for 24 hours before removing the ropes.
Insert the bottles into the prepared branches and enjoy.
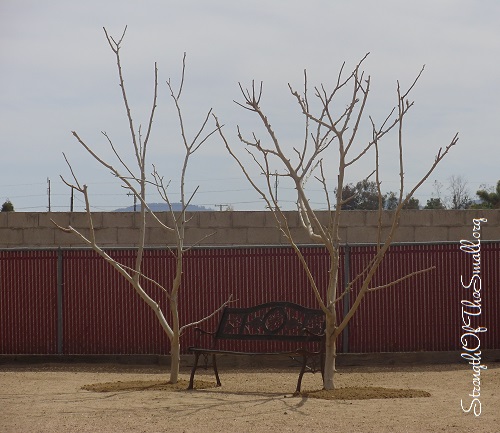
Bare Tree Branches. (March 2014)
We decided to place the branches on both sides of a bench to create a beautiful sitting area. The effect is unique and we enjoy it immensely.
Inspire yourself or someone else this weekend with your creativity.