DIY: Projects

DIY: Primitive Garden Table

EPEngineer By EPEngineer1 min read558 views

Today we decided to make use of a spare door that was laying around our storage shed. Since my daughter has been very eager to help out in the garden, I thought she would enjoy an area where she can create her own container garden. This will give her opportunities to learn about plants and how to grow them. She will also have more responsibilities in the garden as she takes pride in tending to her plants.

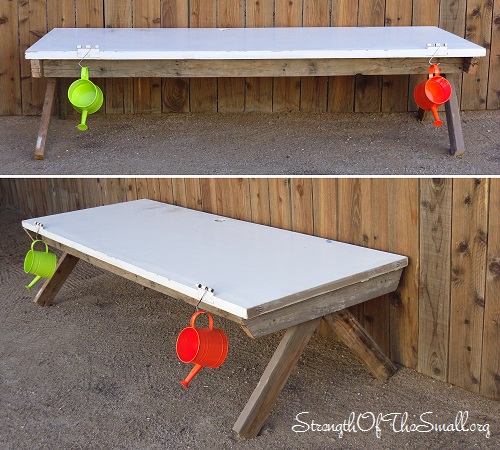
Being that the door is hollow in the middle I had to reinforce the edges to hold the weight it will need to hold. The base is a big rectangle that allows me to screw onto the wood pieces that are inside the door for added strength. The legs I cut onto an upside down V and screwed it to the inside of the rectangle. You can see from the pictures below how everything fits together.

Materials/Tools Needed:

  • Old Door
  • Scrap/Reclaimed Wood
  • Screws
  • Drill, Drill-bits
  • Spray Paint/Paint/Stain
  • Wood Chop Saw
  • Wood File
Primitive Garden Table.
Primitive Garden Planting Table.

My wife has always involved our children in selecting plants and lending a pair of hands or two in the garden. We will be visiting a few nurseries this weekend and we hope they will have a wonderful time choosing beautiful plants, accessories and additional gardening tools.

Allowing children to do things on their own fuels their desire to learn more and achieve more.
Decorate with Pinecones

JM Perez By JM Perez2 min read2K views

I have a fondness for Pine Trees and I love their refreshing scent. For so many years I have decorated my Home with Pinecones and for the past six years I started using cones around my yard using a variety of shapes and sizes. I use them all year round and not just for special events.

We live in an area with an abundance of pine cones as most of our neighbors have Pine Trees in their yards always full of cones with so many of them all over the ground. I planned to stock up on pine cones for some garden projects and also to replace the ones which got damaged by wind and rain.
On Friday afternoon we suited up and went Pinecone picking around the neighborhood and returned home with four large heavy duty plastic bags full of cones. We were lucky to find a few acorns as well. Because some cones have sharp thorns, you should always use gloves when picking and handling them.

Pinecones.
Pinecones with sharp thorns.

Since I wasn’t planning on using the cones indoors, I just checked to insure that their scales were free of pine needles and debris and then I spray painted them with different colors. The main reason why I didn’t rid the cones of their thorns is to discourage squirrels and stray cats from digging into my garden beds.

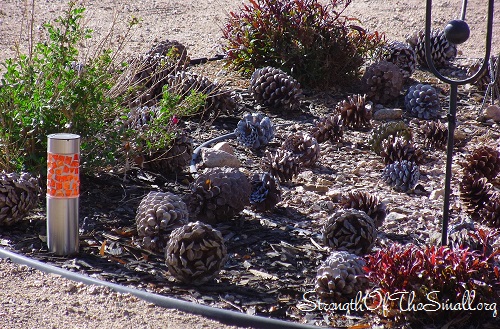
A few Pinecones around my Water Fountain.
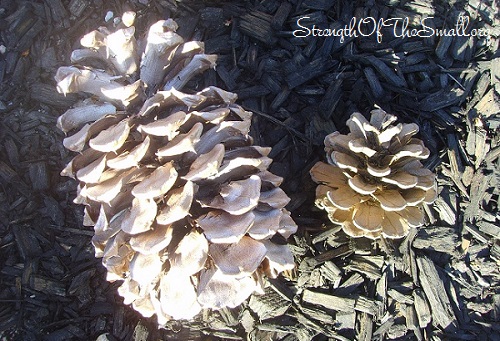
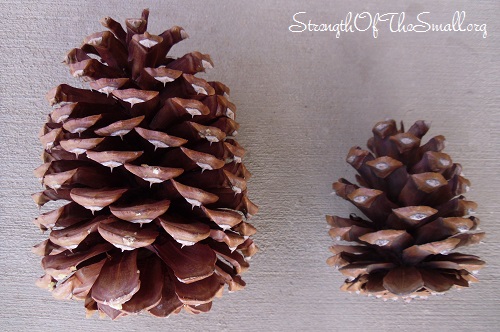
Jeffrey Pine Cone (left) and ... Pine Cone (right).
Jeffrey Pine (left) and Red Pine (right).

Here are some ideas to decorate with Pinecones:

  • Picture Frame
  • Earrings
  • Curtain Tiebacks
  • Ground Cover
  • Wreath, Branches, Trees
  • Place Cards
  • Boutonniere
  • Bouquet
  • Basket Arrangement
  • Holiday Gift Wrap
  • Topiary
  • Basket
  • Chandelier, Mobile
  • Garland
  • Table Display
  • Candlestick Holders
  • Ornaments
  • Centerpiece
  • Potpourri
  • Cake Topper
  • Stocking Hanger
  • Bird House & Feeder
  • Pinecone Mulch
  • Fire Starter

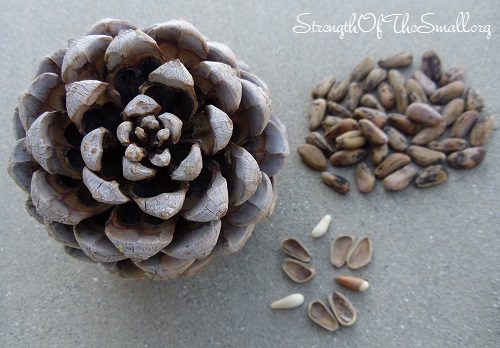
All the pinecones we found contain pine nuts, the edible seeds of pine trees and are quite hard to extract. There are usually two nuts nested in each scale of the cone. While Crows are struggling to crack open the hard shells, Squirrels on the other hand have shown no interest in them. According to the Temperate Climate Permaculture website, it takes anywhere from 5 to 75 years for some Pine trees to begin producing seeds.

Pinecone & Pine Nuts (unshelled and shelled).

Possibilities and ideas are endless when decorating with Pinecones.

Click here to learn about Preparing and Preserving Pinecones.

Topiaries Art & Sculptures

JM Perez By JM Perez2 min read1.5K views

The weather is beautiful, Spring is nearing and I am so excited. My entire property is now 100% weed free as of last Sunday. The Mini Pergola is up and by next weekend we will begin building a Dry Creek Bed next to the structure. One of the many good things I did in my backyard was use shrubs as well as entertaining areas as dividers for different sections. With the weeds gone it’s easier to look at the backyard and imagine the possibilities for landscaping and designing since that’s where most of the magic is waiting.
This Spring, I will be creating a Mosaïculture piece of artwork (also known as Living Sculpture) which I know my kids will enjoy. For the first project I will be starting with something fairly small and simple using Chicken Wire to form a shape. My backyard is ready for the next stage in its evolution.

Mosaïculture, according to Mosaïcultures Internationales de Montréal, an international Mosaïculture competition held in Montréal, Canada, is a refined horticultural art that involves creating and mounting living artworks made primarily from plants with colorful foliage (generally annuals, and occasionally perennials).

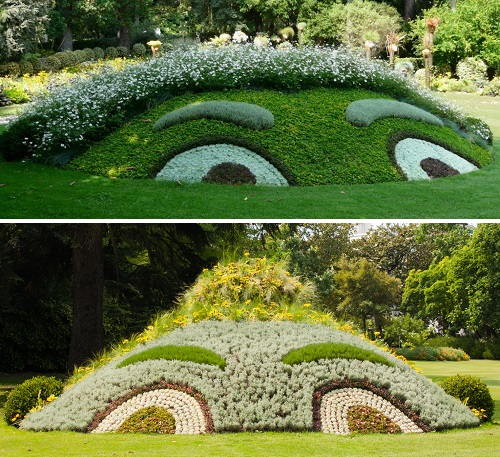
I love Living Sculptures. They are inspiring and incredibly beautiful thanks to the talented Gardeners who work hard to nurture and shape them. Out of everything I have seen so far, I love the Garden Bed Topiary best.

Easter Island Heads, Montreal Botanical Gardens. Image Credit:  Deanna Young
Easter Island Heads, Montreal Botanical Gardens.
Image Credit: Deanna Young.
Mother Earth, Montreal Botanical Gardens.
Mother Earth, Montreal Botanical Gardens. Image Credit: Guy Boily.
Montreal Botanical Gardens. Image Credit: Guy Boily.
Owl Topiary.
The Giant Flower Owls In Nantou County, Taiwan.
Image Credit: Ernesto Huang.
Garden Bed Topiary.
Garden Bed Topiary.
Image Source.
'Sleeping Chicken' by Claude Ponti, Jardin des plantes, Nantes Image Credit: InTheSideCar.com
‘Poussin Endormi (Sleeping Chicken)’ by Claude Ponti, Jardin des plantes, Nantes
Image Credit: InTheSideCar.com
'Monsieur et Madame Génie', Claude Ponti, Jardin des plantes, Nantes.
‘Monsieur et Madame Génie’, Claude Ponti, Jardin des plantes, Nantes.

Just like growing Moss, growing and maintaining a living sculpture is time consuming and requires dedication. In the end, the hard work which consist of preparing and shaping the soil, growing the plants, pruning and training them to give shape to the desired art is a rewarding work of art to any gardener.

Click here to learn about creating your own living sculpture.

DIY: Reclaimed Wood Pergola

EPEngineer By EPEngineer2 min read1.4K views

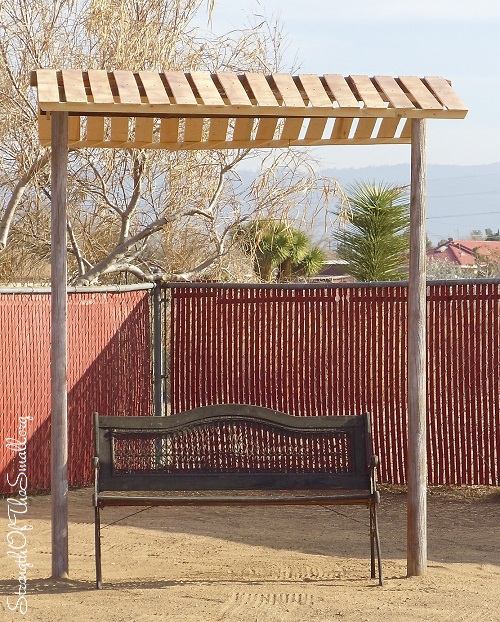
This afternoon we finished putting together a Pergola we built entirely from reclaimed wood and pieces of a dismantled wooden pallet. We decided on a canopy that not only provided some shade, but also resemble that of a water well in case we decide to change the design later on.

Mini Pergola.
Mini Pergola.

Materials/Tools Needed:

  • Scrap/Reclaimed Wood
  • Screws
  • Drill, Drill-bits
  • Cement
  • Bucket/Cement working tools
  • Spray Paint/Paint/Stain
  • Wood Chop Saw
  • Wood File

Step by step:

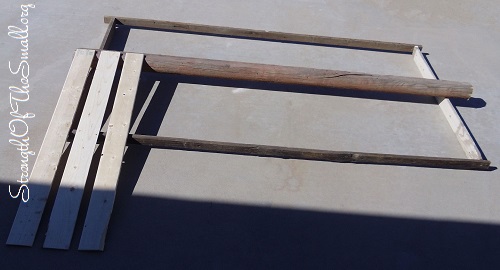
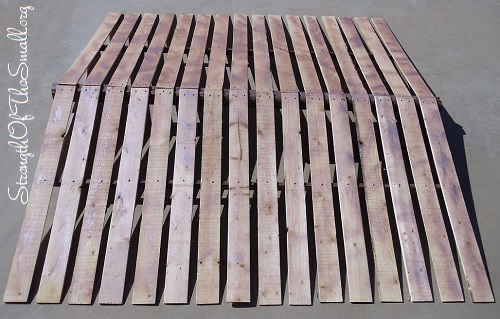
  • We used screws to fasten the pieces of wood together and used a scrap piece of wood to keep the spacing between pieces even. Once done we sprayed the top to give it a slightly weathered look.
Building The Canopy.
Building the Canopy.
Canopy.
Canopy built before the raising.
  • Once the canopy was finished we measured the distance between the two ends of the canopy to determine the post spacing. The measurement was then used to dig the holes according to the spacing. We used almost a whole 90 lb bag of cement to secure the posts. All we did was dig the holes, add water to the cement after pouring some in the bucket and mixed it. We poured it onto the hole and inserted the post making sure to keep it straight. We repeated the same steps for the second post and used a rope to tie the two posts together to maintain the spacing.
  • After 20 hrs of drying the cement was ready to take the weight of the canopy so we proceeded to lift it and place on top of the posts. We used 10 inch screw to screw the cross-piece of the canopy onto the top of the post after using a drill bit to drill a hole to guide the screw. Once screwed in, we finished fastening the rest of the canopy and did the finishing details.
Pergola Posts.
Pergola Posts.

A weekend project that we will enjoy for years to come.

DIY: Footstool Reupholstered

JM Perez By JM Perez2 min read924 views

Last month, while visiting my favorite Vintage Shops here in the High Desert, I decided to make a quick stop at the Estate Liquidators. I have found so many beautiful vintage choice pieces here and I purchased a small vintage footstool that same day. What I love the most about this little beauty is its primitive feel.

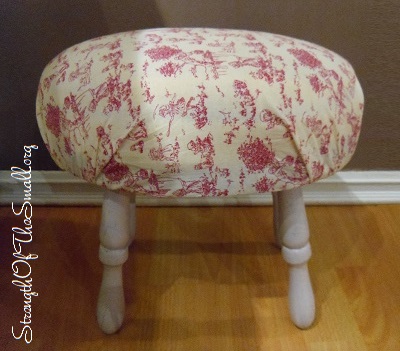
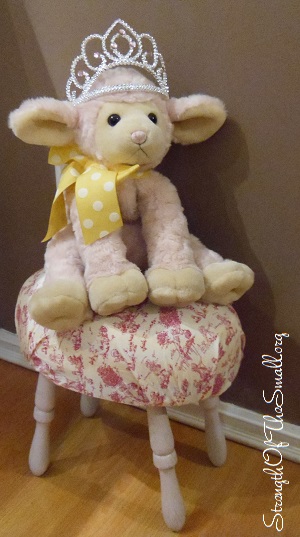
Reupholstered 4-Legged Vintage Footstool.

Today I gave it a makeover with a new coat of paint and a pink Toile de Jouy fabric.

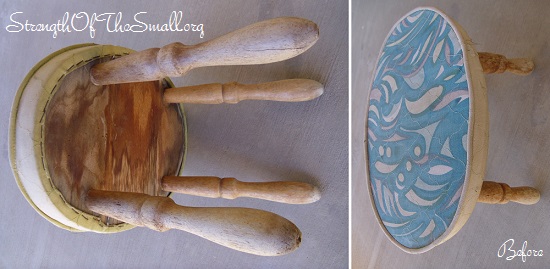
Small Vintage Footstool.
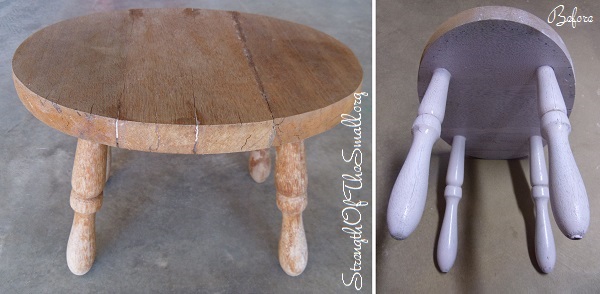
4-Legged Vintage Footstool.

I started by carefully removing the staples that were holding the fabric in place and took off the old upholstery fabric. I found some light cracks here and there, which I patched up with wood glue (which also helped fill out the gaps and secure the pieces), letting it dry. I then proceeded to sand and clean the stool to get it ready for the painting.

4-Leg Vintage Footstool.
4-Legged Vintage Footstool.

Materials Needed:

  • Staples and Heavy Duty Stapler
  • Foam
  • Batting (to cover your Foam)
  • Spray Adhesive (to keep your Foam in place)
  • Choice Fabric for Bow
  • Scissors (to trim the excess Fabric)
  • Flat-head Screwdriver and Pliers (to lift up the staples and pull them out).

Optional:

  • Button Cover Kit
  • Drill and Drill Bits (to drill holes in your Foam and Wood)
  • Upholstery Thread
  • Sharpie (to mark holes on the wood)
  • Decorator Needles

Step by step:

  • Mark your hole on the wood where you want your button to go and drill a hole using your drill and drill bit.
  • Cut your foam to the size and shape of the wood.
  • Spray adhesive on the wood to keep the foam in place.
  • Use your batting to secure the foam to your wood with a staple gun.
  • Place and attach your fabric over the foam and start stapling.
  • Cover your button with the same fabric.
  • Run some thread through the button and push the threaded needle up through the pre-drilled hole (once satisfied, staple the thread at the bottom of the wood to secure and hold it in place).
Reupholstered 4-Legged Vintage Footstool.

I love how it turned out and my daughter now has a new reupholstered footstool for her dolls.

Linking up to Beverly’s Pink Saturday.