DIY: Projects

DIY: Restore Cast Iron Furniture

JM Perez By JM Perez1 min read2.8K views

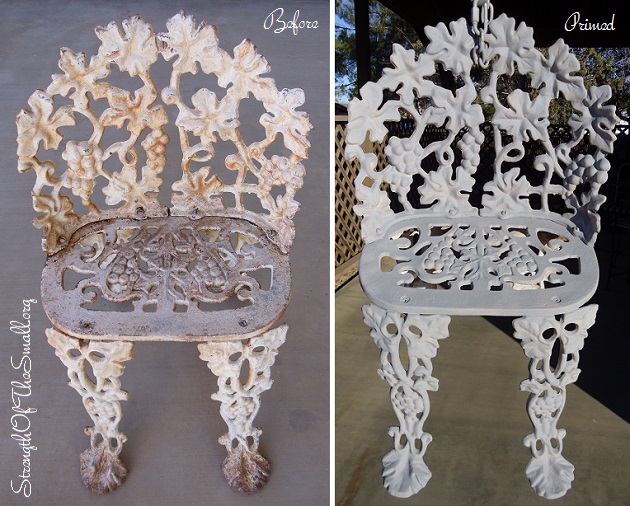
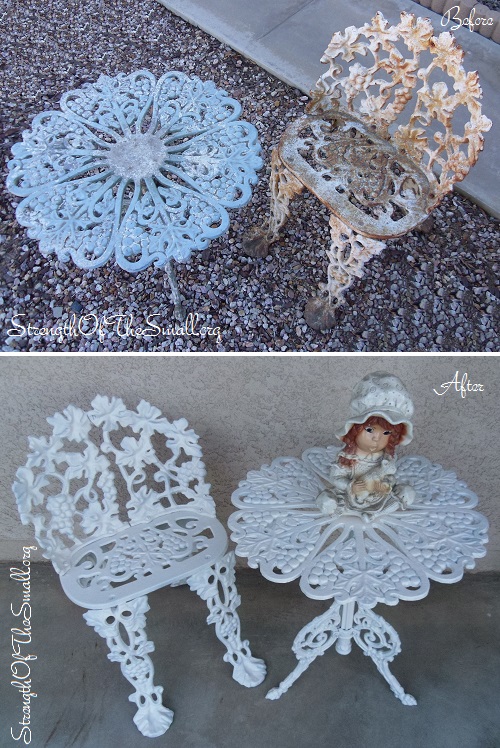
I recently found an Antique Cast Iron Chair and a matching Vintage Cast Aluminum Side Table with adjustable legs. What I love about this tiny set is the fact that it has a Grapevine pattern similar to an Antique Victorian Cast Iron set I own (read about it here). The set was weathered, the paint was flaking and chipping. As expected, there was some mild surface rust and wear especially on the chair.

Vintage Cast Aluminum Side Table.

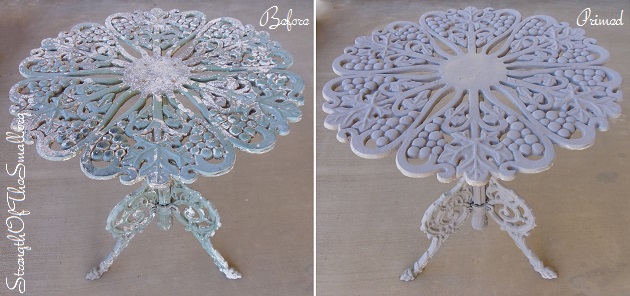
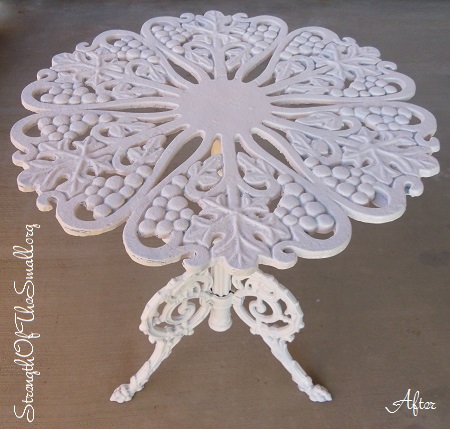
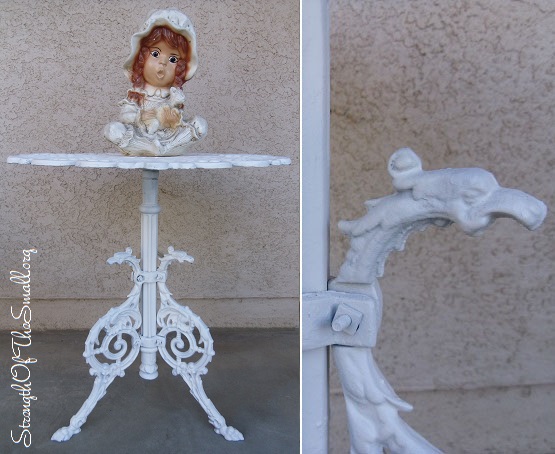
The side table has three legs with the pattern of a Phoenix head at the top and claw foot at the base.

Vintage Cast Aluminum Side Table.

Though time consuming, the restoring process is simple.

We started by removing the rusted and flaking areas with a wire brush. Once that was done, we washed the set with soap and water to rid it of any debris and to ensure that the paint sticks to it. We let it dry and applied spray primer to seal the metal surface and prevent future rusting and finally, we spray painted it.

Vintage Cast Iron Chair.
Antique Cast Iron Chair.
Vintage Cast Iron Chair.
Antique Cast Iron Chair.

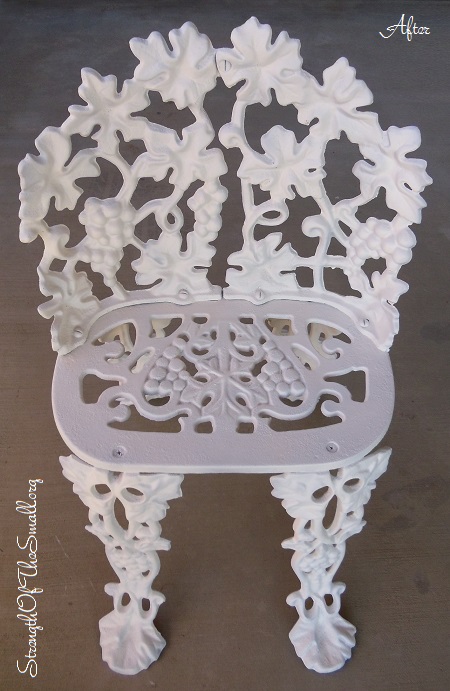
Now restored, the set will make a great addition to the rest of the collection. It was an exciting finishing project we all were eager to get our hands on.

Vintage Cast Iron Chair and Cast Aluminum Side Table.
Antique Cast Iron Chair and Vintage Cast Aluminum Side Table.

This was a fun project and we are looking forward to the next one.

DIY: LEGO MechWarrior

JM Perez By JM Perez1 min read1K views

School is out for the holidays for my first grader who has been doing such an amazing job at school. In just five days we will be celebrating the birth of our Savior, Jesus Christ. Until then, I am doing the best I can to keep some tiny fingers from opening all the presents underneath the Christmas Tree.

With the help of their Father, my kids got busy this morning with their LEGO bricks and elements and created a LEGO MechWarrior among other things. It’s simple and quite impressive.

LEGO MechWarrior.
LEGO MechWarrior.
LEGO MechWarrior.
LEGO MechWarrior.
LEGO MechWarrior.
LEGO MechWarrior.
LEGO MechWarrior.
LEGO MechWarrior.

Until next time, I hope you get creative with your kids.

DIY: LEGO Offroad War Jeep

JM Perez By JM Perez1 min read586 views

My Son’s one week break is over and tomorrow is back to school. We had a great time together doing the things we enjoy the most (eating, playing games, dancing, sleeping late, traveling, watching movies and so much more). He is so exited to see his friends and teacher.

This morning he got busy with the LEGOs and started creating beautiful things such as the ones below.

LEGO BoyBot & Offroad War Jeep.
LEGO BoyBot.
LEGO BoyBot.
LEGO Offroad War Jeep.

Until next time, have a blessed Sunday.

DIY: Winter Bird Wreath

JM Perez By JM Perez1 min read592 views

Last year I made a simple Owl Wreath for Christmas. For this year, I decided to make a Winter Bird Wreath.

Winter Bird Wreath.
Winter Bird Wreath.
Winter Bird Wreath.
Winter Bird Wreath.

Materials Needed:

  • Wreath (I used a Foam Wreath)
  • Yarn
  • Bird (you can find one at a craft store)
  • Tiny Pine Cones
  • Ornamental Red Cherries
  • Felt Balls
  • Glue gun
  • Hot glue sticks
  • Choice Fabric for Bow
  • Decorative Frosted Needle Pine Branch

Step by step:

  • Once you’re done wrapping the yarn tightly around the wreath until it’s thick and all covered, hot glue the end
  • Glue the Felt Balls on the wreath, closely next to each other (use different sizes)
  • If you were lucky to find a bird already on a Needle Pine Branch, hot glue it on the felt ball at the top; otherwise get creative
  • Gather your Ornamental Red Cherries, Tiny Pine Cones, Decorative Frosted Needle Pine Branch and arrange them to your licking
  • Hot glue the arrangement on the bird’s abdomen and hot glue the finish product on the felt ball at the top
  • Use your Choice Fabric to tie a bow on the wreath and voilà!

Now, up to working on my Spring wreath.

DIY: Primitive Wood Bench

EPEngineer By EPEngineer1 min read781 views

I enjoyed spending the whole day with my family outdoors today as I watched my kids running around the backyard, giggling while hunting for Grasshoppers as I was building a second Reclaimed Primitive Wood Bench. These are the days we cherished the most since the cold weather is setting in slowly but surely and we might not have an opportunity to spend time outdoors until next year.

Materials/Tools Needed:

  • Scrap/Reclaimed Wood
  • Screws
  • Drill, Drill-bits
  • Spray Paint/Paint/Stain
  • Wood Chop Saw
  • Wood File

Step by step:

  • Decide how big or small you want your bench to be
  • Decide on the design of the legs (for my bench I decided on a 30 degree angle for the cut on the legs since the bench is not deep)
  • Measure and cut your wood
  • Screw your pieces together
  • Using a wood file, file the rough/sharp edges of the wood to prevent splinters
  • Wash the bench to ensure that the paint will stick to the wood
  • Let dry and paint or stain
Reclaimed Primitive Wood Bench.

I hope you find this tutorial helpful and get creative building yours.