DIY: Projects

DIY: Desert Diorama

JM Perez By JM Perez2 min read5.1K views

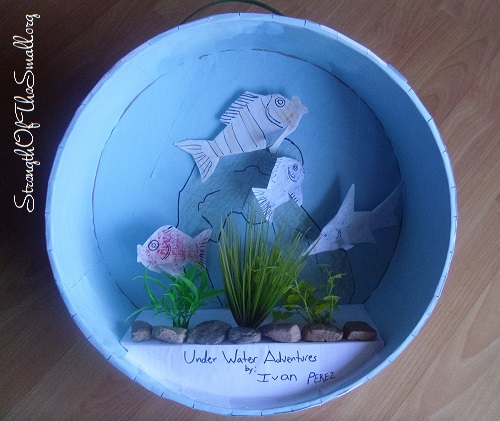
For their first month of school, the second graders project is taking the students to the Ocean or Desert. They were asked to create a scene using a Poster, a Diorama or creating a PowerPoint presentation about their subject.

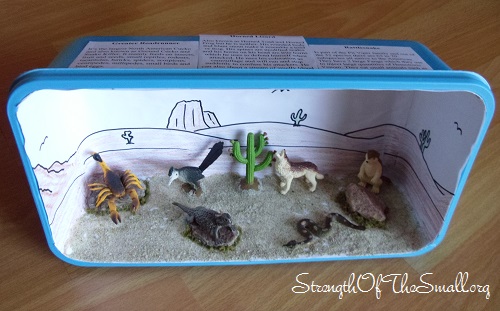
My Son choose to make a diorama showcasing a few Desert Animals in their habitat.

Desert Animal Diorama.

Materials/Tools Needed

  • School Glue
  • Hand drawn scenes
  • Scissors
  • Synthetic Desert Plants
  • Stones
  • Craft Moss
  • Sand
  • Box (we used a Swiffer Sweeper Wet Refills Box)
  • Desert Toy Animals (or cutouts from drawings or Magazine)
  • Markers
  • Glue Gun and Glue Sticks

Step by Steps:

  • Decide on the scenery you want for your background, draw directly on your box or on a paper and then glue onto the box.
  • Figure out the placement of the Animals and Plants.
  • Generously apply school glue at the base of your box. Randomly place your stones and then sprinkle some sand and let it dry.
  • Apply some glue around the stones for the Moss.
  • Let it all air dry for a day and enjoy.
Desert Animal Diorama.

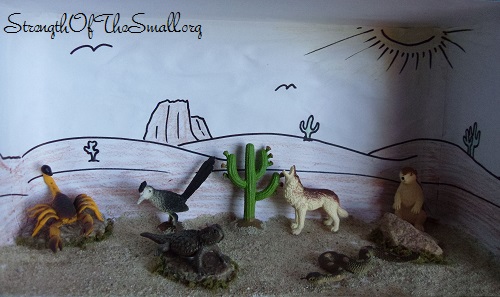
Our Scenery consists of a Desert Scorpion, Road Runner, Horned Lizard, Coyote, Rattle Snake and a Ground Squirrel which are all Desert animals and which are local to our surroundings. We got to learn what these animals eat, their favorite habitat preferences and the way they affect their ecosystem by their existence.

Our second grader had so much fun researching each animal and picking the facts he believed to be important for others to know about each animal. We hope you and your little ones will have as much fun as we did building this project.

Have fun and enjoy!

DIY: Fruit Tree Deterrent

JM Perez By JM Perez1 min read2K views

A couple of weeks ago, I urged my husband to do something about the Squirrels digging holes all over my front yard to gain access to the nuts on the Sweet Almond tree. He came up with a very simple, yet functional mechanism to prevent those rodents from climbing up the tree. He created a piece similar to an umbrella shape and/or a funnel shape using materials we already had on hand.

Squirrel Fruit Tree Deterrent.

From the pictures you can see how most of the work was done.

Materials/Tools Needed

  • Zip Ties
  • Chicken Wire 1 inch spacing
  • Pliers
  • Drip Tubing
  • Compression Reducing Tees

Step by Steps:

  • He first made a circle around the tree with the tubing making sure he could have the room to place the two support pieces to hold it in place.
  • After making the ring with the supports he cut strips of chicken wire to wrap around the ring edge and making certain there was no gap between wire and tree trunk.

The effectiveness is similar to the one of the image below.

Image Source: HarrietCarter.com.
Squirrel Baffle
Image Source: HarrietCarter.com.

Click here to learn about Tree Squirrels and how to prevent them from climbing up a pole, tree, or other structure.

DIY: Solar Powered Jars

EPEngineer By EPEngineer1 min read741 views

Today we gave a facelift to a set of old solar lights.

DIY: Solar Jars.
DIY: Solar Powered Jars.

Materials/Tools Needed

  • Solar Lights
  • Glass Jars
  • Screw Driver
  • Small Screws
  • Wire
  • Pliers
  • Drill and Drill Bits

Step by Steps:

  • Remove lid from Jar and drill a hole in the center of the lid for the light bulb/LED bulb to go thru
  • Remove both stake and globe off the Solar Light top
  • Remove the lid off the jar and screw the lid onto the Solar Top making sure the screws do not damage the light electronics
  • Take the wire and loop the wire around the neck of the Jar. Use the pliers to tighten up the end, shape a handle, loop the end and tighten it using the pliers.
  • Reassemble the Jar, hang and enjoy.

DIY: Ocean Diorama

JM Perez By JM Perez1 min read2.8K views

For their last month of school, the first graders project is taking the students to the Ocean waters. The kids were asked to allow their imagination go wild and create their own Ocean scene in a box.

Ocean Diorama Project.

Materials/Tools Needed

  • Cardboard
  • Hand drawn scenes
  • Blue Construction Papers
  • Scissors
  • Synthetic Plants
  • Stones
  • Fish cutout (from drawings or Magazine)
  • Card stock
  • Markers
  • Glue Gun and Glue Sticks
  • Fishing Wire

Step by Steps:

  • Decide on the shape of box you want.
  • For background, draw a scene on a blue construction paper, cut it out then glue inside box.
  • Draw Sea creatures on paper, cardboard or simply cut out shapes out of magazines.
  • Use fishing wire to make free-floating fish by taping them to the top of the box and the body of the fish.
  • Hot glue the stones and synthetic plants on the floor of the diorama.

It was another fun project which my Son completed with the assistance of his Father and Sister.

DIY: RecycleBot

JM Perez By JM Perez1 min read2.5K views

This Month at my Son’s Elementary School, they are learning about recycling and taking care of the Planet. The kids were asked to make a RecycleBot out of any materials such as cans, boxes, bottles (glass and/or plastic), bottle caps, cardboard, electronics, metal, paper, eggs cartons, etc.

After looking around the house, he found a few recyclable materials that would work for his school project.

RecycleBot (Front).
RecycleBot (Front).
RecycleBot (Side).
RecycleBot (Side).

My Son found a small LED light that changes color at Kohl’s and has a wire attached to it with a switch at the end, to turn it on momentarily (pictured below).

RecycleBot (Back).
RecycleBot (Back).
RecycleBot (Front).
RecycleBot (Front).

Materials/Tools Needed:

  • Yogurt Cups
  • Ice cream Cups
  • Cardboard Pieces
  • Fishing Wire
  • Sports Drink Container
  • Spray Paint Cover

It was such a fun project which my Son completed with the assistance of his Father.